
BOOKBINDING
BEING DESCRIPTIONS
OF THE VARIOUS TOOLS AND APPLIANCES
REQUIRED MINUTE INSTRUCTIONS
FOR THEIR EFFECTIVE USE.
BY
W. J. E. CRANE.
ILLUSTRATED WITH 156 kENGRAVINGS.
 7
7
LONDON: L. UPCOTT GILL, 170, STRAND.
LITTLE prefatory remark is required in introducing this small book to the public. The present day is especially noticeable for the number of amateur workers who are found in every department of art and technics. That being so, there is certainly no branch of work better fitted to claim their time and attention than that of Bookbinding. It is of great antiquity, of the utmost utility, and capable of almost any degree of artistic development. Looking back to the birth and early history of literature, we find all the oldest manuscripts, both classical and oriental, were written on sheets of parchment or papyrus, and rolled up when not in use. The bookbinder of those days was simply a maker of circular cabinets or repositories, suitable for containing these rolls; and these cases, when for bibliophiles, were often beautifully ornamented. When and by whom the plan of folding the sheet of parchment or paper into pages, and stitching sheets together at the back, was first introduced, is not exactly known; but at that time, and not till then, the book sprang into existence.
This new back required the bookbinder as we know him now; and at the very outset of the trade, his work, though entirely different to the articleic productions of the present day, was elaborate and beautiful. The whole subsequent history of bookbinding has done credit to its brilliant beginning. There are many good reasons for commending this craft to the attention of amateurs, amongst which we will enumerate a few. First, it does not require any great strength or mechanical aptitude. Secondly, the plant is not expensive. Thirdly, it can be pursued anywhere. Fourthly, it is of unquestionable utility: how far preferable it is to have your cherished books, in handy accessible volumes, instead of in heaps of disorderly parts or numbers, almost mere litters, in which one can never find what one wants! Fifthly, and by no means the least important, well-bound books form an ornament to any room, and are satisfactory to show one’s friends. All amateurs are fond of, and proud of, exhibiting specimens of their handiwork to admiring friends and visitors; and what better than books? Fret-cutting, turning, illuminating, &c., are so very common now, that they are almost “played out.” Bookbinding is not so, and if the amateur becomes a good finisher, the amount of varied and interesting ornamentation that he can produce is infinite. In this little volume, full particulars of every process and detail are given, especially adapted to the wants of the amateur. That it may train many skilful articles, is the earnest aspiration of the Author.
INTRODUCTORY
IN the small book, of which this is the preliminary chapter, we purpose to treat, succinctly but completely, of the various practical operations gone through in the binding of books, and in so doing we shall keep the wants of the amateur especially in mind. Unquestionably, the articleic art is one which any intelligent and fairly handy man can practise at home; and as the objects upon which his ingenuity would be exercised come necessarily much into his own hands and those of his friends afterwards, he will often experience the lively satisfaction of being praised for his taste and skill. Bookbinding is a clean and not too laborious occupation, which can be easily practised in any spare room, or even airtight shed where light is plentiful and the temperature can be raised to that of an ordinary sitting-room. “We may premise that, after next chapter, we shall go on to describe, consecutively, the various processes as practised by a professional bookbinder, following each by any expedients which may seem more within the power of the amateur. We shall adopt this course for several reasons. In the first place, it is best that the amateur should understand the correct process as practised by the tradesman, and, where possible, conform to it as nearly as practicable. In the second place, it will render the book a complete manual of the art, useful alike to the amateur or youthful professional workman. We must, at the outset, beg those of our readers who purpose carrying out our instructions to lend their best attention to the subject.
Bookbinding is, undoubtedly, a delicate and a difficult art, and it is almost impossible to describe some of even its simplest processes. In many cases, the slightest deviation from the teaching will risk inevitable failure in the process described; but to make up, as far as may be, for the lack of personal showing “how to do it,” we shall sprinkle our text thickly with sketches of the various operations at different stages, of which we bespeak careful observation. Bookbinding is comparatively a modern art. The books of the ancient and classic nations were, as most people are aware, long rolls of skins or of Egyptian papyrus, which, when not in use, were rolled up and kept each in a species of circular box. When wanted, the roll had simply to be drawn out of its case and unrolled. The Jews use to this day, in their synagogue services, similar rolls of vellum, whereon is written the Pentateuch in Hebrew characters. Doubtless, the earliest specimens of bookbinding were those produced in the eastern branch of the Roman dominions, usually called the Byzantine Empire. These were generally of metal gold, silver, or gilt copper. Of course, this kind of binding was produced by the goldsmith, silversmith, and jeweller, the part of the bookbinder proper being confined to fastening the leaves together and securing them in the metal cover. Of these ancient bindings, some few specimens are still extant. It is difficult to trace the transition of the parchment from the roll form to that of leaves. It is known that the Romans used small tablets of wood, and even leaves of lead, connected by rings at the back, so as to form a small book. Perhaps this gave the hint. It is clear that the book form is more ancient than was at one time believed.
Dr. Hogg says : “Amongst the various objects of antiquity which were purchased from the Arabs, at Thebes, were two papyri, the one in Celtic, the other in Greek, in the form of books. . . . The leaves were about 10in. in length by 7in. in width, and had been sewn together like those of an ordinary book.” Once this step was attained, the covering would quickly follow. In the reign of Charlemagne the art of bookbinding made rapid strides. Italian designers and artificers were employed, and we read of the caskets in which books were preserved as being of solid gold, and covered with precious stones. The clasps of the covers were often closely studded with jewels, and small gold nails were frequently scattered over the leather of which the cover was made. Ivory was also a favourite material for book sides. This was probably derived from the Roman diptychs. The next great step in the history of bookbinding was the general adoption of leather as a covering. Hitherto nearly all the binding had been done in monasteries, and, although they might use velvet, and call in the aid of the silversmith to ornament books bound for princes, yet those of the monastic library were generally supplied with a binding of plain vellum, or enclosed with heavy carved oaken boards of immense thickness. It is not known precisely who introduced leather binding, nor the date of its introduction. It would seem to us to follow naturally on the use of vellum. To Matthias Corvinus, the celebrated literary and chivalrous King of Hungary, the first use of morocco is credited. This may be true of the dressed skin of the goat (morocco), but deerskin had been employed long previous in the monastic binderies. Richard Chandos, Bishop of Chichester, mentions, in his will, as early as the year 1253, a “Bible with a rough cover of skins;” and the ” Accounts of the Households of Edwards I. and II.,” contained in four MS. volumes, presented to the Society of Antiquaries by Sir Ashton Lever, were in the original binding of calfskin, dressed like parchment, but with the hair on, except where it had been removed to give space for the written inscription. It is thus evident that the practice of bookbinding was far advanced at the time of the discovery of printing.
Of course, the introduction of that “art preservative” largely increased books, and hence bookbinding. As far back as the Wardrobe Account of Edward IV. (1480), kept by Piers Courtneys, we find entries for ” binding, gilding, and dressing ” a certain book, and mentions of silk and velvet ” purchased therefor.” Among monarchs, Elizabeth and the first James seem especially well affected towards velvet. Henry VII. appeared to have been the first English king who formed a library, and he had a magnificent one–the books being covered with splendid bindings. Soon after the introduction of vellum, it came into general use (circa 1430), almost ousting velvet, except for livres de luxe. Very soon we find the sides of such vellum books covered with an elaborate stamping of various designs–sometimes crowded and without merit; at others, so sharp, clear and well defined, that they have never been excelled, and scarcely rivalled, by any modern workmen. When we consider that these early binders could not have the aid of the powerful arming presses of to-day, we may well wonder how they managed to impress the large and elaborate blocks with the success to which they attained. James I. appears to have been an ardent bibliophile both before and after assuming the crown of Great Britain, and many of his bookbinders’ bills are extant, showing entries for books bound in leather, vellum, and parchment. Although plain stamping (“blind tooling”) is found very early in the history of leather binding, as is evinced by the vellum and “basil” book covers so ornamented, there seems little doubt that gilding the leather had its origin in Italy, probably Venice, and had been derived by the Italian bookbinders from Eastern sources.
To these same binders we probably owe the initiative of the burst of the articleic glory in the fifteenth century. It was in 1479 that Jean Grolier de Servia, Vicomte d’Aguisy, the founder of French bookbinding, was born. He was himself of Italian extraction, and was sent by Louis XII. to Milan in a diplomatic capacity. Probably he here imbibed his love for fine bindings, for, on his return, his famous library of finely bound books soon became celebrated. Grolier gave an immense impulse to French bookbinding, and appears to have brought Henry II. and his chere amie, Diana of Poitiers, to the same enthusiasm as himself, for they were both lavish in the bindings of their books. Grolier is supposed to have been the first man whose books were lettered on. the back. By the sixteenth century leather binding had assumed its perfected form as seen at the present day, and its subsequent history showed few changes. Amongst those which have taken place, may be mentioned the substitution of ” marbled ” edges for gilded and self-coloured ones, and the introduction of stamped calico (cloth) in the present century by English binders (by Archibald Leighton, in 1825).
The latter, as a cheap medium of binding, is an immense boon, and it is now being slowly adopted in other countries. It is, however, only a temporary vehicle for new books, and can never take any place as a library binding. Let us now, before proceeding to practical details, say a few words on taste in bookbinding. Most book lovers, in all ages, have desired to see their treasured volumes fitly, and even splendidly, clad. Chaucer’s ” Clerke of Oxenford ” preferred to see At his bede’s hede, Twenty bokes clothed in blake and rede, to any other spectacle which the world could afford; and a magnificent binding so enraptured Skelton, the laureate of our eighth Henry, that he asseverates It would have made a man whole that had been right sekely, To beholde how it was garnisshyd and bound, Encoverede over with golde of tissew fine ; The claspes and bullyons were worth a thousand pounde. It is a disputed question, among book lovers of taste, whether the whole of a small collection should be bound in the same material, and of the same colour, or whether a diversity should prevail.
There are valid reasons for either plan. A library where both morocco and calf bindings are adopted, in the various hues which are given to each leather, has a pleasant and lively appearance, and if glaring contrasts in hues be avoided in neighbouring volumes as they stand upon the shelves, an air of lightness and vivacity will characterise the apartment. But the contrast must by no means be too pronounced. Dr. Dibdin, a great authority on all such matters, warns us specially against the employment of either white vellum or scarlet morocco as a material for the jackets of our volumes. Both are too decided in appearance, and impart a “spotty” look to the shelves. Of course, this objection applies only to single volumes or small sets in libraries of limited extent. If, for instance, a whole press, or set of shelves, could be appropriated to vellum-clad volumes of the Fathers and patristic theology, the effect would be good. The decision on the general question of uniformity versus variety must be left, in great measure, to individual taste. Where the collection is small, say, sufficient to fill two ordinary bookcases (about 500 volumes), an excellent plan is to reserve one case for standard
English authors, and bestow in the other works on science, art, travels, foreign books, &c. Let all the bindings be of morocco, either ” whole” binding (the term used when the book is wholly covered with leather), or half binding (where the back and corners only are leather covered, ” cloth,” of a similar colour to that of the leather, being used for the sides), according to the value and importance of the book. If maroon morocco be chosen for the books in the first press, and an olive green for those in the second, the effect will be chaste and massive. Both these leathers ” throw up ” the gilding of the back splendidly. Where expense is not a primary consideration, the backs should not be scrimped in this matter of gilding, or, as it is technically termed, “finishing.” A morocco bound book should bear a good amount of gold on the back; but the patterns of the tools should be carefully selected. For all volumes of tolerable size, a bold, clear style of ornamentation should be adopted, and raised ” bands,” crossing the back of the book, should be a sine qua non with every tasteful bibliophile. Not only should all the books in one case be in the same kind of leather (if the uniform plan be adopted), but the style of “finishing” should be the same. If lines have been chosen as the means of ornamentation, let all the books be decorated therewith. On the contrary, if a more florid style has found favour, let it be adhered to throughout. One of the most effective sets of books that ever came under our notice had all the volumes bound in blood-coloured morocco, richly gilt in the cinque cento style of ornament. The Empress Eugenie is stated to have had her books uniformly bound in sky-blue morocco, thickly sprinkled with the golden bees which form one of the emblems of the house of Bonaparte. It is, however, not unlikely that the amateur bookbinder will introduce greater variety amongst his bindings, for the simple reason that he will be desirous of trying his hand on morocco, calf, roan, vellum, and cloth–all of which we shall, in due course, describe.
TOOLS AND APPLIANCES.
LET us now consider the tools necessary for a small bookbinding plant. The bookbinder’s workshop may be fitted up in any spare room or weather-tight outbuilding. It should always, if possible, be on the ground floor, because the operations of beating, pulling down the standing-press, and even cutting, cause considerable concussion to the walls and joists of the place. The first fixed tool is the common screw ” standing-press,” which is similar to that used by packers, and in the making of cheese and cider. It usually consists of two heavy cheeks of wood, and a head and bed of the same, the whole forming a kind of parallelogram when put together. Through the head passes a brass box, in which revolves a long iron screw, with a tolerably fine thread, and from this screw depends a stout piece of wood called the ” platen,” or sometimes the ” follower.” The books are piled up between smooth beech boards, in the centre of the bed of the press, and the platen screwed down upon them, at first by the hands, then by the short iron press-pin, and lastly by the long one, to which a couple (or more) men lend their force, one pulling and the other pushing.
Sometimes a ” purchase ” is used; this is a strong post, planted in the ground at some distance from the left side of the press. Fixed on this are a cogged wheel, pinion, and handle, which turn a wooden cylinder, around which a chain can coil. The free end of the chain is provided with a hook, and, this being fixed to the end of the long press-pin, when at the right cheek of the press, the windlass handle is worked by one or two men, and as the chain is wound upon the barrel, the pin is necessarily brought over with more power than by muscular effort exerted directly. Standing-presses are also made wholly or partly of iron. The screw of the press should always be kept well oiled, and, to preserve it from dust, it is well to make a paper cylindrical case a little bigger than the screw, and put over it.

The iron ring shown above the press (Fig. 1) is intended to support this standing press pasteboard cap. The press should be firmly fixed by strong timbers braced to the walls and ceiling, in order to hold it quite firm, and resist the shocks of the pulling down. Each press should be supplied with a round piece of wood, about 18in. long, with which to screw it up and down when empty, and a short (4ft.) and a long (6ft.) iron press-pin, fitting the screw socket.

There are several modifications of the screw press, amongst which the ” Athol” press (Fig. 2) possesses much merit, as, from the position of the lever, this press does not jar the premises when fixed so much as the ordinary one, and, moreover, requires no separate press-pin–the Isle of Man legs, Been on the right cheek, being used to pull it down. Another novel and excellent press is the American “Boomer” (Fig. 3).

This press consists essentially of screw pressure applied by a wheel until it is too great, when a lever working a rachet wheel is brought into operation, and a very intense pressure is obtained, stated by the maker to be greater than that of the hydraulic press. With this press also there is but little jar or shock. Of the hydraulic press it is not needful to speak, as that is seldom used except in large establishments, and certainly never by amateurs. The price of a standing-press ranges from £8 for a small wooden press, and from £14 to £26 for an iron one; small Athol, £35; small Boomer, £28. In most cases (unless, indeed, the purpose is to do a great deal of work) it will not be necessary for the amateur to purchase a standing-press. If he beat his books effectually, he can make shift without one. They can be screwed up in the laying-press sufficiently tightly to get much smoothness. A large iron copying-press, or even a good wooden napkin-press, are not to be despised as auxiliaries.

Mr. F. Ullmer, Cross-street, Farringdon-road, and Mr. Powell, 33A, Ludgate Hill, E. 0., keep small iron screw bench-presses (Fig. 4), which would prove very useful, and cost about £5 each.
With every standing-press it is necessary to have a good supply of pressing-boards. These are rectangular pieces of beech, from 1/2in. to 1in. thick, planed perfectly smooth and square, and varying in size, from those capable of receiving a folio to those only large enough for a 12mo (these sizes will be explained in due course). Next in importance come’s the lying (or ” laying,” as it is invariably called by the professional bookbinders, which form we shall follow) press (Fig. 5). This consists of two large square cheeks of oak or beech connected by two large wood screws and two guide bars. On one side, which is kept uppermost for general purposes, the cheeks are simply planed smooth.

On the other side, however, which is used for cutting purposes, the left-hand cheek has two small pieces, screwed on in such a way as to leave a channel between them, in which the left-hand cheek of the ” plough ” slides in the operation of cutting. When this side is uppermost, the press is termed a ” cutting press” (it is in this position at Fig. 5). This press can be tightly screwed up by the short iron “press-pin” shown at B. When in use, the screws and guide bars should be treated with soft soap and blacklead, or some similar lubricating composition, to allow of their working freely. If the two small square pins or keys (A, A, Fig. 5) be driven out (which can easily be done with a hammer and a square pin of hard wood), the grooves in the screws, in which they work, can also be lubricated. With this press is used the “plough,” a small apparatus of beechwood, shown at Fig. 5. This consists of two flat cheeks, which can be brought together by turning the screw. The right cheek of the plough is furnished with a sharp pointed knife, secured by a screw. When the book is tightly screwed up in the cutting-press, with one of its edges slightly protruding, the binder places the plough with its left cheek in the groove, takes the plough by the handle in the right hand, resting, meanwhile, is left on the other end of the screw, screws up the right cheek, until the point of the knife just touches the book, then begins to push the plough along the groove backwards and forwards, turning the screw a little every time the plough travels from him. The knife, by this method, gradually passes over and through the entire edge of the book, removing, in a series of shavings, the surplus portion of it that projects above the level of the press. There are various minutise which will be described particularly when we come to the section accorded to ” cutting edges,” the foregoing brief description being only intended to elucidate the uses of the press and plough. Plough-knives must be kept very sharp, and require some care in grinding. They are kept in two principal forms, the common knife, shown at Fig. 5 (C), and the Scotch, or sliding, at Fig. 5 (D). The first has a square hole in its butt, through which the plough screw passes, as shown at E (Fig. S), while the Scotch knife has beveled edges, and the end of the plough screw has a channel, G (Fig. 5), formed in it, in which the knife slides, as shown at F (Fig. 5). Either knife is good, but our personal option is for the ordinary form, which, moreover, takes less grinding than the sliding one. The press can be had in various sizes, at different prices. The amateur will not require the largest size, and may get one to suit him, with plough and pin complete, at from 30s. to £2 2s. These two tools the amateur must have.

The ” tub ” (Fig. 6) is a rectangular wooden frame, upon which the laying-press rests, whichever side is in use. The ancient bookbinders used a veritable tub for the purpose, hence the present name. This should be strongly morticed and tenoned together, and can be made by any local joiner,or by the amateur himself, if handy with carpenter’s tools. It is best to put a bottom to it and board up the sides for 1ft. 6in. or 2ft., to keep THE TUB. the shavings in. The stuff of an egg-box or two is very suitable for this purpose. We must here mention that in a large establishment the cutting of edges, “out of boards,” is seldom done with the plough, but is accomplished by the ” guillotine cutting-machine,” in which, by lever power, a horizontal knife is brought forcibly down, and will pass through a pile of books at one stroke. As the machine is expensive, and not at all in the amateur’s line, we merely allude to it to render our list of tools complete.

A “beating-stone” and hammer (Fig. 7) are indispensable. The hammer may be either of wrought or cast iron, something in the form shown at A (Fig. 7), with edges well rounded off and provided with a short wooden handle. It may weigh from 10lb. to 14lb. Any smith can make one. The “beating-stone” (Fig. 7) is a piece of York or Portland stone, or any stone capable of taking a smooth surface, about 2ft. by 2ft. or 1ft. 6in., and 2in. thick, ground upon its upper surface quite level. It should be firmly fixed on an upright support of wood, which should be a stout square log, firmly secured to the floor, or let into the ground, and covered on the top with saddle-cloth, felt, or several sheets of brown paper, to hinder, as far as possible, shocks or jars through the impact of the heavy beating-hammer.

Beating-hammers vary in price from about 5s. The stone can be bought for a few pence; but the fitting of it up will depend upon the local charges for carpenters’ work. In all extensive bookbinding establishments the ” beating ” is now superseded by passing the books between the heavy rollers of the rolling-machine (Fig. 8), which was invented about fifty years since. If the amateur resides in a town, he can generally discover some binder who ” rolls for the trade,” and will pass his books through the machine at about an average of 1in. per vol., unless very large or thick; in this case he will not need the beating-hammer or stone. The rolling-machine costs about £30, and is consequently out of the question as an amateur’s tool.

A small but important implement is the sewing-press (Fig. 9), which consists of a flat wooden bottom, provided with a vertical wooden screw at each end. On each of these screws revolves a wooden nut, and these sustain the crossbar, from which depend the cords upon which the books are sewn. These cords are secured beneath the bottom of the press by brass keys of the form shown at A (Fig. 9), of which five form a set. Middle-sized press and keys can be purchased for about 10s. 6d. A pair of medium-sized millboard-shears are necessary. These cost about 25s., and consist of a large pair of iron shears, precisely similar to those used by the whitesmith to cut up tin plate and zinc. They are screwed up in the laying-press or fixed, in a hole in the work-bench, and are used for cutting up the millboard covers for the books; though they are now almost superseded in establishments of any pretensions by the millboard-cutting machine, which consists essentially of a single large blade, worked by the right hand, and sundry arrangements by which any number of boards can be cut to one gauge (when fixed) without marking off.
There are various other machines used in large establishments, to which we need do no more than allude, as in small places,, where great speed is a secondary condition, their work is accomplished manually. Amongst these are Starr’s backing-machine, or some modification of the original patent. This consists of two iron vice jaws, between which the back of the book can be ked, when a small iron roller is worked across it to produce the proper curvature. The bookbinder’s saw-bench, worked either by foot or steam, consists of several small saws arranged on a spindle, and is used for sawing the grooves to admit the cords in the back of a book instead of cutting them individually by the tenon saw. The bookbinder’s trimming-machine consists of a thin plate of steel something like a small circular saw, but quite sharp instead of toothed, usually driven by steam, and used to trim off rough edges and overplus of monthly magazines, &c., while still not removing sufficient to leave a smooth surface, as is done by the guillotine. A small grindstone for grinding plough-knives, &c. will be required.

The form shown at Fig. 10 is a good one, and can be driven by the foot. A 2ft. stone, costing about 30s., will answer. We will now enumerate the minor forwarding tools. Two folding sticks (one pointed). These are pieces of flat bone, like small paper knives but without handles, 4d. and 6d. each; pair large scissors, long blades, for squaring plates, 4s. 6d.; small tenon-saw, 3s. 6d.; small wooden tub to hold thick paste, Is.; glazed earthenware pan to hold thin paste, 1s.; a glue-pot, 2s.; several small “sash tools,” as brushes for paste and glue, 6d. and 8d.; backing-hammer, 2s. 6d.; pair Lancashire wing compasses, 3s. 6d.; 9in. carpenter’s square, 3s. 6d.; knocking-down iron, 2s. 6d.; bookbinder’s rule, 4s. 6d.; scratcher-up, 1s.; oilstone hone, 2s.; shoemaker’s knife for cutting out, 8d.; French knife for paring leather, 2s.; pair band-nippers for setting bands nicely square, 3s. 6d.; pair trindles, 2s. 6d.; steel scraper for edges, 1s.; beech ” backing-boards,” per pair, according to size, from 4d. for 18mo to 2s. for imperial folio; beech “cutting-boards,” per pair, according to size, from 2d. for 18mo to Is. 2d. for folio; agate or bloodstone burnisher, from 4s. Gd.; pressing-tins, from 9d. each; pallet knife, 1s. 3d.; packet bookbinder’s needles, Is. The foregoing tools and machines can be obtained of the undernamed firms in London: Mr. Ullmer, Cross-street, Farringdon-road; Messrs. Harrild, Farringdon st.; Messrs. J. M. Powell & Son, 33A, Ludgate Hill; Messrs. Hughes and Kimber, West Harding-street, Fetter-lane, E.G.; and most printers’ brokers. Having briefly enumerated the tools requisite for ” forwarding ” a book, let us now advert to those which appertain to the ” finishing ” department. In trade technical parlance, “forwarding” comprehends all the operations up to and including getting the book covered with leather or cloth; and ” finishing ” is the affixing the gilt or other ornaments, and lettering the title on the back or sides. When space can be spared, the finishing is best carried on, not in the forwarding shop, but in a separate room, which should be well lighted. Here everything should be kept as clean and free from dust as possible, in order that the work in hand shall stand no chance of getting soiled. The necessary tools and appliances for finishing are neither numerous nor expensive, and the amateur would do wall to obtain those named in the following pages.

A small gas stove for healing the tools and letters, as illustrated at Figs. 11 or 12. The tall one, which stands on the floor on tripod legs (Fig. 11), costs about £2 10s.; the small one, shown at Fig. 12, which stands on the bench, costs 16s.

Both stoves are connected with the gas by an elastic tube. A stout bench, for finishing-press, &c., to stand on, is useful Some bookbinders do all their finishing at the ordinary laying, press; but the use of a finishing-press, which can be moved about on a shop bench, is much more convenient. The cost of bench would depend upon carpenter’s charges in vicinity; but a strong large kitchen table without leaves makes a very good substitute. A useful sized finishing-press, such as is illustrated at Fig. 13, costs about 12s. 6d.

It consists of a couple of small but solid beech cheeks, connected by a wooden screw at each end; the right end of each screw is turned up to a handle for the right hand, for in screwing up the book about to be finished in this press the hands only are used, a press-pin not being required. Larger sizes can be had. The screws should be occasionally lubricated with blacklead and soft soap.

A single line, a two line, and a three line fillet are also required by the bookbinder. These tools are small brass wheels, the peripheries of which have been turned up to one, two, or three fine lines. Their use will be explained when we come to the department of ” Finishing.” It is sufficient here to say that when heated, rolled on gold leaf, and applied to the back or sides of the book, they leave a gilded impression of one, two, or three lines respectively. Other kinds, either of plain line patterns or those which have their periphery, or rim, engraved with floral and other patterns, can be had, and the purchaser can consult his wants and means in adding to the three described above. The line fillets cost about 5s. each. More elaborate patterns run up to 10s. and 12s., or even more, according to intricacy of pattern. Pallets are very useful, and a few should be obtained. These are small brass tools, about 4in. or 5in. long, and have line and ornamental patterns cut on their curved edge. They are worked across the back of the book, either with gold or without. (The latter process is termed “blind tooling.”) The binder should also have several alphabets of letters and figures and a brass case. Formerly the letters used in bookbinding were cut individually on the end of a small piece of brass, which was provided with a wooden handle, as shown in Fig. 15. Great dexterity was needed to properly “letter” the title of a book with these separate letters, and this undoubtedly led the bookbinder to use brass type, which he ” sets up,” as a printer might do, in the case shown in Fig. 14. These brass types are now sold in complete ” founts,” or sets of sufficient alphabets and figures for any ordinary works. The amateur can get price lists and specimens of the cast brass type of Messrs. Ullmer, Harrild, Powell, or any other dealer. The price runs from 12s. per 100 letters upwards for types. Separate handled letters run from about 10s. to 30s. per set of one alphabet and ten figures. In the specimens given the smallest size is suitable for 12mo and crown 8vo (these terms will be duly explained) volumes; the next size larger, for demy 8vo; and the largest for folio.
BOOKBINDING BOOKBINDING BOOKBINDING
These three alphabets should be nearly sufficient for an amateur. Some binders employ ordinary printing type (of type metal, which is principally composed of lead); but this, although cheap, is so easily melted that we cannot recommend it to the amateur. The “cases” or “type holders” (Fig. 14) are 10s. 6d. or 12s. 6d. each. We may mention that many of the best binders, both in London and the provinces, do not adopt this plan, although decidedly the easier, but prefer to use the separate handled letters, under the impression that this expedites the work. An alphabet of these, suitable in size for the work in hand, is ranged round the top of the gas stove (Fig. 12), the handles resting in the recesses; and the finisher catches up each letter from its place as he requires it, brightens its face, presses it on its place on the back of the book, and replaces it on the stove. It need scarcely be said that it requires a very keen eye and steady hand to ” work” a line of small separate letters straight across the curved back of a large volume. In order to do this more certainly, some binders lay a small piece of sewing silk across the gold in a straight line, as a guide in working the separate letters. A selection of various separate ” tools,” of small pieces of brass (handled), on the ends of which are cut different ornamental devices–as Maltese and other crosses, acorns, anchors, &c. –used in finishing, will also be found useful. The price ranges from 2s. upwards, according to size and intricacy of design (Fig. 15).

Amongst the minor but necessary tools and appliances are the following: A polishing-iron (Fig. 16). Used to give increased smoothness or gloss to calf books. Price 10s. Pressing-tins and boards for the final pressing. Gold-cushion. A piece of fin. board, covered first with a couple of thicknesses of flannel or cloth, and then with calf leather, with the “flesh” (rough inside) side uppermost, and with a piece of vellum sticking up from one end and part of one side as a guard (Fig. 17).

This can be made by the binder. If purchased it will cost 2s. 6d. Gold-knife. A small, straight-edged knife, used for cutting and lifting the gold leaf. Price Is. 6d. or 2s. Gilder’s tip. A few fibres of sable, fixed between a couple of cards. Used for lifting gold leaf. Costs 6d. Three small sponges, about the size of a peach, or rather larger. Small piece of flannel to oil books with. Small glazed pipkin in which to boil size, Is. Two or three gallipots. ” Devil,” or ” frother.”

This is a slight piece of tough wood, about 10in. long. At one end four or more pieces of a quill,cut about 3in. long and split, are tied tightly to the wood at right angles, as shown at Fig. 18. This is used to froth up the ” glaire,” as will be explained in a subsequent section. The little wire ” egg-whiskers,” sold at American Novelty Stores in London, answer excellently. Gold-rag. A piece of coarse canvas, well greased, for clearing off the gold first.
MATERIALS.
THE materials brought into requisition in the binding of books are not very numerous, and the following may be taken as being all that will be required by the amateur, or even the professional bookbinder; unless the latter be in a very large way of business, when crocodile skin and other novel coverings are sometimes called for:
Morocco and Calf.
These leathers can be had in different colours, from about 7s. per skin upwards. Calf is a smooth leather, morocco one with a raised grain. One is the skin of the animal whose name it bears, the other that of the Oriental goat. Either is excellent leather for good books, although morocco is just now, perhaps, the favourite. At Messrs. Eadie’s, Great Queen-street, Long Acre, either may be bought in half and quarter skins, or even enough for the back and corners of a single volume of course, at slightly enhanced prices over the whole skin relatively.
Persian.
We have said that morocco (Turkish understood) is the skin of the goat. Persian is also the skin of a small Eastern goat, but the leather is much harder and inferior to the Turkish. It is good leather, however, and very suitable to second-class work, and is only 3s. 6d. per skin. It may be had in various ” grains ” or surface patterns, but not in many hues only, perhaps, plum-coloured and dark green. The “hard grain” Persian is the best.
Russia.
This is a strong, brown, smooth leather, only used in ” stationery binding” i.e., for ledgers, pocket books, &c. It is occasionally used in bookbinding, and is a good leather, but very thick, and needs careful paring. It can be bought in skins or small pieces, but is expensive. It is celebrated for its pleasant odour, due to the empyreumatic oil of the Russian birch bark employed in tanning it. Hogskin.-This should never be used, as it engenders mildew and mould in other bindings placed near it.
Roan.
This is a stout sheepskin, tanned with, a smooth shiny surface and a straight grain. It is a common leather, but much used for half-bound books of no great value; about 4s. per skin. Skiver.-This is the “grain” or outside portion of a sheepskin, split from the “flesh” or inside of the skin (of which the so-called ” chamois” leather is made). Skiver is very thin, and will tear almost as readily as good paper. In appearance it is much like roan, but is only suited to very common work.
Vellum.
This is made from calfskin by a peculiar process. It is a tough but intractable material, much used in the Middle Ages, but rarely now, and then generally for ancient theological books. It resembles stout parchment. The skins are small, and cost from 5s. to 7s. 6d. or 10s., according to size. … , Velvet and Silk. These materials are occasionally used by bookbinders, but we should not recommend them to the amateur. Prices vary, and cannot well be quoted.
Bookbinder’s Cloth.
This is a textile fabric of about 30in. width usually, and sold in pieces of about 36yds., or can be bought for about Is. per yard; certain special colours, such as vermilion, scarlet, magenta, and mauve being dearei’, and some common colours, as purple, &c., cheaper. Cloth can be had in a large range of colours, and of ” grain,” which is a small surface pattern, produced by passing the fabric through engraved rollers. Some grains, such as morocco, are old; others, such as pin-head, new. Cloth is much used to cover the sides of half-bound books. Marble Paper.-This is used for end-papers and book sides. In such cases the edges are marbled to match. Coloured papers, of various tints, such as the brown Cobb so called from a bookbinder of that name are used for end-papers. Marbled paper, 2s. 6d. or 3s. per quire; Cobb and coloured paper, 7d. and 9d. per quire. Millboard is a hard board made from old rope. It is of different thicknesses, from “tip,” which is not much thicker than brown paper, to boards 1/4in. thick – more used by portmanteau makers. It costs about 44s. per cwt., good quality, but commoner kinds are cheaper. Strawboard is a common imitation of, and substitute for, millboard. It is very brittle, and only suited for common work. About 20s. per cwt. Headbands, ready-made, per yard, according to size and quality.
Stout Brown Paper for lining up the back of book. Glue, of good quality, 9d. or lOd. per Ib.; cheaper by the cwt. Paste, thick and thin. Gold Leaf, in books of twenty-five leaves, about 5s. per 100 leaves. Gold leaf varies in colour, some being ” deep,” or of a reddish hue, while ” lemon” gold has a silvery lustre. Deep gold is preferred by most binders. Parchment Shavings or Chippings, for size, may be bought by the pound, of account-book makers, &c. Glaire is the beaten-up whites of eggs. Bole Armenian, for making sprinkle for edges. Other materials for sprinkling and marbling colours are used, but if the binder intend to attempt the marbling of his edges himself, he will also require a marble slab and muller, a marbling trough, and sundry “combs;” also “flea-seed,” or gum traga-canth, and colours, as lake, indigo, orange, yellow, white, Chinese blue, black, green, and vermilion. These he can buy dry of any colourman, but his best plan will be to procure them in small jars (pounds), ready ground and prepared, of Mr. Corfield, dealer in bookbinders’ materials, St. Bride’s-street, London, E.G. Though we shall, in its proper place, give a detailed account of the operation of marbling, we would dissuade the small binder from attempting the process. It is both dirty and difficult, and a man needs to be in constant practice to insure success. If he cannot be satisfied with gilt edges for valuable books, and sprinkled edges for common ones, he had better keep the books by him until he can send them to one of the London marblers, who, for Id. or lid. per volume, will marble them as they should be, and return them promptly. Either the Mr. Corfield just mentioned, or Messrs. Eadie, of Great Queen-street, Long Acre, can be depended upon for this pur-pose. Either of these two old-established firms will also supply the binder with all or any of the materials which we have enumerated, with the exception that Mr. Corfield does not keep leathers. Messrs. Eadie do, and will even cut sufficient for a single volume (to match), either in morocco or call’. Most of the dealers in bookbinders’ machines and tools also keep materials.
Folding
FOLDING
WE now come to the first step in the actual process of Bookbinding, viz., that of folding or re-folding; the first term applying to new work, the second to re-bound books. In new work, the binder receives the sheets of the book from the printer flat, and not folded, and his first duty is to fold them so as to bring the pages into order, with proper margins of plain paper all round.
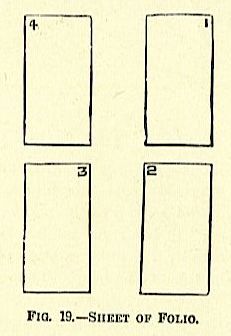
The manner of doing this will depend upon the number of pages in each sheet, and the manner in which the printer arranges (technically, ” imposes”) them. In the first place, if we take a sheet of white paper, of any size, and desire to have it occupied by four large pages. the printer will so arrange them that when the sheet is printed there will be the impression of two pages on each side of the sheet, as at Fig. 19 (this shows both sides of pages). Thus, one side will bear pages 1 and 4, and the other pages 2 and 3. This size is termed ” folio,” from the Latin word folium, a. leaf, and consists of two leaves only. Yery many of the ancient books were folio, as the size was convenient to the printer. This sheet only requires folding up the back, in such sort that pages 2 and 3 fall accurately on each other. To do this, a clean millboard is laid on the work-bench, and a pile of first sheets (or, as a binder would say, of ” section B”) is laid upon it with the inner pages upwai’ds, and the ” head ” on top of the pages farthest from the folder, page 2 being to his or her left hand, and page 3 to the right.
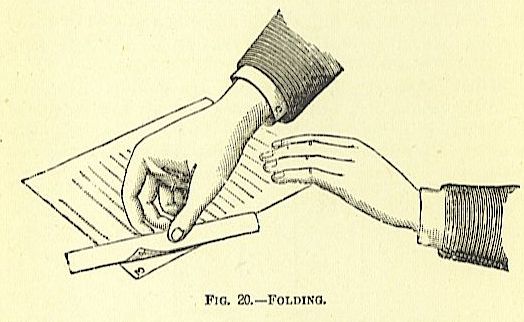
The folder holds a bone ” folding-stick ” in his right hand. He slightly “fans” out the heap of sheets by a circular motion of his folding-stick or thumb nail on the top of the heap. This permits the respective sheets to be seized expeditiously. The folder now, with his right hand, turns the right-hand portion of the top sheet (pages 1 and 4) over on to the left (pages 2 and 3), slightly doubling over the head of the page where the head-line and page figure are (as at Fig. 20), bending it a little over the folding-stick. He then advances the folding-stick and paper with his right hand until he sees that he has got the head-line and page figure of page 3 exactly on, and over, those of page 2. When this is achieved, he gives the folding-stick a rapid sweep clown the centre of the doubled-over part (page 4), from head to tail, .
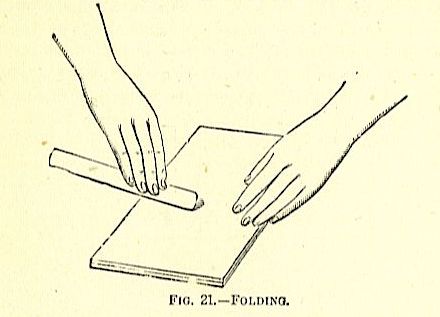
as at Fig. 21, and the sheet is folded. The sheet is now cut into halves, and doubled again up the back. It is then placed on the left, and a second sheet proceeded with. When all are finished, it is well to put the thumb of the left hand at the bottom of the back of the heap, and let the sections pass down severally, meanwhile working the edge of the folder along the back, as shown at Fig. 22. .
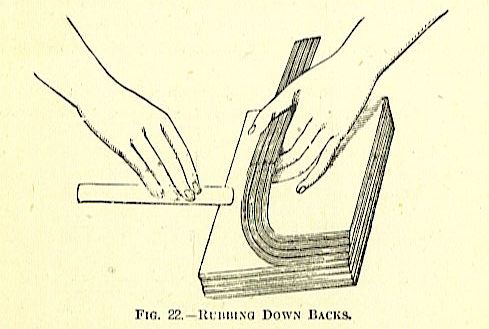
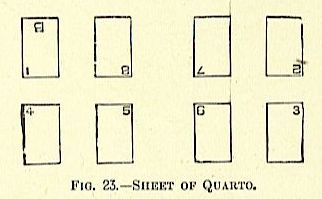
This presses the back fold close and tight, The next size to “folio” is the “quarto,” from the Latin word quartus, meaning ” four.” In this case, the printers put eight pages in a sheet, four on each side (as shown at Fig. 23).
This, of course, necessitates an extra fold. After the sheet is folded as in folio, it is turned with the fold away from the operator, and the right – hand side is brought over the left. Thus, pages 3 and 6 are brought down on pages 2 and 7, and the fii-st fold made. The partly-folded sheet is then turned to the second position, and page 5 is brought accurately upon page 4, and the second fold made. The quarto is also an old-fashioned shape, but still lingers amongst us for certain books, principally family Bibles, dictionaries, atlases, and encyclopaedias. The next size is the “octavo,” from the Latin word for ” eight,” of sixteen pages to the sheet, eight on each side .
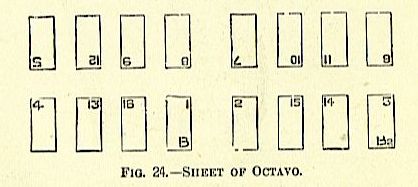
(Fig. 24). If the octavo were folded again, it would give small square pages of thirty-two to the sheet, called ” 16mo,” but this is such an awkward shape that it is very seldom used. Still another fold gives a “32mo.” This is not infrequently met with for very small books. The next legitimate size to 8vo (or octavo) is ” duodecimo,” or ” 12mo,” with twenty-four pages to the sheet (Fig. 25). It will be seen that the principle of dividing the sheet is different from that before noticed. Here the third part of the sheet, with eight pages, is so arranged that it has to be folded down upon the other part of the sheet before the main fold of the sheet is made.
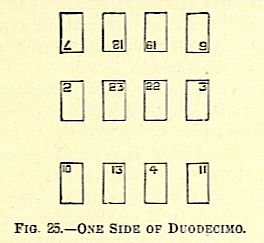
Let us now describe the folding. In folding the 8vo, the sheets are laid upon the bench, with the signature (which will be seen at the bottom of the first page) turned to the top of the table at the corner nearest to the left hand of the folder, and presents pages 2, 15, 14, 3, below, and above, with their heads reversed, pages 7, 10, 11, 6, reading from left to right. The sheet is then taken with the left hand by the angle to the right and creased with the folding-stick in the right hand, in the direction of the two point-holes made in the printing, taking care, by shading to the light, that the figures of the pages fall exactly one on another, which will be 3 upon 2, and 6 upon 7, and thereby presenting uppermost pages 4 and 13, aim above 5 and 12. The top part of the sheet is then brought down, with the left hand, upon the lower pages, 5 and 12, falling upon 4 and 13, directed properly, and again folded. The sheet then presents pages 8 and 9, which are then folded evenly, 9 upon 8, forming the third fold, finishing the sheet. In folding the 12mo (Fig. 25), the signatures, when placed before the folder, should be at the top at his left hand, and towards the table, the sheet presenting pages 2, 7, 11, 23,18, 14, 22, 19, 15, 3, 6, 10. On the right, pages 11, 14, 15, 10, are separated from the others by a large space, indicating that they should be cut off. The folder detaches this part with the folding-stick, and, bringing page 11 upon 10, makes a fold, and 13 upon 12, which will be uppermost, finishes the folding of what is termed the “inset,” which bears the signature of the sheet it has been separated from, with the addition of a figure or asterisk, as A 5 or A*. The remaining eight pages are folded in the same way as the 8vo, and, when done, the inset is placed in the centre of them, taking care that the headlines of both range correctly.
Books are sometimes printed in what are called ” half-sheets,” but they are folded the same, after being cut up. The next size (still diminishing) is octodecimo, or 18mo, with thirty-six pages to the sheet. There are a few books (principally Prayer-boots and devotional manuals) which are still smaller (48mo and less), but these do not come much in the way of the ordinary bookbinder. It must be understood that each of the preceding denominations and sizes applies to all sized sheets of paper, and hence the total number of book sizes is greatly enlarged. For example, demy (a sheet of which measures 21 1/4in. by 19 1/4in.) may be termed the usual or standard size of paper. Demy 8vo measures about 9 1/2in. by 5 1/2in., and is a very usual size for modern books.
All the reviews, and most of the magazines, are of this size. But there are also larger 8vos. Thus, the Leisure Hour, of the Tract Society, is an imperial 8vo, and much larger; Chambers’s Journal is a super-royal 8vo, aud also larger; while All ihe fear Round is a royal 8vo, only a trifle larger superficially than the demy Svo. The most important of the smaller-sized sheets is “post” or “crown.” The 8vo of this paper is much used, both in this country and abroad, for popular handbooks. “Crown” (or “post”) Svo is 4 1/4in. by 7in. per page, is a very popular and useful size, and is much used for novels and the generality of cheap French works.
Supposing the book to be bound is a volume consisting of monthly parts, you first see that they are in correct order, then take the wrappers off; next, go through them again, cut the thread that holds each part together, pull off the advertisement pages, take off the plates (illustrations), if any, and lay them, face downwards, in a pile in the order in which you remove them; and, lastly, pull all the ” sections” (sheets) of which the part is made up, apart, and lay them down in order, face downwards, proceeding thus through all the parts. The title-page and contents will usually be found at the end of the last part, and these must be placed at the beginning, before section B. When folding, you turn the pile of separated sections, with the title-page upward, and place them on your left hand. You then take up the first section (the title-page), and having cleaned off any glue which may have adhered to the back, by rubbing the edge of the folding-stick up and down it, from head to tail, a few times as it lies on the millboard, next, with the same tool, unturn any dog-eared corners, giving them afterwards a pinch with the thumb and forefinger of the right hand to make them retain their proper position; and, lastly, observe whether the sheet has been rightly folded, so that the lines of the title run straight across the page; if not, you alter their position and give the back a fresh crease with the folder. You then put this sheet down, face downward, 011 your left hand, and, taking up section B, proceed to treat it in a similar manner. If the section is thick and has been badly folded, you will often find it necessary to divide it into portions of four leaves each, and fold them separately, afterwards re-inserting them in each other, taking care that all the head-lines and pages fall upon each other, which can be seen by holding the opened section up to the light.
It will not unfrequently be found that when the head-line* are thus got to agree, the margin of plain paper above them is much more to some pairs of leaves than others.
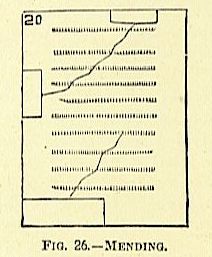
This must be obviated, or when the book is “knocked up” all the edges will come to correspond, and then the head-lines will get ” out of register” (or correspondence) again. When you have got the head-lines right, therefore, and discover any pairs of leaves that have less margin than they should have, the middle of the back of the pairs of leaves inside these should be touched with, a pasty finger, so that the tiny portion of paste left on it will hold the short pairs of leaves down, with the head-lines in the right place. Half the surplus head margin on the other pages should then be cut off with a pair of scissors. When the whole of the sections have been re-folded, turn the pile (which will be rather higgledy-piggledy) again in a pilo at your right hand, with the title-page upwards, and, taking from the top a parcel of about twenty sections, proceed to ” knock-up ” these, i.e., to tap their heads (top edges) and backs upon the millboard, until they are all quite level. “When this is done, lay the parcel on the left, face downwards, serve the next twenty sections in a similar way, and so on, till the whole volume is perfectly level at the head and back, when it may be put aside on a shelf for rolling or beating, which must not be attempted until any paste used is quite dry. If any of the leaves of the book are torn, they may be mended by pasting small pieces of plain white printing paper (such as is used for the end papers) across the margin (on each side of the page) where the tear crosses it, as shown at Fig. 26.
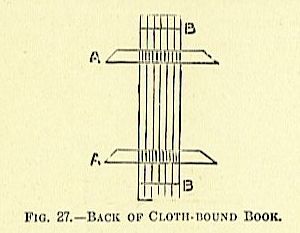
Some very dexterous menders can scrape away each of the edges of the tear with a sharp penknife, so that they resemble ?what carpenters call a ” scarf,” and cement them together with paste, so that no paper slips are required; but this skill is very rare, and only needed for valuable works. One of the menders employed by the celebrated Roger Payne was famoua for her dexterity at this work, and commanded high prices. Lastly, we come to the re-folding of books which have been previously bound. If these are cloth boarded, the two boards are first turned back, and held tightly in the left hand. The sections of the book are’now held in the right, and, by a sudden jerk, are forcibly torn away from the boards. It will now be found that the back of the book is covered by a piece of canvas and brown paper. This being pulled off, the back of the book will be exposed, as at Fig. 27. With a sharp knife, the tapes upon which the book is sewn (A, A), and the ” kettle,” or catch stitch, which secures the sewing (B, B), are now cut out, when the sections can be easily pulled apart. The glue is then cleared off, the thread taken out of the middle of each section, and any folding that may be required is effected. “With ” bound” books (those in leather) the procedure is nearly the same.
The boards are first removed, by cutting through the cords which secure them to the back. The leather and paper are then scraped off the back, the cords and kettle stitches cut out, and the sections pulled apart. Some old “tight back “books, sewn upon raised bands, may present trouble from the tenacity with which the lining of paper and the leather adheres. If very refractory, it will be well to plaster the whole back over with thin paste, leave it to soak for an hour or two, lightly screw up the book in the laying press by its fore edge, and then scrape off the softened leather and paper with a blunt knife. The back may then be rubbed clean and dry with a handful of shavings, the cords cut out, the sections taken apart while damp, and the other operations proceeded with as before.
PLACING PLATES, BEATING AND PRESSING BOOKS.
WHEN the books arc folded or refolded, as the case may be, the next step is to place the plates (if any) in their proper positions. To aid the binder, there is always a printed list of plates, attached to the contents. Guided by this, the binder finds the place, and, having ” squared ” the first plate, dips his forefinger in some thick paste, and pastes the back of the plate for about an eighth of an inch in, and then puts it in its place and rubs it down with the back of his finger. The ” squaring” consists in seeing that the margin of the plate at the back and head is uniform in quantity along the plate, or otherwise it would be out of the straight when the book is cut.
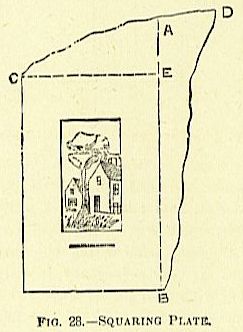
For instance, let Fig. 28 represent a plate printed on a piece of paper, of which the edges are represented by the black lines. It is obvious that, if it were pasted and fixed by the edge, B, D, it would be out of the square. Consequently, the binder cuts off the superfluous portion at the back along the dotted line B, A, and then makes another cut, at right angles with this, at the head, along the line E, C. This is generally done by eye with a pair of long-bladed scissors or shears, but sometimes the binder places the plate on a smooth cutting-board, and, placing a thin straight-edged board, called a ” trindle,” along the line he wishes to cut, draws a keen knife along the edge of the trindle, and then, trims the head in the same manner.
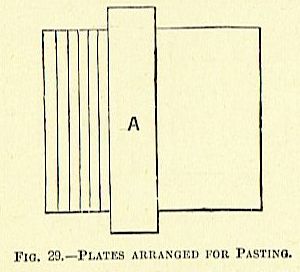
If the plates are numerous, he will sometimes, instead of pasting each separately as he squares it, square a number, and then lay them down on a board one over the other, leaving about an eighth of an inch of the back of each uncovered, as at Fig. 29, then place a board, A, over the top one, and, holding this down firmly with the fingers of his left hand, draw the paste-brush over all the exposed edges. It must be borne in mind that the plate must always be pasted at a back (behind the side of the printing) edge; also that plates printed the long way of the paper must always be so fixed that the ” inscription” line or title of the plate must be on the right hand of the page, as at A (Fig. 30), never reversed, as at B (in same figure).
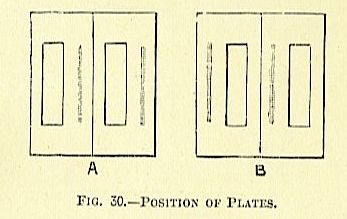
This is done in order that when the book is inspected the reader shall not have to reverse it in looking at such plates, and is de rigueur. In books consisting wholly of plates on plate paper, it is far best to square them with the boards, and, if folios, it is well to mark off the margin accurately with the compasses before cutting. Maps or doubled plates should be “mounted” by pasting a slip of stout cartridge paper up the fold, leaving about half an inch of the paper to paste to. Maps or plates should never be folded in several folds to get them in. This is a clumsy expedient, and, after the book has been used a little, the folds are sure to get out of order, and the fore edge of the maps, &c., to protrude, causing the book to ” gape ” and look most unsightly. When all pasted places are dry and hard, the books are ready for ” beating ” or ” rolling.” Beating the book with a heavy hammer is of great antiquity. In one of the quaint sketches which the Dutch designer, Jost Amman, has left us of contemporary trades, is one of a bookbinder at the operation of beating. Unlike the modern, who always stands at the stone, the operator is comfortably seated on a cushioned stool. Unlike, too, the bookbinder of the present day, his ancient prototype grasps his hammer as a smith might do, and, raising it above his head, brings it down with the full force of his muscular arm. We gave an illustration of the hammer in a previous chapter.
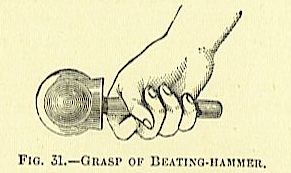
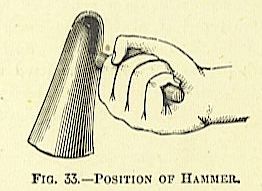
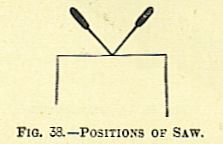
Let us now speak of the manner of holding it. As the hammer rests on the stone, the binder grasps its short handle firmly with his right hand in such a manner that his knuckles point to the stone, and his nails are upwards, the outer side of his forefinger resting against the inside of the head of the hammer (Fig. 31, as seen from above). The hand is then swung over from the wrist, so that the operator can see the face of the hammer (Figs. 32 and 33).
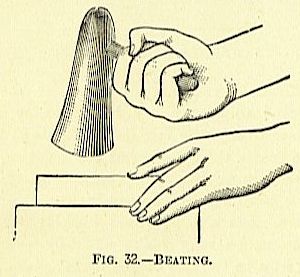
This peculiar action, with the back of the hand downwards, insures that the face of the hammer always descends perfectly flat, which is essential, or the paper would be cut or bruised.
The learner should practise on a packet of waste paper, and must not be disheartened if, at his first essays, the paper be full of hills and holes, and perhaps with half a dozen long sharp cuts through it, where he has permitted the edge of the hammer to fall first. As he acquires dexterity and his wrist gains strength, he will soon get the ” hang” of it and find iteasy enough. The book or paper is held by one corner with, the left hand, and moved about so that all its surface is successively brought under the action of the hammer. The operation is shown in side view at Fig. 32. The number of sections taken to a “beating” must be left to the discretion of the operator. If it is a re-bound book, care should be taken that the projection at the back of the section, where the former ” joint” has been, should be well levelled. Perhaps it will be safest for the tyro to go over this with the backing hammer. The number of strokes necessary for each ” beating ” must be left to the judgment of the workman. The work looks very laborious, but is really not so when the knack is acquired, for we can well remember that in our apprentice days we have often stood at the beating-stone for three or four hours at a stretch. A piece of plain waste paper or part cover should be placed oa each side of the beating, to preserve the first and last section from actual contact with the stone or the hammer. Before commencing to beat a book, the operator should refer to the date at the foot of the title-page, to ascertain when it was printed.
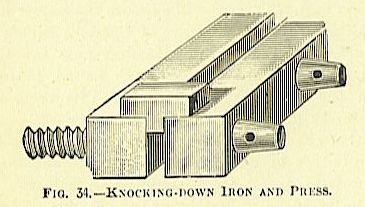
This is necessary, because, if recently-printed books are exposed to very heavy beating, they will probably “set-off”; that is to say, the ink lines will be partly impressed on the opposite pages, thus rendering the printing more or less illegible, and much impairing the appearance of the book. New books should be beaten very cautiously. If the amateur has not provided himself with a beating-hammer and stone, he may make shift by screwing up the knocking-down iron in the end of the laying press, as at Fig. 34, and beating his books thereon with the “backing hammer.”
This is, of course, only a very inferior makeshift; still, the work may be done so. In all tolerably large establishments the rolling-machine has superseded the beating-hammer for many years past. Of this machine we have given an illustration. It consists essentially of two large smooth-surfaced iron cylinders, between which the books are passed; it is provided with an apparatus by which the rollers or cylinders can be brought together or set further apart; it does its work well and quickly. The operator sets the rollers at what he considers a suitable distance asunder, then takes a number of sections and places them between a pair of tin platea of corresponding size, and puts them to the rollers, while an assistant turns the handle.
The plates and sections are caught by the rollers and drawn between them, and are received by the assistant as they emerge at the other side. Precautions against ” setting-off ” are as necessary with the rolling-machine as with the beating-hammer. We may here remark that of late years a new kind of book illustration has come into vogue which needs special precautions. We allude to the “chromo” plates, such as those issued with the Leisure Hour, Sunday at Home, &c. The coloured inks and oil colours used in printing these are very slow in drying. This is especially the case with the dark brown used in the shadows (probably asphaltum), which seems as if it would never dry; and if such a plate were inserted in its place before the book were beaten or rolled, it would be found to have adhered to the opposite page so tenaciously that it would be impossible to separate them. These plates must, therefore, never be ” placed ” until the book has been through these operations; but this is not all. They will even ” stick ” from the other ordinary pressure the book will have to go through. It is, therefore, necessary that, after each plate is placed, the binder put a piece of waste paper in front of it, to guard against sticking; though, in all probability, when the book is bound, he will not be able to get even this waste paper off without the use of moisture, which is objectionable. Perhaps, proper-sized pieces of the ordinary oiled tracing paper would answer better, although we have not personally made the experiment.
The whole of the ” batch ” of books which the binder has undertaken to ” forward ” together being now beaten or rolled, it is next usual to put them in the standing press and leave them there at least a night, to render them still more compact and level. “We have given an illustration of the common screw standing-press, and also of the Athol and Boomer presses. The manner of ” blocking up ” is similar in all. The binder is provided with a number of pressing-boards of all the various sizes, and he begins by dividing each volume into several parcels, and putting in the largest first. Thus we will suppose the binder has several volumes of the Graphic (folio), two of Cassell’s Bibles (4to), and twenty Quarterly Reviews (8vo). He first puts the Graphic in the folio boards, a board between each parcel, taking care to” place it in the centre, then cautiously lifts them on to the bed of the press and takes care they occupy the centre of it. This may be effected by measuring the distance from the ends of the boards to each cheek of the press, and making this uniform on both sides; then, standing outside the left-hand cheek of the press, he judges by eye if the pile of boards and books occupies a central position as aligned against the inside of the other cheek. This should be done very carefully. The binder now divides the Bibles into parcels and places them between a suitable number of quarto boards, then lifts these on to the folios already in the press, taking care that they stand in the centre of the uppermost folio board. Next the reviews are placed between octavo boards, and lifted in with similar precautions.
Now, upon the top octavo board is put an octavo pressing block, which is a piece of deal or pine, about Sin. thick, planed level and square. Then, while the blocker upholds the pile of books and boards steady and upright, an assistant lowers the “platen” or “follower” of the press by turning the screw. When he can cause it to revolve no longer, he takes out the wooden peg, and, putting in the shorter iron press-pin, pulla down as long as he can from right to left. When this pin will actuate the screw no longer, the long pin is substituted, and one man pulls while the other pushes, till all is done that their united strength can achieve, when the shorter pin is placed in one of the screw holes in such a manner that one extremity rests against the right-hand cheek.
This is done to prevent the screw from receding during the night, and consequently relaxing the pressure, which a well-oiled iron screw will not infrequently do. The binder should examine the pile of books with his eye frequently as the “pulling down” goes on, not only from the front, but also from the sides?indeed, most from the latter; for, if he has not blocked up the press truly perpendicularly, he may find his pile bend or bulge, and, as the pressure increases, presently shoot out pell-mell, either behind or before the press. It is not advisable that there should be too great disparity in the sizes of the books put into the press at one time. If it begins with folios, it is better to end with octavos, and reserve the smaller sizes for another blocking up, or even, if there are only two or three, screw them firmly up in the laying-press.
Sewing
THE press-load of books should be left in the standing-press all night, and the next morning they will be ready for sewing. The press is unscrewed by pulling the press-pin round the contrary way, viz., from left to right, and the boards and books lifted out. The various portions of the books are then taken from between the boards and laid together in proper order, so as to form volumes. The next operation is to saw the backs for sewing. If the reader will examine an ancient book, say, one bound 100 or 150 years ago, he will find the cords (” bands,” they are called) upon which it is sewn project from the back. In process of time, however, this appearance of the bands came to be considered objectionable, and the adoption of the ” open back,” in place of the “tight back,” rendered them inconvenient, and “kerfs,” or channels were cut with a saw in the back of the book, to permit the bands to sink in. A ” tenon” saw is used for this purpose. It should be kept sharpened and properly set. Several books of the same size are laid together, say, four octavos (Quarterly Review], with their backs and heads together (level), and an octavo pressing-board is placed at each side of the parcel.
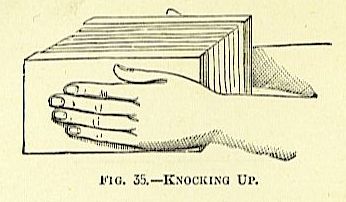
They are then lifted in both outspread hands, as at Fig. 35, and brought down forcibly on the right-hand cheek of the laying-press. This is done several times to both the back and the head until all the sections are beaten up level at both places. This is termed ” knocking-up.” It may here be well to remind the reader that the four edges of a book or a leaf are termed: The top, ” the head ” ; the front, the ” fore-edge “; the bottom, the ” tail” ; the other edge being, of course, the ” back.” When the books are knocked up level at the head and back, set the two boards, one on each side, about 1in. from the back, lower the fore-edges into the laying-press, and screw up with the hands.
Stand at the side of the tub, so that you face the side of the press, and, taking the tenon saw in the right hand, make a cut (or ” kerf,” as the carpenters call it) across the back, about an inch from the head (as at Fig. 36). This is to receive the top “kettle-stitch” (or ” catch-stitch”), so will not require to be very deep, about the sixteenth of an inch, or rather more if you are going to sew the book with large thread. Next, make a corresponding kerf at about 1 1/2in. from the tail of the book. Then, supposing the book is an 8vo, with eight leaves to the section, measure with the end of the saw (as at X, Fig. 37) to find the centre between the two kettle – stitches. When found, make a saw-cut there. With a book of 8vo size, it is usual to sew ” two on” with good sized threads, so that three cords will be required; consequently, the distance between each of the kettle-stitches and the last cut made must be judged by eye, and another saw-kerf made between them.
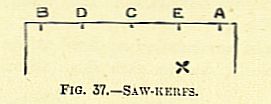
This process is shown at Fig. 37, where A and B are the two kettle-stitches. Then the central saw-kerf, 0, is made; then D, between the head kettle-stitch and C; and, last, E, midway between the tail kettle-stitch and 0. The three latter saw-kerfs should be deeper than the kettle-stitches, say, about 1/2in. It is a good plan to have at hand the ball of cord upon which the volume is to be sewn, and to lay the cord in the kerf. The form of the latter should not be a simple “cut,” as for the kettle-stitches; but the kerf should POSITIONS OF SAW be wider at the bottom. This is effected by slanting the saw first to one side and then to the other as the sawing goes on, as at Fig. 38. By this means the bottom of the kerf is enlarged; it must not be too big, however.
The size of the cord used for the hands depends upon that of the book; generally the warehouseman where you deal will sell you the usual size. The number of bands and saw-cuts depends upon the number of leaves to the section, as a rule. After the book is sawed, and before sewing, it should be “collated,” in order to verify that the sections are still in proper order. This is effected by holding the volume in the left hand by the angle of the back and head, the tail of the book being upwards; the whole of the sections held by the right hand are permitted to escape from the restraint of the right thumb, one by one, and to fall upon the left hand, the eye attending to the signature of each section as it falls over, and seeing that the sections follow in order, as ” Title, B, c, D,” &c. In order to get a nice round back to the book, when backing, there must be a certain amount of thread in the back, so as to spread it out sufficiently. On the other hand, if you get too much thread in the back, the book becomes unmanageable. As a general rule, small books (18mo and 12mo), with twelve or more leaves to the section, are sawed for two bands, and sewed all the length of each section with fine thread. Octavo, of whatever sized sheets, may be sawed for three cords, and sewed two sheets on, as follows: The first section (title – page) is laid on the bed of the sewing-press (which was illustrated at page 16, Fig. 9), with its back to the cords; the saw-marks are brought to the cords, and the cords are moved to the proper place, so that the latter enter them; the press is screwed up, so that the cords are tight. The needle (threaded) is now introduced in the tail kettle-stitch saw-cut, and brought out at the saw-cut D (Fig. 37); there it passes around the band (cord), and re-enters the section again at D, but on the other side of the band. It then passes along, inside the section, to kerf C (Fig. 37), where it emerges, and is re-inserted in the same saw-kerf, after having gone round the band; and so on, passing round each cord, until the needle finally emerges at the head kettle-stitch kerf, A (Fig. 37). The next section is then laid on, and the needle passed into the head kettle-stitch, A, and the same process of sewing round the cords repeated, only in reverse order, viz., from head to tail, instead of from tail to head. “When the thread comes out at the tail kettle-stitch of the second section, it is tied to the end of the needleful which is still projecting from the tail kettle-stitch kerf of the firat section sewed. It must be understood that the thread is not drawn entirely through or out.
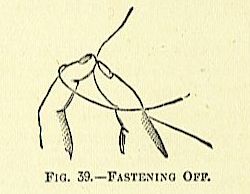
The usual way of making this knot is to throw the thread attached to the needle over and around the forefinger and thumb of the left hand, and then, with the finger and thumb, take hold of the end of thread which projects from the tail stitch of the previous section, gradually pulling the top of thread across the fingers, tight, with the right hand. (Fig. 39 gives some idea of the position.) This is the first kettle (catch) stitch, and these two sections have been sewn ” through,” i.e., they have thread all through their length.
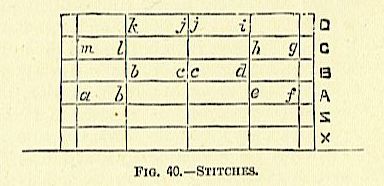
Now we will begin to sew “two on.” We will place a third section on those just sewn, as A, Fig. 40, and, passing the needle in at the kettle-stitch a, let it emerge at the band kerf b. The fourth section, B, is now laid on, and the needle, having gone round the band, enters this at b, being on the other side of the cord to that at which it emerged at b from section A. The needle now passes to c, round the cord, and from c to d, along the middle of the inside of section B, coming out at d. Here it goes round the cord, and is then pushed into section A again at e, passing from e to f along the middle of the section, and coming out at f, where another kettle-stitch is made.
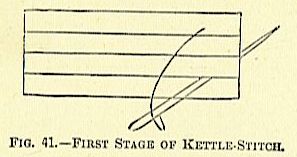
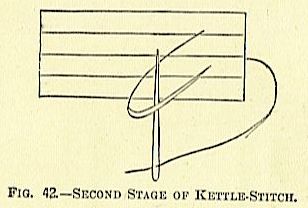
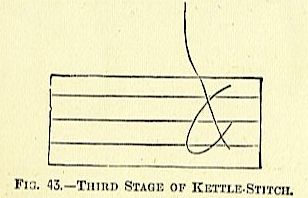
This is effected by passing the needle in between the two previously-connected sections from the back inwards, as at Fig. 41, so that it can come out between the section at the head, as shown. The needle is then passed upwards through the loop there made as at Fig. 42, and then drawn gradually up, as at Fig. 43, until it draws into a tight knot, which slips into the kerf of the kettle – stitch, so that it is below the surface of the back.
The previous process is then repeated (sewing towards the tail) with the next sections, C and D, the kettle-stitch being passed under the sheet last secured; and so on. In larger books, with still thinner sections (say four leaves to the section), it will be necessary to lay on more than two sheets in sewing, and, therefore, they must be sawed for more bands.
Thus, a, quarto, of four leaves to the section, should be sewed on five bands. In sawing this, the kerfs should be arranged at about the proportional distances of Fig. 44. sewing, three sections are laid on, thus: First section sewn from B (kettle-stitch) to D; second section from D to E, third section from E, around 0 to F.
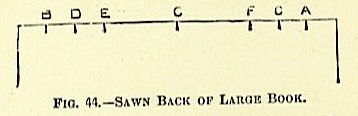
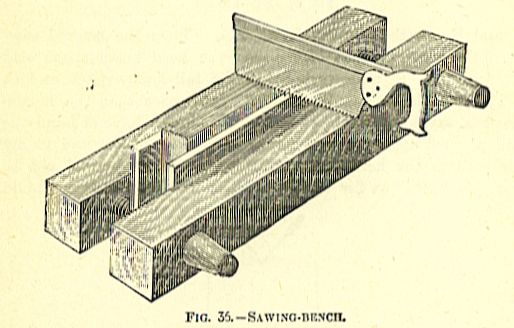
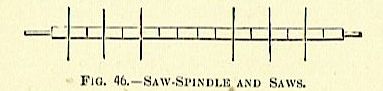
As this stitch has no hold at either end, it is made longer; then, going back to first section, it is sewn from F to G, and then the second one from Gr to A, the kettle-stitch securing the whole. In all cases, the first two and the last two sections of every volume should be sewn all the way along, as shown at Fig. 40. In large establishments it is common now to supersede the manual use of the tenon saw by the bookbinder’s saw-bench (Fig. 45).
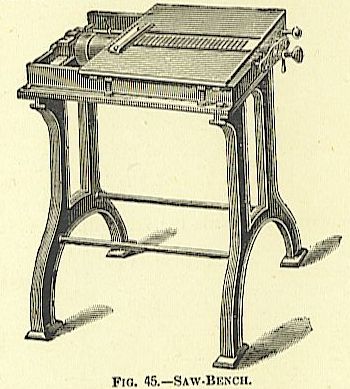
This machine, which is worked either by the foot or by steam power, is very useful. The saws (of which seven are supplied with the machine) are circular and small. They are arranged on the saw spindle by placing collars between them, so as to separate the saws as desired (Fig. 45). The washers will give a change for every quarter of an inch. Of course, this is only for new work. The top edges of the saws project through the slots in the plate, and the pile of books, well knocked up, is gradually drawn across the plate, on which, of course, the backs rest. Price from £18 upwards.
When the first section of a book has a steel engraving pasted to it, or is otherwise composed of separate leaves pasted together, it cannot be sewn all along the middle of the section. It is, therefore, ” overcast,” by making a small hole through it on each side of each kerf (Fig. 47), and passing the needle and thread through up and down, and around the various cords and bands, so that when it is sewn the stitches on the top side lie as in Fig. 47.
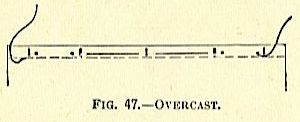
Before the next section is laid down a small piece of thick paste is taken on the end of the forefinger, and the section and stitches are well pasted up to the dotted line (Fig. 47). The next section is then laid on, and this should be well pressed down on to the pasted section with the edge of the folder. In all sewing every few sections should be pressed down with the folder, especially at each side of the cords. When sewing two or more on, the folding-stick is also used to keep the middle of the lower section. When you lay the first section, A, on, and sew from a to 6 (Fig. 40), leave the folding-stick there, projecting from the end. Then section B is sewed on. Now, in order to take the second stitch in section A, from e to f (Fig. 40), all that is necessary is to find the folder, and then the middle of section A is known directly.
When a volume consists of maps, plates, or single leaves, it should be ” knocked up” on the laying-press, held between a pair of pressing – boards of the proper size, until every leaf is up true at the head and back, the pressing – boards being also level with the leaves. The lot is then lowered into the laying – press, and screwed up moderately tight, back upwards.
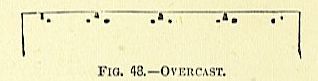
The entire back is then lightly but well glued over with thin glue. When the glue is dry (but not hard), the back is sawed as usual. The volume is then divided into three or four portions, according to thickness; each of these is pierced on each side of the kerf (kettle-stitch only one side), as at Fig. 48. This may either be done by a fine bradawl, wriggled first a little one way, then a little on the other, or by the ordinary bookbinder’s bodkin (Fig. 49), which will require to be assisted by a smart tap or two of the backing hammer.
They may then be pulled into sections of eight or ten leaves, according to size of thread, and sewed as the section at Fig. 47 is, each following section in the same manner, and each section being well pasted. Music may be “overcast” in the way just described. There is another way of overcasting more used in London. Suppose it is a volume of music : Out away as much of the book with the plough as will make a good surface; then screw it up and glue it. Saw, and divide into such thicknesses as you think suitable, say ten leaves.
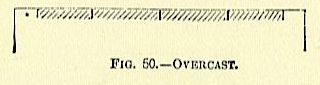
When divided, take a small needle, threaded -with fine thread, make a knot at one end, pass it through the first section, close to a kettle-stitch kei-f, and draw it through till the knot rests against the paper; then whip the section over and over, as at Fig. 50; finish off safely at the end. Now take the next ten leaves or so, and whip them over in the same way. These leaves are thus formed into sections by the stitching, and can now be sewed along the middle of the section exactly as if it were a folded sheet, and will not need pasting, although some binders never omit to run a bit of paste along. When the skein of whitey-brown thread (which is the kind used in bookbinding) is undone, each of the little knots is cut with the scissors, which leaves the thread in needlefuls.
The visual knot for connecting these, as the work goes on, is the well-known Weaver’s Knot (Fig. 51), one manner of doing which is to turn the end of the first needleful over the first two fingers and thumb of the left hand, so as to form a loop, as at Fig. 51. Thus, loop B is then passed over the end of A of the used-up thread projecting from the last section, and the knot pulled tight, taking care that the end B is meanwhile kept taut or extended. This is a good and safe knot. To secure tlie cords in the press, the bottom of each cord is wound round the ” key” two or three times, and then the key is turned, so that it takes the end into its forked portion. The key is then pushed longitudinally through the slot of the sewing-press, and then turned at right angles, so that it rests against the bottom.

The crossbar is now raised by screwing the nuts up, which tightens the cords that are held by the keys, until they are taut enough to sew to, which may be known by their emitting sound when “twanged.” Fig. 52 is an excellent representation of the position of the sewer at the press. The left hand is kept in the centre of the section, to seize the needle when it is passed into one of the saw-kerfs from the outside. The size of the thread used in sewing any particular book should be considered. If the book consist of thick sections, a stouter thread may be used than if they are thin. Only practice will teach the tyro when his book has its back of the proper thickness. If it have too much thread in it, it will be unwieldy and unmanageable; while, on the other hand, if it have not sufficient, the back will not take a proper degree of curvature.
French and other Continental paper-covered new books are generally sewed with cotton. They have no bands or cords; but the cotton takes one stitch in the centre of the first section, then the needle emerges from the back and is thrust into the second section at the same place. It makes a stitch in the middle of the second section; then, emerging, is plunged into the third section, and a single stitch taken backward; and the whole of the book is thus sewed with one length of cotton, and each section has but one stitch, there being no kettle-stitches.
It may here be well to mention that a single sheet pamphlet, as a sermon, list, or catalogue, is generally secured by a single etitch at the middle of the back, as at Fig. 53. The needle is pricked through the centre of the back, as at A; it is then put through the back from the outside, a little lower down, as at B. The needle is then passed upwards, inside the section, to 0, as much above A as B was below it, and is here passed FIG. 54. through the section to the outside.
Lastly, the needle is brought down outside to A again, and is passed through beside it at D. The stitch B, C, is now between the two ends of the thread, and when these are tied together the whole stitch is secure. When there are more sheets than one, they are placed on each other, and three holes made through them, as at Fig. 54, with the bodkin a,nd hammer. Where much of this stitching is done, the amateur had better have a wooden stabbing-machine (Fig. 55), -which forces three bodkin blades through at one pull of the lever.
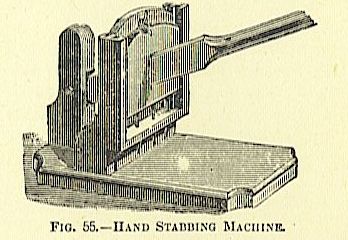
The price is about 12s. Mr. Frederick Ullmer, of Cross-street, Farringdon-road, recently introduced FIG. 55.HAND STABBING MACHINE. a treadle machine of this kind (see Fig. 56), which is very useful, as it leaves both hands free. Book-sewing machines have lately been introduced from Germany.
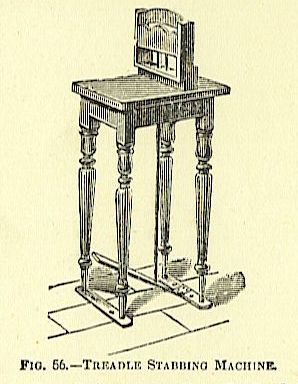
They are very ingenious, the sections being secured to the back by little links of steel wire; but they are only adapted for new cloth boarded work, so we need not enter into any detailed description.
WHEN the press is unblocked, and the boarded books are taken out, the next operation is that of cutting the edges, to which, accordingly, we will now proceed. Here let us impress upon the reader the necessity of having his plough-knife in good order. It must be very sharp, and have a smooth edge. He must learn to grind it up at the ordinary grindstone, so as to keep the point the same shape it had when new, and it must be ground thin for edge cutting.
For cutting millboards it may be rather what engineers call ” stunt,” but for edge cutting it must be ground thin. Then it should be carefully whetted on the oil-stone after grinding, in order that all the roughness of edge left by the grindstone be removed. It is best to keep two ploughs in use, one for the millboard cutting, and one for the edges of the books. The knife should be perfectly straight and true in the plough. By screwing the cheeks of the plough together, and noticing where the point of the knife falls, you can form some judgment, but when you begin the cutting you will soon discover how it is running. The knife is regulated (that is to say, its point is elevated or depressed) by adding to, or removing from/the pieces of waste paper put between it and the cheek of the plough on each side of the knife-bolt. In cutting, begin with the head, holding the back of the book towards you. Pull up the millboard on the left-hand side level with the head (top) of the book, and place it against the ” cut-against.” Then draw down the millboard at the front (right hand), until it is as much below the head as you want to cut off. Then place the “runner” precisely level with the top of the millboard, lower the whole carefully into the press, and screw up as tightly as you can.
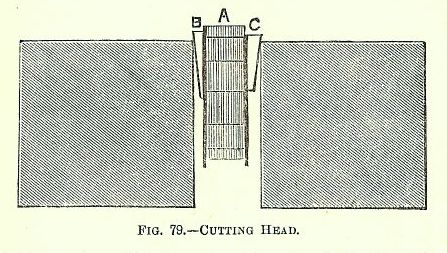
The sectional position is shown at Fig. 79, where A is the book, B the ” cut-against,” and 0 the “runner.” Now place the plough in the rods, and slowly and carefully work it to and fro, holding it firmly down, and turning the screw as the plough recedes from you. The head being cut, turn the book and cut the tail in a similar manner. Next lay the book on the cheek of the press, and draw the bodkin along the front edge of each board, making a line and an occasional indentation. A cutting-board should be placed under the end paper while this is done. Now beat the back of the book quite flat against the cheek of the press, and push the trindles under the back. The trindles (of which a pair are required) are pieces of thin iron of the shape of A (Fig. 80).
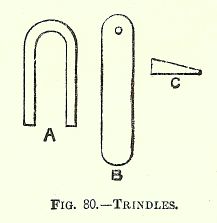
One of these is pushed between the back and the boards at the head of the book, and one at the tail, so that the first and last bands go in their insides respectively, as shown (from above) in Pig. 81. This is done to push up the back, and make it quite flat.
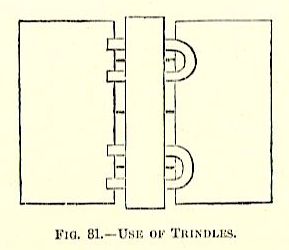
Some bookbinders prefer a piece of plain iron, as at B (Fig. 80), thicker at one edge than the other, as shown infection C in same figure. These are pushed in under the head and tail kettle-stitch. “Whichever kind of trindle is used, a piece of string is next wound several times around the leaves of the book, and secured by the end being pushed under, as in Fig. 82.
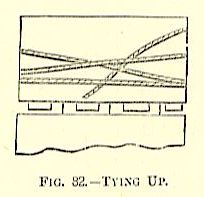
This is to keep the leaves in their places. The back is then struck once or twice more on the press, with the title-page to the right hand, the cut-against placed on the left-hand side, level along the mark made with the bodkin, and the runner similarly placed on the right-hand side, but below the line by as much as it is desired to remove. The book is now firmly grasped by the fore edge, and these boards (without shifting them) elevated ahove the open press, the millboards (which hang pendent) guided into it with the right hand, the trindles carefully snatched out, and the book and boards lowered. The runner should now l>e level with the top of the right-hand cheek of the press, and the cut-against elevated above the left cheek by just as much as the runner is below the bodkin mark; in other words, by the quantity which is to lie cut off. Gh-eat care must be taken about this and the whole operation. All being right, the press must be screwed up tightly, and the fore edge cut precisely in the same way as the head and tail have been (Fig. 83).
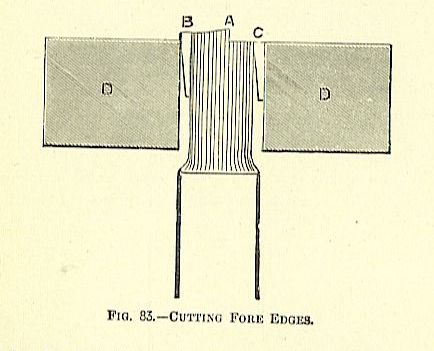
The cutting of the fore edge is shown in section at Fig. 83, where A is the book half cut through, B the cut-against, and C the runner; D, D being the cheeks of the laying-press. When the book is removed from the press, the string is taken off, and the leaves are struck smartly against the cheek of the press, when they will separate, the back spring again to its convex form, and the fore edge assume a similar concavity. The boards are now put hack to the proper place, when the squares (that is to say, the portion of the millboard projecting beyond the edges of the book) should be of equal size and level all round. If they are not, the edge which is not cut sufficiently should have a little more removed. The foregoing method of cutting is termed “cutting in boards.”
Bevelled boards are very popular just now both for morocco and cloth books. The operation can be executed by laying the board on the cheek of the laying-press, and filing of the proper quantity with a rough file or a carpenter’s rasp. The amateur can easily make a guide apparatus, sufficient for his purpose, by screwing a couple of pieces of hard wood, such as beech, together, leaving an opening between them for the board to pass through (Fig. 84).
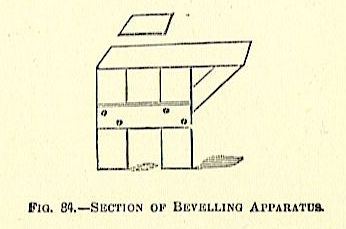
The edges can be brought to the right bevel, which is that of 45deg., or half a right angle, which may be obtained by drawing a line diagonally from one corner of a square to the opposite comer, as shown at Fig. 85.
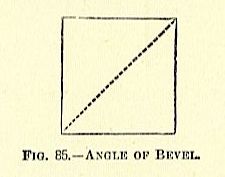
AFFIXING END PAPERS,
ROUNDING AND BACKING.
AFTER the book is sewed, the next operation is to affix the end papers. The “end papers” are those blank leaves which are found at the beginning and end of every bound book, and are popularly termed “fly leaves.” The number and style of these differ, to some degree, in various establishments, but we will describe the more usual. In making the end papers, various kinds of paper are employed, viz.: Marbled paper is used both for half-bound, extra, and whole-bound books, principally the latter. The making of marbled paper originated in the Low Countries, but was subsequently introduced into this country, and our marbled papers are now equal to any. Marbled paper ranges in price from 2s. 6d. per quire upwards, and is generally royal or super-royal in size. Marbled paper of every description can be obtained of Messrs. Eadie, Great Queen-street, Lincoln’s Inu-fields, and Mr. Corfield, St. Bride’s-street, E . Cobb paper, so-called from the binder who invented it, is used for ordinary half-calf work. It is a self pulp-coloured paper, a reddish-brown and an olive being the favorite hues. Surface paper is that which has one side coloured by pigment spread on with a brush. A pale yellow or buff is the usual tinge, but darker colours (as olive) are used for Bibles, and of late a chocolate has been popular for general work. Fancy printed papers of various kinds are much used as end papers by the French binders, and sometimes in this country. They generally consist of small patterns printed in gold and colours, some being very elaborate. When used for new cloth work, there is often a tablet in the centre, in which the publisher’s advertisements are inserted. Paste paper is often used in Germany, and can be made by the binder for himself. Any pigment that may be selected is mixed with paste and a small piece of soap until it is about the thickness of cream, or a little thicker; it is then ground on the slab by the muller. One side of each of a couple of sheets of white paper is then covered with the colour by the aid of a brush. The two coloured, surfaces are next placed together, and when pulled apart there will be certain marks, bearing some resemblance to a pattern. These sheets should then be hung up over strings to dry. “When dry, they may be polished by passing a hot flat iron over them; but a better polish will be got by rubbing them with a hot polisher such as bookbinders use.
End papers are cut from sheets of paper of the same size as that on which the book is printed (sometimes a size larger), and are of ordinary white printing paper, of pale yellow surface coloured paper, of the self-coloured brown paper, technically called ” Cobb,” and of marbled paper. Say it is desired to prepare ” Cobb” end papers for eight demy octavo volumes : take four sheets of 201b. white printing demy paper, cut them carefully down the back fold, fold them again carefully with the folding stick, so as to bring them to quarto size, and cut them along the fold. You will now have sixteen pieces of paper of quarto size. Next take four sheets of ” Cobb,” and cut them in a similar manner, and you will have sixteen quarto pieces of brown-coloured paper. These are next to be pasted together in pairs. Lay the white (or brown) papers in a heap, one on the other, and paste the top one carefully over with a large brush and thin paste. If any lumps of paste or hair from the brush are seen on the pasted surface, remove them with the finger nail. Now lay one of the white pasted pieces on one of the ” Cobb ” pieces, or vice versa, and rub it well down with the palm of the hand, so that the two adhere everywhere, and there are no “blisters ” or air-bubbles. The rubbing or pressing should proceed from the centre of the piece of paper to the edges, so as to drive out the air systematically. Proceed thus with the other pieces, so that you have at least eight pasted pieces, which will, of course, be white on one side and brown or olive on the other. Now fold each one down the centre, with, the’ coloured side inwards; this will bring them to octavo size. Take another sheet of white demy and cut it into single octavo leaves. Paste one of these to each of the double sheets, by pasting the edge of the latter for about 1in. at the back and attaching the single leaf to it. Place all of them under a few millboards to ensure their drying flat.
There is another method of making end papers, followed by many binders. Suppose they are for demy octavo: the sheets, both white and coloured, are cut into quarto, and then doubled up the middle to octavo (in the case of marbled paper the coloured side is folded inside). A folded white paper is now laid on the pasting board, and evenly pasted over with thin paste, then one side of one of the coloured pieces is laid to this, and well pressed down. By this means half the white end paper will adhere to half the marbled or coloured one. When all required are thus made, they should have a nip in the press, and then be hung up on strings to dry. In pasting, do not load the brush with paste. Draw the brush over all the surface of the paper, and from the centre to the sides. Do not remove the brush until it reaches the side. Lay the paste on evenly. As we are now beginning to deal with the use of paste and glue, it will be well to speak of the preparation of the same. Thick Paste.–Fill a small iron saucepan half full of water, and throw into it a teaspoonful of powdered alum; let it melt; now add as much good wheaten flour as, when well stirred in, will make a thin batter. Get a few sprigs of birch (from a new broom), and tie them into a small bundle. Place the saucepan on a clear fire, and stir the paste continually (in one direction) with this brush. By-and-bye you will find it get so thick that you cannot stir it with the birch brush; take it out and use instead a smooth stick about the size of the finger, and 15in. or 18in. long. Let the paste continue to boil (never intermitting the stirring, or it will burn) until you can hardly stir it, then empty it. The best vessel to keep it in is a small oaken tub (which you can purchase at a cooperage); or, next to that, one made of leather, which any harness maker will construct for you. Earthenware or metallic vessels cause the paste to become thin, watery, and useless. It is well to keep it covered for the prevention of mould.
Thin Paste.
In a glazed vessel or basin mix good wheaten flour and water to about the consistence of a batter for batter pudding or pancakes, adding a teaspoonful of alum. Put a kettle of water on the fire. Now, with a spoon, beat up the batter until it is perfectly smooth, with no kind of lumpiness about it. By this time we will suppose the water is boiling. Hold the kettle in your left hand, and pour the contents on the batter, stirring the latter round meanwhile with the spoon in your right band. If all has been managed rightly, the batter will for some time continue to get thinner; but when a certain amount of the boiling water has been added it will begin to thicken.
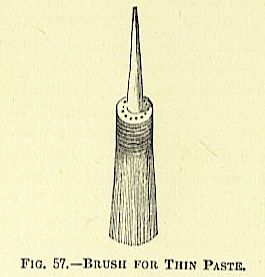
When it is thick enough (which must be learnt by experience), leave off adding the boiling water. This paste may be kept in the earthen pan in which it is made. The alum is added in both cases, because it is supposed that its astringent qualities prevent blisters or wrinkles in the paper, &c., pasted. A small ” sash-tool” (such as painters use) is the best tool for thick paste, which is principally used for leather. A large and less stiff tool does well for the thin paste, which is used for paper. A small whitewash brush (see Fig. 57) will do.
Glue.
Glue is manufactured from the cuttings and parings of hides, bones, &c., and varies much in quality. Scotch glue is generally esteemed the best. The very thin amber-coloured glue is the most superior ; but this is rarely used., save by cabinet-makers in veneering. As a rule, price is the criterion. If you go to a good house, and give a good price, you will generally receive a good article. The binder requires glue of two descriptions, and should therefore have a couple of gluepots, with brushes. One, a small pot, must contain thick glue, for lining, &c. ; the other, much larger, thin glue, for glueing cloth, &c. The tyro will receive his glue in good-size; cakes, as it came from the drying-nets, and. the just thing is to reduce it to small pieces, of about 1in. each. If the glue be dry and hard, as it is in one weather, the most ready way of electing this is to wrap up a few pieces in thick brown paper and pound vigorously upon them with the backing hammer : they should soon break up. Should it, however, be soft from moisture, this plan would fail. Instead, screw up the millboard shears in the laying-press, and you will find that you can readily cut the glue up into pieces somewhat resembling jujubes. If necessary, holding a piece to the fire for a minute will tend. to soften it. Good glue should contain no specks, but be transparent when held up to the light. When you have broken up the glue, place it in an earthenware pipkin, and pour on as match soft water as to cover it. Let it soak for from twelve to twenty hours, and then place it in the inner pot of the gluepot, add some water, fill the outer pot with water, and place the whole on the fire, and gradually raise the temperature until all is dissolved, stirring frequently when melting. If the outer pot boils over, lift the inner one up, and, removing the whole from the fire, replace it on a duller place. It does not require boiling. Prepared in this way, it cools down into a thick jelly, which requires only a little warming to it it for use. The glue for putting cloth on should. be thin and well melted.
Take the brush out and stamp down its hairs on a piece of dry rough brown paper, with the handle upright ; place the palms of both hands on either side of the handle, and rub them backwards and forwards, so as to cause the blush to rotate briskly. After doing this a few moments, put the brusk back in the same position in the gluepot, and revolve it in the same manner. Presently, a slight foam or froth should appear on the top of the glue, which should increase till the pot becomes well-nigh filled with glue froth. It is now in good order for spreading on the cloth, and should look white and frothy when applied. Some binders believe in mixing tallow, &c.; but all that is really necessary is to cause the brush to revolve briskly upon a rough surface for a short time, which initiates the tendency to froth. When the end papers are dry, they are pasted to the sewed book, one at the beginning and one at the end. The end papers are laid over each other, leaving about ^-in. of the back on the side where the single leaf is, and the exposed part pasted with thick paste. The pasted end-paper is then placed at the beginning or end of the book, with its pasted portion next to the book, and level with the back and head, and carefully rubbed down.
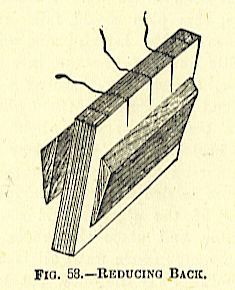
Take the books that you have sewn, one by one, and, holding in the right hand, beat the back against the laying-press, so as to bring up the backs of all the sections perfectly level. If they will not come up readily, lay the book down flat and work them up level with the fingers and thumb. Next, take the book in the left hand, head towards you, and smooth down the cords in tne last section; place a backing-board level with the back, at about Jin. therefrom (Fig. 58). Then turn the book, tail to you, and place another board similarly on the other side (but leaving the cords free here). Holding the boards and book tightly in the left hand, lower it carefully into the laying-press and screw it up with the hand. Take a pair of backing-boards (or cutting-boards), one in each hand, and strike each side of the back simultaneously (see Fig. 59), until the sections are driven close together, and the swell of the back is lessened.
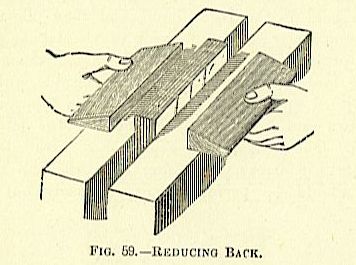
Some binders simply place the book on the laying-press, and beat it up the back with the backing-hammer until the back becomes thinner. Others flatten the book in the laying-press, leaving the back out. The press is then screwed up tightly, a knocking-down iron held against the projecting portion of the back at the left side, and the back hammered on the right. It is usual to paste the first and last sections to those next them. Place the book on the laying-press, turn the top section back; lay a slip of paper along the section at about i-in. (more for large books) from back of section to waste paper, paste along it, take waste paper away, and replace section, rubbing down with the finger; serve last section at other side of book similarly. The middle finger of right hand is best for pasting with. When all the end-papers are pasted on and dry, the next step is the ” glueiing-up.” There are different ways of accomplishing this. Some binders place one or more volumes between a pair of pressing-boards of proper size, and, holding them between the palms of the hands, as at Fig. 35, beat the backs and heads on the cheeks of the laying-press until they are quite square; then draw the boards about lin. down from the back, lower the books and boards into the laying-press, and screw them up by the handis.
Lastly, having the pot of glue hot, the brush is dipped in, and the whole of the back well glued over, working the glue in between the sections, but taking care that none smears over the end-papers nor on the bands. Thin glue is employed. Other binders knock each volume up at back and head while it is held in the right hand, and then pile them upon each other on the right hand cheek of the laying-press, with the backs projecting over on the right hand, the largest size book being laid down first. When a tolerable number have been thus piled up, a board is placed on the top, and the pilo is held down and kept steady by placing the left hand on this board. The brush, well replenished with glue, ia now worked over the backs, beginning with the top one. This operation should be performed expeditiously but carefully.
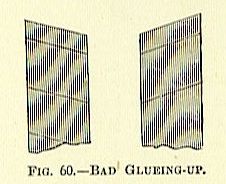
The first plan is the safer, but the second is the quicker. It must be understood that it is indispensable that the sections be well up at the back, and that the head be quite square. If this last requirement be not attentively observed, the head of the .book may present a “nose” on one side, as at Fig. 60, and, of course, when the edge is cut more will be removed from this portion than from the other. The books are now left for the glue to set, and meanwhile the millboards are cut out on the same principles as the endpapers were. The millboards are made to regular sizes, like sheets of paper. They are divided as desired by the aid of a large pair of Lancashire compasses, and then marked off with a bodkin, drawn along the side of a straight edge, held from one compass mark to another. Thus, Fig. 61 represents a millboard marked off to octavo size. The boards are generally cut up wittt the millboard shear.
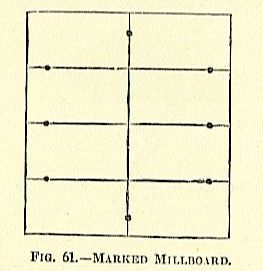
These are screwed up in the end of the laying-press nearest to the operator, and, the millboard being placed between the jaws, the edge of the upper jaw coinciding with the mark upon the board, the upper handle is worked by the right hand, and the board is readily and quickly cut. The millboard is held in the left hand during the operation. In most regular establishments of any pretensions, the shears are now almost superseded by the board-cutting machine. This consists essentially of a long, slightly curved blade, working against au iron edge, while on the right hand is a gauge (Pig. 62). With this, in the first place, a pattern piece or size pattern is prepared, having the exact size and form of the boards to be cut.
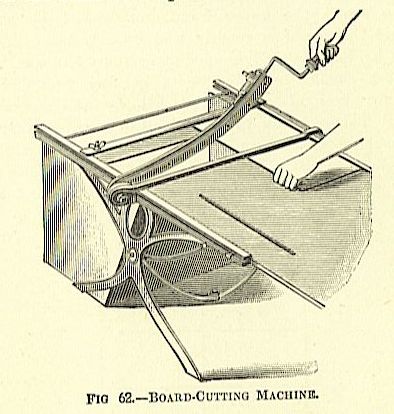
The machine is then adjusted by setting a movable grooved and raised edge at a certain distance from the place where the knife works (Fig. 62). The arrangement of this machine enables the pieces to be cut with perfect accuracy, both as to size and rectangular form. In order to have boards of the right thickness, it is sometimes necessary to “make” them. This is effected by pasting one board over with thin paste, laying it on the other to which it is to be attached, and screwing them up in the press for a short time. In placing them to the book, the side formed of the thinnest board should go next to the book. This is done in order that the boards should bend to the book, not from it. With the same object, it is sometimes usual to paste a wrapper or piece of paper on the inside of a board, or a couple of crossed strips, as shown at Fig. 63: these will cause the board to warp towards them.
Let us return to our glued-up books. The glue should now be nearly dry; it must not be quite dry, but so nearly so that it does not retain any ” tackiness,” or it will stick to the hammer. We have now to round the book, that is to say, impart a curvature to the glued back. This is effected PAPER SLIPS by laying a volume on the cheek of the laying-press, placing the thumb of the left hand against the fore edge, and with the fingers of the same hand drawing the top end-paper and sections towards the workman, who, while he is performing these movements, gently strikes the edges of the back of the book with the backing hammer (Fig. 64).
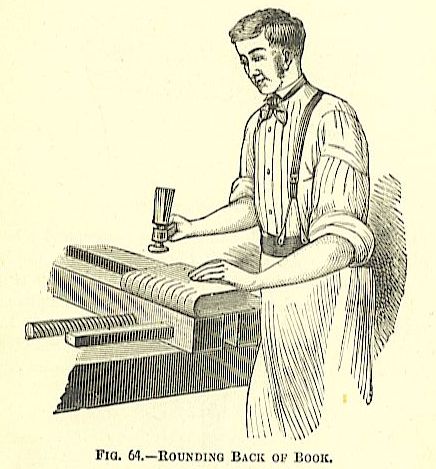
This is done to both sites, and. is an important operation. Many people (not practical) have conjectured how the graceful concavity of the fore edge of a book is produced, and why it should correspond. so perfectly with the convexity of the back. The secret lies in the present operation and one or two others about to be described. We have said nothing about the proper thickness of board for each description of binding, because no useful rule can be given. This must be a matter of individual judgment. A halfbound book requires a thicker board than does cloth, and whole-bound thicker than that for half ; also, as a matter of course, a large book requires thicker boards than a small one, and a thick book thicker boards than a thin book. Here let me impress upon the amateur binder the importance of closely inspecting every well-bound book that comes into his hands, whether in libraries or booksellers’ shops. He may thus learn much of the minutiae of good work, the proper thickness of boards amongst them. A little thought will show that when the hoards are placed to the book, those of thorn that are thick will project beyond the back, and make a stiff and awkward hinge. To obviate this, the book must be ” backed”; that is to say, a groove must be formed at the back for the board to repose in.
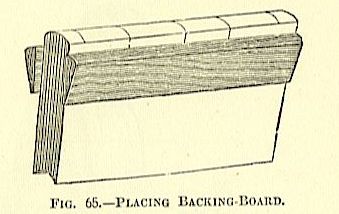
For this purpose, the book is held in the left hand, tail from operator, and a backing-board placed at its side, at a suitable distance from the back to make a groove of sufficient depth for the millboards (Fig. 65). The book is then turned, and another backing-board placed to it in the same manner. The book and boards must now be carefully lowered into the laying-press, keeping the relative position of book and boards unaltered, until the outer edges of the backing-boards are level with the cheek of the press. The inner side of the board is the straight one (A, Fig. 66), and this, in all cases, goes next the book; the sloping side (B) going towards the cheek.
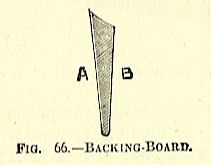
If the tyro finds the boards slip or change their position on the book, he may obviate this by expectorating slightly upon them before placing. The laying-press should now be screwed up with the press-pin as tightly as possible, and the workman, taking the backing-hammer in liis right hand, proceed to ” back.” This is effected by hammering the back smartly down each side, so that a portion of the back of the outside sections is hammered down on the top surface of the backing-boards, and forms a clear and well-defined groove. This is an operation that looks very simple, but, as a matter of fact, it requires both ” nous ” and knack. In the first place, the hammer must not be brought down edgeways on the portion of the book hammered down on the backing-board, or it will cut through it. Next, although the book should be mainly struck down the sides, an occasional tap nmst be given to the middle, or the book will be ” rabbit-backed,” as shown in section at Fig. 67, which is very objectionable.
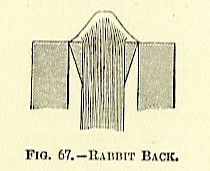
Lastly, the process must be so regular and careful, that no creases along the back of the section shall be seen when the volume is opened (Fig. 68). When the sheets are beaten in one direction, they should not be knocked back again.
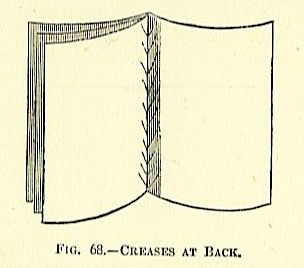
The hammer should be so manipulated that it always strikes away from tlie centre of tlie back, and that the course of the head should be circular. The right shape of the back (in section) is about (Fig. 69) one-third of a circle, or more, according to present taste.
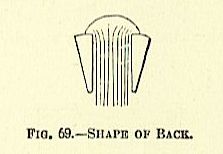
We gave an illustration of a backing-machine in a previous chapter; but its use is not to be recommended, as it is rather liable to cut the work.
COLOURING EDGES.
THE edges of the books being cut, the nest operation is to decorate their white surfaces in some manner. This may be done by colouring with sprinkle, self-colour, gilding or marbling. In this chapter we shall treat of the first two methods.
Sprinkled Edges.
This the simplest and commonest kind of edge decoration, but very chaste and effective for some kinds of work when well done. The sprinkle is composed of some earthy pigment ground up with paste, and dissolved in water. Bole Armenian, or Armenian earth, a common red pigment, is generally employed. A quantity of this is piled, up upon a marble slab, and a depression made in the centre of it. Into this hole a little thin paste and a few drops of oil are put. The sides of the heap are then drawn over this, and the whole amalgamated together by a palette knife. When all is well mixed, the mass is drawn to the side of the slab, and a small piece, about the size of a walnut, brought with the knife to the centre of the slab, This portion is then carefully ground by the action of a marble or granite muller, such as is used by artists in grinding their colours. The action of the muller should be rotatory, and the pigment should often be gathered together with the palette knife, so as to ensure every portion being well and properly ground. When all the pigment has been thus reduced to the utmost fineness, it is placed in a large brown stoneware pot or other vessel, and sufficient clean water added to dissolve it all perfectly. The books to be sprinkled are next either placed in the laying-press, with their fore edges upward, and screwed up, or laid side by side on their backs on a board, and tightly corded round with a piece of string.
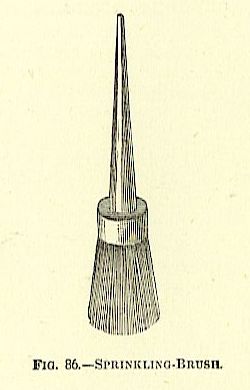
The operator now takes the “sprinkling-brush”-a large brush, the hairs of which are secured by a strong wrought iron rim (Fig. 86) soaks it well in the “sprinkle,” and then presses out as much as he can against the side of the pot. Next, holding the brush by the handle in the right hand, and the short press-pin of the laying-press in his left, he strikes the former against the latter over the top of the pot until he has beaten most of the sprinkle out of the brush, and the spots which fall are very fine and regular. He carefully wipes the ring of the brush and the press-pin on a bunch of paper shavings. Then he goes to the row of books, and repeats the operation over their edges, holding the press-pin about two or three feet above them. Some dexterity and experience are required for the successful performance of this operation, as it is necessary that the spots should be very fine and regularly laid on. The higher the press-pin is held and the less sprinkle there is in the brush, the finer the spots will be. The whole of the edge should be carefully gone over, so as to keep the sprinkle very regular. The ring of the brush and the press-pin must be frequently wiped on the shavings, or the sprinkle will accumulate and be thrown down in great blots, destructive to the work. If necessary, the brush can be recharged and the surface again gone over. When the fore edges are finished, the heads and tails should be similarly treated, the backs of the books being from the operator. Care should be taken to give these edges the same amount of colour as the fore edges. It should be remembered that the sprinkle dries rather lighter. Occasionally school books and legal books have their edges sprinkled blue. Any good blue ink will answer the purpose. Other colours are rarely used, though sometimes foreign books are sprinkled in fancy colours; and such expedients as, say, colouring the edge over with yellow or pink, and then laying grains of rice or pieces of breadcrumb over the edge at intervals, and sprinkling it with blue, are resorted to. The rice or breadcrumb being then removed, the edge appears blue or purple, with yellow or pink interspaces.
The effects of this kind of thing, however, are hardly sufficiently good to be worth the trouble. Although the sprinkle-brush described and illustrated is that used almost everywhere, it may be well to mention that there still remain a few old-fashioned bookbinders who adhere to what is termed the “finger-brush.” This is a brush about the size of a shaving-brush, of stiff hairs cut square at the ends. The brush, being dipped in the colour, is drawn across the fingers, so as to jerk the colour off in spots. The fingers should be slightly oiled. There is still another plan adopted by some. An ordinary nailbrush is dipped in the sprinkle. A common clean wire cinder-sifter is then held in the left hand above the row of books, and the brush, held in the right hand, is then worked round and round the sieve with the bristle next to the wires, when the spots will fall in a regular shower.
Self-coloured Edges.
At the present time these are almost confined to red edges, which is the revival of a very old fashion. During the last century, however, other colours were in use, especially a lemon colour for whole calf books, which has been recently, in some degree, revived. Red edges are very suitable to devotional books, and have lately almost superseded gilt edges for prayer and hymn books. The pigment chosen is generally a vermilion of good quality, to which some binders choose to add more or less of carmine. The colour should be carefully ground with the muller upon a slab, some paste being mixed with it as for sprinkle. It is well to add a couple of drops of oil, and the same of vinegar and water. Some binders mix up the colour with paste and water only to the proper consistence; others prepare the colour with glaire. In colouring the edges equally over, the boards at the head of the volume must be beaten even with the edges, and the book rested on the edge of the press or table; then the back must be held with the left hand, and the colour applied with a small sponge, passed evenly over the edge, towards the back one way and the gutter the other, to avoid a mass of colour being lodged in the angle of the fore edge. This done, the other parts are similarly coloured, the fore edge being laid open from the boards, and a runner held firmly above to prevent the colour searching into the book. It will be perceived that a dozen volumes may be done as easily as one. For further security, and to prevent the colour searching into the books, it may be advisable to put them into the laying-press and screw them moderately tight.
Slack Edges.
Books of devotion were generally bound in black leather, and the edges blacked to correspond with the covers, so that it will be as well to describe the process : Put the book in the press as for gilding, and sponge it with black ink; then take ivory black, lampblack, or antimony, mixed well with a little paste, and rub it on the edge with the finger or ball of the hand till it is perfectly black and a good polish produced, when it must be cleared with a brush, burnished, and cased with paper. This kind of edge has, however, quite dropped out of favour, and is now rarely seen.
Colours.
The following are the principal pigments used for colouring and sprinkling book edges: Blue-indigo and Prussian blue, with flake white or whiting for lighter shades ; yellow -Dutch pink, King’s yellow, and yellow orpiment; brown – umber burnt over the fire; red-vermilion, or Oxford ochre, burnt in a pan; pink-rose pink (lake will make it brighter); green-the first and second mixed to any shade. But spirit colours are the best, because they will not rub in burnishing. These are generally made by mixing the colours in vinegar or mineral acid. Judson’a dyes make very good colours for the purpose.
GILDING EDGES.
EDGES of books are no doubt best preserved by being gilt, and this may be done either plain or ornamented. The former process being tlie easier and the more general, we will describe it first. Gilding Plain Edges.The fore edge of the book is first gilt. It is screwed as tight as possible between boards placed even with the edge in the laymg-press, and then the edge is scraped perfectly smooth with a steel scraper, round on one end and flat on the other, for the better execution of such parts as present slight inequalities of surface.
After the edge is well scraped, it must be burnished with the burnisher, then coloured over with red bole or chalk ground in soap, rubbed immediately dry with fine clean paper shavings, and again well burnished. This gives a deeper appearance to the gilding, and hides any slight defect that a white edge at times presents. The gold is next cut on the gold cushion to the sizes required, and each piece taken off with a small slip of paper folded with one smooth edge, or with an instrument called a tip, by rubbing it on the head and attaching the gold by gently pressing upon it. Sometimes a piece of tissue paper (very slightly greased) is used. This is much adopted by painters in lettering facias, &c. The size (prepared with the white of an egg in three times the quantity of water, well beaten together) must then be applied evenly on the edge with a large camel-hair pencil, and the gold immediately placed thereon. Should any breaks appear in the gold, other portions must be applied with a piece of cotton wool. A size made of writing parchment, applied warm, with six or eight drops of vitriol in a cupful of the size, is used by some gilders; but the former is more simple and equally effective. After the edge is dry, it must be burnished lightly and carefully, to avoid rubbing off any of the gold; and the better to insure this, a piece of tissue paper should be placed on the edge during the first operation, and the edge itself afterwards burnished until it is perfectly uniform and clear.
The head and tail of the volume must be gilt with the same precaution, the back towards the workman, The burnisher is worked across the leaves. Gilding a I’Antique.Should it be considered desirable to give the book the character of the period in which it was written, or an additional degree of beauty and elegance, the ornamentation of the edges may be pursued farther in the manner we shall now describe. After the edge is finished as directed, and before taking out of the press, ornaments, such as flowers or designs in compartments, may be stamped upon it in the following manner : A coat of size is passed quickly over with great precaution and lightness, and only once in a place, to avoid detaching any of the gold. When dry, rub the edge with palm oil, and cover with gold of a colour different from that of the first. Then, with tools used in gilding leather, warmed in the fire, proceed to form the various designs by firmly impressing them on the edge. The gold that has not been touched by the tools is then rubbed off with a clean cotton, and there remain only the designs the tools have imprinted, which produce a fine effect. This mode is, however, now seldom used, though almost all books in the original binding of the sixteenth century are so adorned.
Gilding Marbled Edges.
This edge, which Dr. Dibdin, in his Bibliographer’s Decameron, calls ” the very luxury, the ne plus ultra of the articleic art,” is one requiring great care and expertness in the execution. After the edges have been tastefully marbled, and not overcharged with colour, the book must be put in the press, and well burnished as before directed. The size must then be laid on lightly, to prevent unsettling the colours of the marble, and the gold immediately applied, and finished off as in other edges. “When dry, the marble is perceived through the gold.
Gilding Landscapes.When the edge is well scraped and burnished, the leaves on the fore edge must be evenly bent in an oblique manner, and in this position confined by boards tied tightly on each side, until a subject is painted thereon in water colours, according to the fancy of the operator. When perfectly dry, untie the boards and let the leaves take their proper position. Then place the volume in the press, lay on the size and gold, and, when dry, burnish. The design will not be apparent when the volume is closed, from the gold covering it, but when the leaves are drawn out it will be perceived easily. The time and labour required make this operation expensive, and, consequently, it is very seldom performed.
After the edges have been gilt by any of the foregoing methods, the rounding must be examined and corrected, and the book should be put into the standing-press for two or three hours, to set it. The whole of the edges should be wrapped up with paper to keep them clean during the remainder of the process of binding.
Gold Sprinkle.
After the edges of the book are coloured with any of the self-colours already alluded to, whether mineral pigments or Judson’s or spirit dyes, a good effect may be given by sprinkling with a gold liquid, made in the following manner : Take a book of gold and 1oz. of honey, and rub them together in a mortar until they are very fine; then add half a pint of clear water, and mix them well together; after the water clears, pour it off, and put in more till the honey is all extracted and nothing left but the gold; mix one grain of corrosive sublimate with a teaspoonful of spirits of wine, and, when dissolved, put the same, with a little thick gum-water, to the gold, and bottle it, always shaking well before using. When dry, burnish the edges and cover with paper till the work is finished.
MATERIALS FOR MARBLING EDGES.
MARBLING may be defined as the art of so arranging moist colours upon an elastic surface, that they either will or can be made to readily assume sundry fantastic forms, such colours being transferable from the medium on which they lie to the edges of the book. The process, viewed by a casual spectator, appears wonderfully easy and simple; but it is, nevertheless, most difficult to describe or practice, and the tyro who attempts it must not be discouraged if he fails at first.
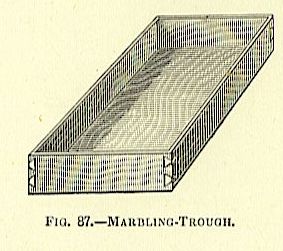
The tools required for marbling are a shallow wooden trough, about 2in. deep, and of size suited to your work, generally about 16in. to 20in. in length, and 6in. to 8in. wide will be large enough. It may be of pine, dovetailed at the corners, pitched along the joints, and painted (Fig. 87). Sometimes zinc is the material of the trough.
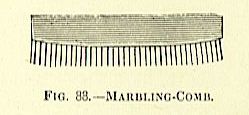
A little round stick; several combs, of which the one for small Dutch (Fig. 88) is made of many short pieces of fine brass wire set between a couple of pieces of wood (see Fig. 89); a marble slab and muller for grinding; and an earthenware cup and small brush for each colour.
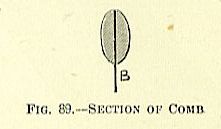
Colours used in Marbling.
The colours used for this purpose are the same as those ordinarily used for painting, both in oil and distemper, but you must procure them in their dry state, just as they are produced or manufactured, either in lump or powder, and grind them yourself ; they may be obtained at almost any oil and colour shop. We subjoin a list : Reds, drop lake, peach wood red, vermilion, rose pink, Oxford ochre (burnt); bluesindigo, Chinese blue, ultramarine, Prussian blue; yellowslemon chrome, Dutch pink, Oxford ochre (raw), blacks vegetable lampblack, drop ivory black; brownTurkey umber (burnt); orangeorange lead, orange chrome; whiteschina clay, pipeclay, flake white, Paris white.
All the colours must be well ground with a muller and marble slab in the manner prescribed in a former chapter for grinding sprinkle. It is of the greatest importance that the colour should be ground until perfectly impalpable.
Drop lake.
This is the most beautiful, but the most expensive, of all the reds, and is used only for book edges and the most superior kinds of work. There are different shades of this colour, viz., scarlet, crimson, and purple. The scarlet is the most expensive, and looks best on book edges, possessing a brilliancy which no other colour will produce; but there is a great quantity of a very inferior kind of drop lake about which is of no use whatever to the marbler, as, when it comes to be worked, it is found to possess no body at all. In order to ascertain whether the article you are about to purchase is likely to do, take a piece of the colour, and, breaking it, apply the broken part to your tongue : if it adheres to your tongue, it is doubtful whether it will do; but if it takes up the moisture without manifesting any inclination to adhere, you may try it with better expectations. This colour is sold in the form of small cones or drops, from which it derives its name, and is a preparation of cochineal, therefore the value of it depends much upon the price of that article.
Vermilion.
This colour is but little used, on account of its great specific gravity, and seldom without being combined with some other colour. It is a preparation of mercury, and, though nominally a much lower price than lake, it is so heavy that it comes nearly as dear as that article.
Rose Pink.
This is a very useful, though common, colour; it is composed of chalk or whiting, coloured with Brazil wood, consequently it is what is termed a fugitive colour, the pink very quickly fading on exposure to the atmosphere or heat. When combined with indigo or a little Chinese blue, it makes a good purple.
Burnt Ochre.
This colour is sometimes called stone ochre. It is one of the most useful colours we have, and, as the price is low, it is extensively used. With the addition of a little black it makes a good brown; with a little blue or indigo it makes a good olive; or it is a good colour used by itself, and not liable to change.
Wood Lalce.
This is a preparation of peach wood, and has only been introduced of late years to the notice of marblers. It is manufactured at Birmingham. This colour is an exception to the rule, as it is sold in the pulp or damp state, and may be mixed and even used without grinding, being made almost exclusively for marbling. It is the best red we have for general purposes, and for appearance comes next to the drop lake.
Chinese Blue.
This is a very beautiful, but not a very durable, colour. It is, however, an almost indispensable one to the marbler, as it will produce nearly every shade of blue by the addition of certain proportions of white. This colour requires particularly well grinding, as, indeed, do all the blues; it is also sold at some places in the pulp or damp state. There is a very good damp blue made in Birmingham.
Indigo.
This is a most valuable colour, and cannot be dispensed with under any consideration. It is too well known to require any description here. Though not a bright colour, it is one of the most durable, and for mixing and producing greens and purples of a permanent kind is invaluable; neither can you make a good black without its help: but be sure you procure it good.
Ultramarine.
This is a very beautiful colour, but must be used sparingly, as it will not glaze or take any polish, and is always inclined to rub off. The kinds now in general use are the French and German, the genuine article being far too high in price for this kind of work.
Prussian Blue.
This colour has of late been almost superseded by the Chinese blue, which is a much brighter colour; Prussian blue is darker and much heavier looking, and is, moreover, a very bad colour for glazing.
Dutch Pink.
This is a common, but very useful, colour. It is a preparation of whiting and quercitron bark, and is used in making greens, no other colour answering the purpose so well. It is also very useful in mixing with chrome to produce the various shades of yellow you may require.
Chrome.
This is of various shades, varying from a light lemon colour to a deep orange, approaching to red. It is a useful colour; but, unless it is pure, it is very difficult to get it to work properly.
Raw Ochre or Oxford Ochre.
This may be used in certain proportions for making olive tints, combined with Dutch pink and blue or black. It is also of use in small quantities to mix with yellows when they are inclined to run off, this colour being of a very adhesive nature.
Drop Ivory Slack.
This colour cannot well be used alone; it may, therefore, be called only an auxiliary to others.
Vegetable Slack.
This is a superior kind of lampblack, but prepared from vegetable instead of animal matter. It is surprisingly light, and cannot be used alone; it will not produce a black for marbling, except in combination with double its own weight of good indigo.
Turkey Umber (burnt).
This colour produces a very good brown, but it is hardly required if you have the burnt Oxford ochre; as, with the aid of that colour and a little indigo and black, you may produce almost any shade of brown you may require.
Orange Lead.
This is a very heavy colour, and is but little used, except for the edges of account books.
White.
For this an article called china clay is used; also, for some purposes, the common pipeclay. Flake white may also be used, but the others are much cheaper, and answer every purpose. Paris white is a similar thing to the former.
Marbling Gum.
Of all the varieties of gum, there is but one that is of any use to the marbler, and that one is called gum tragacanth, or gum dragon. You cannot be too particular in your choice of this article, on which so much of the excellence of your work depends. It should be large, white, and flaky. Good gum will produce a good surface, but bad gum will often yield a rough one, which is unsuitable to the purpose. Again, a bad gum will sometimes give a smooth surface, and yet possess no strength: the colours will flow well upon it, and form properly, and when the paper is taken off it will look at first very beautiful; but, five or ten minutes after, you will find the colours all running off, to your indescribable annoyance and mortification. To properly prepare the gum, procure a large earthen pan, glazed on the inside, capable of containing from eight to twelve gallons of water ; put therein lib. of gum tragacanth, and on it pour about two gallons of soft water; stir it every few hours with a clean birch broom, kept expressly for the purpose, breaking the lumps, and adding more water as it thickens or absorbs that which was first put to it: in about forty-eight hours you may venture to make use of it, but seventy-two hours would be better, and wo have known some gum to be all the better for a longer period; as, although a considerable portion of the gum may be dissolved, yet the best properties of it are not extracted till the whole is dissolved. It must be strained through a fine hair sieve before using, and if any lumps remain, put them back into the pan in which you soak them, until they are all dissolved. Linseed.It is possible to marble some patterns on mucilage of linseed, but it can never be made to produce a satisfactory effect. It is made either by boiling one quart of linseed in six or eight gallons of water, or by pouring that quantity of boiling water upon the linseed, and well stirring it till it extracts the mucilaginous properties of the seed; but it very soon decomposes or turns to water.
Carrageen, or Irish Moss.
This is sometimes used, but can be dispensed with altogether. It is not a necessary thing: we simply mention it because it is made use of by a few. When used, it should be well picked (the white being the best) and washed ; then set to simmer in a gentle heat for an hour or two, and strain through your fine hair sieve. It will then be ready for use, but will require a proportion of the solution of gum tragacanth, or you will not be able to do much with it.
Flea Seed.
This is an article but little known, except to those who have occasion to vise it. It is a small, brown, havd seed, in size, shape, and colour closely resembling the annoying little insect whose name it bears. It produces a very strong and powerful mucilage, far stronger than that which can be obtained from linseed; and what enhances its value is, that it does not so soon lose its strength, or turn to water, but will keep several days. It is a great assistant, mixed with gum, in the making of French and Spanish marbles; but is worse than useless for Nonpareils and Drawn Patterns. To prepare it, put 1lb. of the seed into a pan, pour upon it a gallon of boiling water, keep it well stirred for ten minutes, and let it stand for half an hour; then stir it again for ten minutes more, and in another half hour add another gallon of boiling water, stirring it, as before, at intervals for one hour; after which, let it remain, and the seed will settle at the bottom of the pan. When cold, pour off the top for use, and the seed will bear more boiling water, though not so much as at first. Sometimes the seed will yield a third extract, but this you must determine by your own judgment, as the seed, when exhausted, will lose its viscid property, and must then be thrown away. Do not stir up your seed after it has cooled, or it will never settle until again heated, or having more boiling water added to it.
Ox Gall.
The surest way of obtaining this article genuine is to procure it in the bladder as it is taken from the animal, if you are acquainted with any butcher upon whom you can depend, for you must ascertain that the bag or bladder has never been broken. As we have been deceived ourselves in this way, we here expose the manner of the fraud. We had for some time been supplied with galls from a slaughter-house : but, finding that, notwithstanding they were brought in the bladder, the gall itself was very weak, we set to work to find out the cause, and discovered that the man who brought them procured one or two good galls and two or three empty gall bladders, the gall for which had been emptied out and sold to some one else; and, mixing the contents of the full ones wi th a quantity of water, he refilled the whole lot, carefully tying them up with a fine string, and selling them for the proper article. The gall from some animals is very thick, but will, after keeping for some time, get thin without at all losing its properties; in fact, gall is all the better for being kept, and is none the worse for stinking.
Water.
Soft, or rain water, when it can be procured, is the best adapted for all the preparations in marbling.
MARBLING EDGES OR PAPER.
IN this chapter we shall describe how the various marbling patterns for book edges or paper are produced, commencing with the easiest and most common kind of marbled papers.
French Shell, Marble.
Your trough being places on a firm table or bench of convenient height, with some feet of spare room on either side, you place the pots containing the colours on your right hand and the paper or books to be marbled on your left ; let there be a small brush in each of your pots of vein colours, and a larger one in your last or body colour.
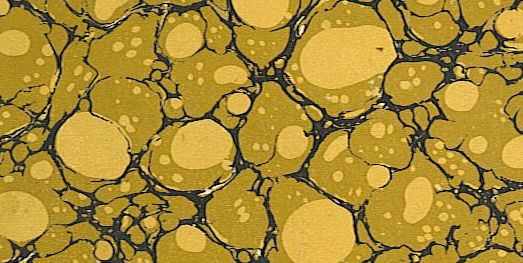
Provide yourself with a small iron rob or bar, about 12in. or 14in. long, and about 1/2in. in thickness ; this you place so as to be able to take up when required in your left hand. Fill your trough to about 1/2in. or 3/4in. from the top with a solution of gum tragacanth and flea seed, as directed, and proceed to mix your colors.
To produce the pattern called large brown French, or shell pattern (see Fig. 90) with three vsins, viz., red, yellow, and black), mix together ox gall and water, in the proportion of one-eighth of the former to seven-eighths of the latter; into this put your vein colours, a little at a time, and gently stir the mixture with the brash (but be very careful you do not make it froth by too rapid stirring) until it arrives at the proper consistence, which must be ascertained by sprinkling a little colour on the solution in the trough: if the colour sinks and does not spread out, add a little neat gall; but should it spread too far, mix a little more colour with water only, and put it to that which opens too much. The brown will require more gall, less water, and a very few drops of the best olive oil, which will cause it to form itself in rings, or shells, as it falls on the surface of the solution in the trough. This colour will require to be thicker than the vein colours, and, when thrown or sprinkled on, should drive or force the other colours into the form of veins.
By increasing the quantity of gall in the last colour, you may bring the veins to almost any degree of fineness, but there is a point beyond which it is not advisable to go. This you must ascertain by your own judgment. If the brown does not shell enough, but forms in holes, add a few more drops of oil and well mix it; but should you pour in the oil in too great a quantity, it will spoil the effect of the shell altogether, and this you will not be able to counteract except by adding some more colour mixed without any oil. Having, then, all in readiness, first skim the surface of the solution lightly all over, and immediately (for, when you begin, you must move quickly till you have all your colour on) sprinkle on your colours, beginning with the red, next yellow, thirdly black, then your principal or body colours. Go well and equally all over, taking care that you throw as much colour on one part of the surface as another. You then carefully bend the boards of your book level with the. edges, and, holding the leaves together, dip the edges in the size. Withdraw it immediately, and shake or blow off as quickly as possible the size adhering to the edge with the colour, to prevent its running into the book. The tail is next dipped in a similar manner. Before marbling the fore edge, the boards must be laid back and the edge flattened on the press, holding the leaves firmly together at each end, taking the colours with the same precautions, and replacing the boards immediately after dipping. It is necessary, previous to throwing on the colour for each dipping, to clear the size of all the colour left on the surface from the previous one by taking it well off with waste paper.
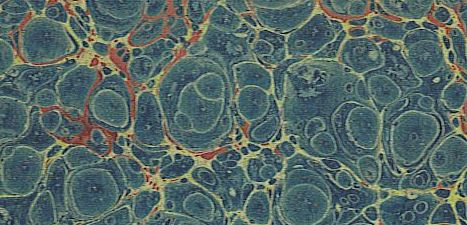
Small French, or Small Shell, Marble.
This pattern (Fig. 91) is produced with precisely the same colour as the preceding. It is called in distinction ” small brown.” But you now require the iron rod alluded to; hold it firmly in your left hand, and, instead of throwing on the colours as before, knock the handle of your brush, near the stock, against the bar; this causes the colour to fall in small spots. Vein Shell Marble.-This pattern has three veins and two French colours, or colours that have been mixed as French- that is, with oil in them-the last of which (in this instance purple) is mixed with a little more both of oil and gall than the other, in order to make it flow out over and drive up the other colours.
Blue Stormont Marble.
This pattern (Fig. 92), though apparently very simple and easy of execution, is, nevertheless, very difficult to keep in order, in consequence of the speedy evaporation and the chemical changes which are continually taking place among the ingredients with which it is made; it requires great quickness and acute observation on the part of the workman. The same preparation of gum and flea seed is used for this as for the French marble. Mix your red for vein, as usual, with gall and water; the other colour must consist of good indigo alone, without which you cannot produce the proper effect. The indigo being ground, as before directed in the instructions for grinding colours, you proceed to mix it with gall, water, and spirits of turpentine, of which last ingredient it will require a considerable proportion: you will find that when sprinkled upon the timigh it will immediately fly out and then close up again, and will appear to be in constant motion on the surface of the solution.
The effect produced by the spirits of turpentine is to mate it break full of little holes, and the acme of this pattern is to get it to look like a fine network. Sometimes it will happen that at first mixing you can do nothing with it, but, after standing a day or two, it will work well; while at other times it will work well immediately. If your holes come too large from excess of turpentine (for they will sometimes come too large from not having enough), add a little more gall and some fresh indigo, putting in a few drops of alum water; but be very careful of this, for if you put in too much you will make the colour thick and clotted, in which case you must have recourse to a little of the solution of potash: but it is best, if possible, to do without either of them. This pattern, though old, is still considerably used by stationers.
Italian Marble.
This (Fig. 93) is a pretty, though simple, pattern, but requires great cleanliness of working to turn it out well. Tour colours being ground as before directed, you proceed to mix them with gall and water only, as though they were for veins. Tour last colour is white; this requires a greater proportion of gall than the other colours, and a larger brush, as in French. After skimming your size, you proceed by beating or knocking on your colours, as in small French, taking especial care to have the rings of your brushes free from any accumulation of colour, or you will have large spots or blotches, which will spoil the appearance of the work. One difference between this and the small French is that you use no oil in any of these colours.
Another method is to use a mixture of weak gall and water, instead of the white colour, which must be firmly knocked or beaten on; this must be proportioned by your own judgment. This method is preferable to the former for book edges, and we like it quite as well for paper.
West End Marble.
This very neat pattern (Fig. 94) is in every respect similar to the Spanish in the working, only it is not shaded. It consists of two prominent colours besides the veins. One of these is dark and dotted all over with small white spots; the other, which is the top or last colour, is light, and is made by taking a portion of the darker colour and mixing a quantity of white with it, sufficient to bring it to the desired tint; so that, whether it be green, blue, or brown, the same rule may be observed.
You proceed to mix the veins in the ordinary way, viz., with the usual proportions of gall and water. You then mix your brown with a larger proportion of gall, and sprinkle it on so as to drive the other colours into veins; you then take the white, or gall and water, as in Italian, and beat it finely and equally all over, but not so much as for the Italian pattern. Lastly, French Curl Marble.This pattern (Fig. 95), after the description of the French marble which has been given, will not require much explanation, the only difference in woi-king being thisyou must not have any preparation of the flea seed with the gum.
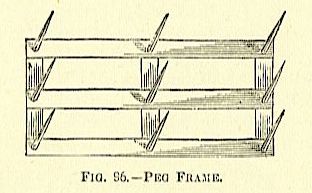
You must also procure a frame (Fig. 96) with as many pegs as you require curls on your sheet of paper; these pegs must be about 8in. long, and about the thickness of a stout goose quill, rather tapering towards a point. Throw on your colours in the same manner as for large French, take your frame of pegs, and, holding it with both hands, put the pegs down to the bottom of the trough; give it a slight rotary motion, then lift it out quickly, so that no drops fall from the pegs into the trough, and lay on the paper as usual, taking care to lay it down true and even, or the whole pattern will be askew.
Spanish Marble.
This is distinguished from all others by having a series of light and dark shades traversing the whole extent of the sheet of paper in a diagonal direction (see Fig. 97); and, as it is not our design to puzzle or mislead the inquirer, but to simplify as much as possible, we will here state that all the plain Spanish patterns may be worked and managed without the aid of any other agents than ox gall and water; of course, presuming that the colours are ground and prepared as before directed. We will commence with one of the most simple and easy patterns. This is called olive Spanish, with red and blue veins.
Mix the veins with gall and water, as in the previous kinds of marbling, until you bring them to the requisite consistence; and, as it is not possible to state any given measure for proportioning the gall and water exactly, you must be guided by yonr own judgment, observing the effect produced in your colours as you try them on the solution; for our experience has often proved that the gall taken from one animal has been more powerful than that taken from another. But this rule is almost without an exception: That each successive colour requires more gall than the one that preceded it, and that the principal or body colour requires to be thicker in itself, and stronger in gall, than any of the others. Having, therefore, mixed and prepared your colours, and placed the preparation of gum and flea seed in the trough, you proceed to sprinkle on lightly first the red, then the blue, and, lastly, with a good brush, full of colour, the olive, beginning at the left-hand corner of the trough farthest from you, and working down and up closely all over, taking care not to go twice over the same place, or you will produce rings by the falling of one spot upon another which is considered objectionable (we do not mean to say that it can be avoided altogether, but to a certain extent it can). You now take up the paper by the two opposite corners, and, holding it as nearly upright as possibJe, yet with a degree of ease and looseness only to be attained by practice, you let the corner in your right hand gently touch the colour in the trough, while at the same time you shake or move it to and fro with a regular motion, letting the other part of the sheet gradually descend with the left hand till it all lies flat upon the surface of the solution. On taking it out, you will find it shaded in stripes; but practice will be required before you will be able to produce it with certainty and regularity.
Treat book edges in the same way.
Nonpareil Marble.
The process for producing this pattern (Fig. 98) is precisely the same in every respect as the preceding one, up to the point of raking it with the peg-frame. You then take your comb, which is a much larger one, draw it through your colour, from left to right, then immediately reverse it, and draw it back again, from right to left, and you will have the desired effect.
Antique Marble.
To make the pattern shown at Fig. 99 throw on the first three colours (red, black, and yellow), rake it once up and down with your peg-frame, and then proceed to throw on your green ; follow with the pink spots, and, lastly, beat or knock on the small white spots. Some antique patterns are made with a blue or some other coloured spot, in lieu of the pink; but the process is the same as the one we have just described.
Zebra Marble.
This pattern (Fig. 100) is done with colours prepared the same as for ordinary Nonpareil. When you have put on the four colours, viz., red, black, yellow, and blue, you rake it the same as for Nonpareil, after which you throw on the spot and lay on your paper, shading the same as for Spanish. Sometimes it is made without shading, and thus passes for another pattern.
Wave Marble.
In this pattern (Fig. 101) the colours are drawn into a kind of undulating form, in which the points of the rows meet each otter. The colours are prepared in the same manner as for the Nonpareil patterns. The red, yellow, blue, and green are thrown on, over which is beaten or knocked the small white, but not too abundantly. You now require a kind of double rake or frame, with teeth of stout wire, about 3in. or 4in. apart, and let the teeth of the hinder ones be so adjusted as to be exactly in the centre of the spaces left open by the first ones; the second, or hindermost, row of teeth must be lin. or l|in. behind the former. The two should be firmly fixed together, forming but one instrument; draw this through your colour as you vrould a comb, from left to right, but with an undulating or seesaw motion, just sufficient to make the top of the hindermost wave catch or touch the bottom of the foremost one, by which means it will produce an uniform appearance all over the sheet, something in the form of diamonds or squares. There are some other patterns of a similar kind, but made without the small white spots, and the same design is sometimes worked upon a French marble; but these require no additional explanation.
Dutch Marble.
This is one of the oldest, and, at the same time, one of the most difficult patterns (Pigs. 102 and 103), and is performed by a process very different from any of the preceding.
If you examine a sheet attentively, you will perceive that the colours are not scattered here and there in an indiscriminate manner, but follow each other in a kind of regular succession in a diagonal direction across the sheet, the red being the preponderating colour. In order to do this well, your colours must be particularly well ground and of the first quality, and they ought to be mixed a few days before using. You will require a number of little tins or pots, l 1/2in. wide and about the same or 2in. in depth.
You will also require two frames the size of the paper you intend using, with wooden pegs in them, slightly tapering, about 1/4in. in thickness, and fixed about 3in. apart, at regular distances over the whole extent of the space required. Your colours will be all the better for this class of work by the addition of a little spirits of wine ; with this exception, the colours will not require any ifferent treatment from the Nonpareil. Mix each of your colours in a large jug having a spout, so that you may be able to pour them out of that into the small tins before mentioned. The colours required will be red, yellow, green, blue, and white. The two frames of pegs must be made exactly alike, so that if the pegs in one frame make an impression in a sheet of paper, the pegs in the other fit exactly in the sanies pots. Having mixed the colours in your large pots, and tried them by dropping a little of each on the solution in the trough, you proceed to fill as many of your little pots of colour as you may need. Place them in the following order, about 8in. apart, so that the pegs in the above-mentioned frames may drop into the centre of each pot, and, when lifted out (which will require to be done with great caution), will convey one large drop of colour on each peg, with which you gently and evenly touch the surface of the size, taking care that you do not put them too deep, but, at the same time, being quite sure that they all do touch. The tins or pots of colour must be arranged as in the following diagram, about 3in. apart:
G Y G Y G Y G
Y B Y B Y B Y
G Y G Y G Y G
Y B Y B Y B Y
G Y G Y G Y G
I have put only the initial letters of the colours to be in this lot of pots, G standing for green, Y for yellow, and B for blue. You must now fill the same number of tins or pots with white, which must be composed of pipeclay ground and prepared as the other colours, and arrange them in precisely the same manner, using the second or duplicate frame of pegs to them. Having arranged all these, you now commence operations by first skimming your size (which must consist of gum tragacanth alone), then well cover the whole surface with red, which you must throw on plentifully with a brush ; you then lift carefully your first frame, consisting of the three colours, giving it a slight rotary motion, so as to stir the colours, which soon settle, but still not so violently as to upset them. Let one drop from each touch the surface of the size upon the red, already thrown on, then quickly take the one with the white and drop that just in the centre of the spots you have already placed on the trough. You next take a rounded piece of tapering wood (a brush handle is as good a thing as any), and pass it up and down through the colours as they are now disposed on your trough, from front to back, at regular distances, till you have gone all over the whole extent of the trough. Then pass your comb through it, from left to right, and lay on your paper. As soon as you have hung it up, pour over it, from a jug with a spout, about a pint of clear water, to wash off all the superfluous loose colour and gum, and make it look clean and bright, which it will not do without this washing, as the body of colour is so much greater than in other patterns. When dry, it will require sizing before it can be glazed.
When curls are required, you must have a third frame, with as many pegs as you require curls in the sheet of paper. The marbled or sprinkled book has next to hare its edges ” burnished.” This is effected by screwing up each end of the book alternately in the laying-press between backing-boards, and rubbing the burnisher forcibly up and down it. Then the fore edge is done. For this the back need not be knocked up flat, but the fore edge is left curved. Some binders leave the burnishing until after the books are finished, but we regard the present as the best time. The book can afterwards be “capped,” or have its edges enveloped in paper if considered desirable or prudent to protect them. We have now gone through the processes for producing the different denominations of marbles for edges or paper very exhaustively, and in such detail that no one can mistake the stage of any process.
HEADBANDS AND REGISTERS.
THE headband is an ornamental appendage, formed in thread and silk of various colours, which is placed at the back of a book at the head and tail. Besides its ornamental appearance, it serves to support that part of the cover projecting above the back of the book in consequence of the square of the boards. This part of the leather is upheld level with the square of the board by the headband, which gives a much more finished appearance to a volume. Thus it will be seen that the headband must equal in size the amount allowed for the square of a board.
For common work, the headband used to be made of paper well rolled between two boards and slightly pasted to hold the paper firm; but for extra work, and for volumes requiring greater durability, it is made of thin board and parchment pasted together and cut into strips of the breadth required. These flat headbands produce a much better effect than round ones. There are two kinds of headbands, viz., single and double. For ordinary work, cloth pasted round cord or common thread is used; for extra, silk, and even gold and silver thread. If the volume is small, it is placed, with the boards closed and drawn down even with the edges, between the knees; or, if larger, placed at the end of the laying-press, with the fore edge projecting towards the body of the workman.
Single Headband.
Take two lengths of thread or silk, of different colours, threading one in a long needle, and tying the ends of the two together. Supposing red and white to have been taken, and the white is attached to the needle, it is placed in the volume five or six leaves from the left side, and forced out on the back immediately under the kettle-stitch of the sewing, and the thread drawn until it is stopped by the knot, which will be hidden in the sheet. The needle is then passed a second time J1 – —– -1— if i ]1ie prepared band under the curl thus made, the thread is drawn tight so as to hold it firm. Before placing the band, it must be bent with the fingers to the curve of the back of the book. The rec now taken with i:he right hand, and brought from the left. t.o the right, crossed above the white thread, passed u^v^ »^ K,^*^, and brought round to the front again, and fastened by the white thread being passed over it in the same way. Take care that the bead formed by these crossings touches the rj~ -* x1–volume. In thus alternately repeating the operatic: the tied threads and passing each time under the band, which is thereby covered, you must occasionally fasten it to the book inserting the needle as before directed once in as many places as the thickness of the book may require, and giving it a doi tack on the right side on completing the band, fastening it 011 the back with a, knot. These fastenings give firmness to the headband, and keep it to the exact curve of the back. The two projecting sides of the bands must be cut off near the silk, giving the band a slight inclination upwards to prevent the worl slipping off before covering.
Double Headband.
This headband is made of silk of various colours, and differs from the single both in being composed of two bands, a large one and a small one, and in the manner of passing the silk. It is commenced in the same way as the sii but when the bands are fastened, the smaller above the laro the red silk is taken with the right hand and passed above the white, under the bottom or larger band, brought out under the upper or small one, carried over it, brought out again over the large band, and the bead formed as before directed near the edge of the book. The white silk is then passed in the same way, and so on alternately till the whole is completed. If the amateur be desirous of accomplishing the foregoing well, he is earnestly advised to take an old book with a worked headband, and, by dissecting it, observe the manner in which it has been worked. The binder of the present day, however, rarely works his own headbands, unless it is for some particularly important job. He can purchase of the material dealei headbands very perfectly worked by machinery, in either silk or cotton, on a slip of fine canvas. These need simply to be cut off to the breadth of the book and glued on the back at the head and tail, when their appearance is as good as that of the worked headband.
Registers.
Registers are narrow ribbons affixed to a book to enable the reader to keep his place. When they are very narrow it may suffice simply to place them in the book when the binding is completed; but broad ribbons, as for Church Services, Bibles, &c., should have one end glued to the back at the head before the headbands are fixed. Some broad registers have gold fringe at the bottom. Registers are usually deep blue in colour. The loose ends should be turned back in the leaves to protect them while the binding is progressing.
GETTING INTO BOARDS.
THE next operation after backing the book is cutting the boards. These have, of course, been brought to an approximate size by the shears or the cutting-machine (illustrated in our last chapter), and also approximately square, but in neither respect are sufficiently accurate. They have now to be cut to exact squareness, arid the precise size requisite for each book, by the agency of the cutting-press and plough. For cloth boarded books and case work this operation is frequently omitted.
For cutting the boards, they are placed in the press between two cutting-boards, one behind the board called a ” cut-against,” because against this the plough-knife cuts, and one in front, to guide the knife, termed the ” runner.” It is usual to place a strip of millboard in front of the ” cut-against,” to receive the first impact of the knife, and preserve the board in some measure. The first step in cutting the boards is to place a pair (or more) destined for a certain sized book with their edges level, and remove as small a portion of the edges with the plough as will leave them perfectly smooth.

Fig 70 is a sketch of boards between the cutting-boards, ready to be lowered into the press. A is the ” cut-against,” B the millboards, and C the runner. One edge of the board being thus cut, the opposite one is operated on. For this it is necessary to ascertain the exact width that the board must be when affixed to the book, including the square of the fore edge. (The ” squares ” of a board are those portions of the boards which project beyond the edges of the book when cut.) For this purpose, the book is laid down upon its side on the cutting-press, and, taking the compasses in his right hand, the workman rests the point of one leg in the groove made in backing, and, opening out the other leg, searches for the narrowest leaf in the book (Fig. 71).
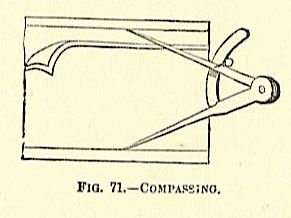
When this is found, he has to consider that in cutting the edges he will have to cut down to this, and hence the millboard must be ihe amount of the “square” wider than this; COMPASSING consequently, he opens out the compasses the amount of the ” square” beyond this narrowest leaf which he has found, and fixes them in this position by screwing them tight. He now places the point of one leg of the compasses to the cut edge of the millboard, and presses the other on to the other side of the millboard; the operation is then repeated at the other end of the board (Fig. 72).
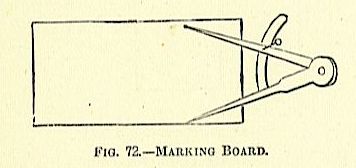
This part of the millboard is then placed on the cut-against, the runner adjusted to the two dots, and the superfluous millboard ploughed off. It is now necessary to cut the heud and tail. The wooden stock of the square is adjusted to one of the cut edges, the steel blade being a little below the end of the millboard, and a bodkin is drawn along the blade (Fig. 73), or a couple of dots made, either mark to serve as a guide for the edge of the runner.
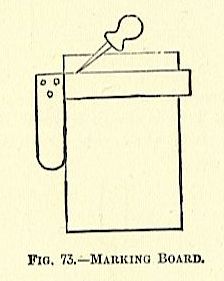
The superfluous board being ploughed off, the book is placed upon the center of the cutting-press with the head to the operator, and looked through for the shortest leaf. When this is found, one point of the compasses is placed to the head and the other to the bottom (tail) of the shortest leaf, and the compasses fixed. This distance is then set off on the millboards from the head just cut, and the point at the other end, where the other leg of the compasses reaches, is squared, as at Fig. 74, and the surplus ploughed off.
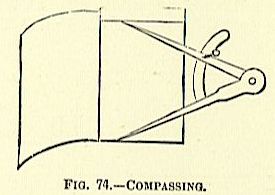
A millboard is now adjusted to each side of the book (if made boards or lined boards, with the right side inwards), and strokes made with the bodkin along them for each cord, as at Fig. 75. It is now necessary to pierce the boards so that the bands may be passed through them. This consists in making a hole from the outside of the board inwards at each bodkin mark, about 1/2 in. from the end. This hole is shown by an o in Fig. 75.
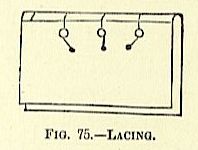
Similar holes are now made from the inside, shown at Fig. 75 by black dots. These holes are made either by forcing the bodkin through the boards, or, preferably, by laying the millboard on a piece of smooth hard wood, and driving the ” piercer ” (Fig. 76) through by a blow from a hammer.
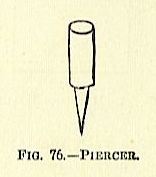
The bands (or cords in which the book is sewed), already unravelled, as before described, are now saturated with paste, and their ends then twisted up, by the finger and thumb, to a point. Each cord is then put inwards through one of the holes nearest to the edge of the board, and outwards through one of those farthest from the back. The cords are then drawn tolerably tight, and all the projecting part, except about 1/2in., is cut off, the piece remaining smoothed down on the board and secured by being struck with the hammer. Each band now forms a kind of hinge, serving to hold the board to the book. The board is now extended flat upon the knocking-down iron, and all the cords knocked down (or riveted, as some term it) with the backing-hammer, as at Fig. 77.
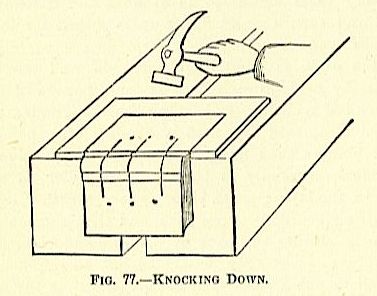
Then the book is reversed, so that the cords can be beaten down on the inside of the board also, until they are smooth and level. Great care must be taken, during this operation, that the bands do not get cut. If it chance that the part of the band between the back and the board, which forms the hinge, gets drawn tightly over the sharp edge of the knocking-down iron, and struck by the hammer, it will be severed immediately. The batch of books thus got ” into boards ” should now be placed between pressing-boards, with the backs projecting, in the standing-press (largest at bottom), and pulled down tightly. In this position their backs are smeared over with the thin paste brush.
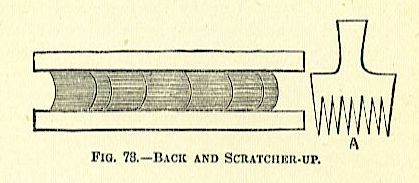
The operator then takes the scratoher-up (Fig. 78, A) in his right hand, and draws it down the back of the books from heads to tails, in such a manner that the teeth of the tool penetrate between the sections. The brush is then drawn along them again, so as to work the paste into these channels, and tlien the scratcher-up is drawn forcibly across the back in every direction. Next, the paste is partially cleaned off, and the scratches rubbed out by rubbing each back in the direction of its length with the end of a cutting or backing board.
Finally, the backs are rubbed clean and dry with a handful of paper shavings, and most binders then apply a coating of thin glue thereto. Some binders, especially in the country, prefer to screw the books up in the laying-press, three or four together, with backing or cutting boards between each, and then scratch them up, subsequently glueing the back of each, and blocking up in the standing-press, where they should be left all night.
It is well to put a piece of waste paper inside the millboard, to prevent the pasted bands sticking to the end-papers. Before concluding this chapter, we think it well to specify the different kinds of millboard which the amateur would require for the boards of his book. The quality of these will depend in a material degree upon the kind of binding he is desirous of adopting. If for leather work, it will be well for him to buy the best quality millboards, which will cost him from 32s. to 40s. per cwt., according to his market. These are made of the best old ropes and sacking, and, from having much tar in them, are very dark brown, mottled with black. They are also so well rolled at the mills that they are extremely hard, and the labour of cutting them is considerable. The inferior kind will do very well for cloth or half roan books. They are much lighter in colour, being a kind of dull grey, and very much softer. These are about 20s. per cwt., or even less, Lastly come the strawboards, which are made of straw instead of hemp. These are much used now for common bindings, and are hard and smooth, but so brittle that they cannot be recommended. If a volume bound in strawboard fall to the ground, the corners are mostly so bruised that the book is irretrievably spoiled; but a good millboard will stand this casualty. Strawboards cost about 10s. per cwt. All boards can be obtained of Messrs. Eadie and Messrs. Corfield, whom we previously mentioned, and of other dealers. Boards are divided, according to their thickness, into what are called ” tenpenny” (the thickest), ” X” and ” XX,” ” eightpenny,” ” sevenpenny,” and ” tip” (the thinnest). The tyro should ask the dealer of whom he buys to show him the different denominations, and remember them, as it may be useful to him in ordering. He had better give his first order for a icwt. or Jcwt. ” assorted.” ” Tip ” is excellent for lining board. Thus, instead of using a millboard of the proper thickness for a certain book, it is far better to use one rather thinner, and paste a thickness of tip on. This causes the board to have an inclination to concavity, which keeps the book compact. It must be carefully remembered that the lined side of a lined board, or the side on which the thinnest board is pasted in a ” made ” board, must always be put next the book, otherwise the boards, instead of curving inwards, will have a tendency to turn outwards at the corners.
LINING THE BACK
LINING THE BACK.
THERE are two methods of dealing with the back of a book before covering: it may be either what is called ” tight” or “open.” In the first, one or two thicknesses of paper are glued to the back, and when the book is covered with leather, the leather which falls on the back is pasted to this paper. The result, of course, is that, in this case, the leather has to take any form that the back itself does.
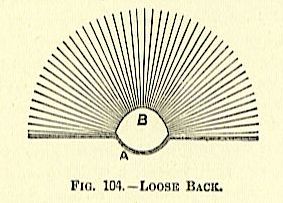
Thus, for instance, when the book Is open the back rises up, as at B, Fig. 104. In the “hollow,” or “open,” back, some slips of paper are glued LOOSE BACK to the back, over which are placed others free from the back When the book is covered, part of the leather is turned in between these, so that the covering of the back only adheres to the loose paper. The consequence is that, when the book is opened, the real back flies up; but the loose back, to which the leather cover is attached, retains its shape. This is shown at Fig. 104, where a loose-backed book is shown open. B is the back of the book, which has naturally sprung up; A is the outer part of the lining, with the leather attached, which, being detached from the actual book, keeps its regular shape. Each method has its advantages. The ” tight” back is undoubtedly the more antique and the stronger system.
All old books have tight backs, so have most small Church Services of the present day (of which more anon) and large pulpit Bibles. But the hollow back opens better, and the ” finishing ” is less liable to damage; and, in short, this kind of back is almost universal at the present day. Before lining the back, the headband should be set. This is done by means of glue. If the headband be worked, it is glued over both at head and tail, and then, by the aid of a folder, the headband is made to take the same curve as the back of the book. This is accomplished by holding the book, with its back downwards, on the cheek of the press, in the left hand, while with a pointed folder, held in the right hand, the bead of the headband is rubbed down and manipulated to make it of good shape. The silk or cambric at the back is then rubbed down as closely as possible, and the book allowed to dry. In lining a tight back, the book is screwed up in the laying-press, back projecting; the back of the book is carefully glued over with glue of tolerable thickness. A piece of smooth brown paper is now taken, which has one edge cut quite straight. This straight edge is applied to the left side of the back, the paper put down on the glued surface, and then well rubbed down to the back with a stout bone folder and the palm of the hand. It is then cut off straight with a sharp knife at the right side of the back. It is well to glue this brown paper over, and apply a second piece; or, still better, a thickness of stout smooth cartridge paper. The paper should be long enough to project a little over the headbands at head and tail. For hollow backs the proceedings differ somewhat. The first thickness of brown paper is glued on, as described. This is next glued over, and another piece put above it, but not quite up to the edge of the back on the left-hand side.
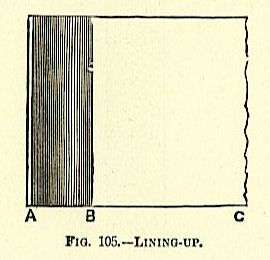
This stage of the lining is represented at Fig. 105, where A shows the glued portion of the first thickness of the paper, not covered by the second thickness (B). The second thickness is rubbed well down with the hand and the thick folding-stick; then it is creased or folded straight along the right-hand side of the book at B, When the lining is dry, the overplus paper at the head and tail should be cut off with the scissors level with the top of the headband. With a sharp penknife inserted into the hollow of the back, each side should be cut down for a couple of inches at the head and tail, so as to allow the leather to be turned in when covering.
If the book is to have bands, these should now be placed. Bands are those projections on the back of a well-bound book which represent the projection of the actual band upon which antique books were bound. Some binders use string or cord for these, but they generally consist of two or three thicknesses of leather glued together and dried under pressure, then cut into slips one-eighth of an inch or less wide, with a sharp knife and the cutting-board. A single thickness of stout morocco will generally be sufficient. A piece of thin white paper is usually glued inside the leather, whether it be of a single thickness or made of several. Of course, the larger the book the wider the band. The book is now placed in the press and marked up.
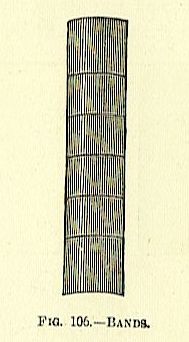
The general number of bands is five, and they are placed equidistant, rather more space being allowed at the tail than at the head of the book. Fig. 106 shows a small sketch of a back so marked and proportioned. The inside (paper side) and the surplus portion, C, is brought over to the left hand, where it adheres to the glued part, and again folded down. When this is done, the small amount of glued space left at A will be found enough to hold this fresh fold of the paper down. This being done, the top of this last fold of paper is again glued and folded over from left to right, and then cut off level by folding it back and running a sharp knife along the fold. This style of lining up is technically known as ” two on and two off,” because, as will be understood from the preceding description, there will be two thicknesses of paper glued to the back of the book, and two others semi-detached from it, being only connected at each edge, so that, when the opened book is viewed from the head or tail, it will present the appearance shown at Fig. 104, where A is the loose thickness of the lining paper, and B that which adheres to the book and assumes its shape. For thin books, one thickness on the back and two on the hollow will be sufficient. Thick or large books may have more paper applied, in proportion to their size.
Overcast books should be rather strongly lined to relieve the strain. Good paper should be used for this important operation. Flabby brown paper, with a liability to stretch, is quite unsuited. Old writing, account-book, or copy-book paper is fairly suitable; tough smooth brown paper is better; and good quality cartridge is best of all.
WHOLE-BOUND FINISHING.
IN whole-bound works a roll of sufficient breadth is generally run along the edges of the boards and the inside of the squares. This may be done by taking the gold upon the roll as usual and holding the volume on the work-bench firmly with the left hand. It is, however, generally best, especially if the volume be large, to screw it up in boards, either in the finishing-press or the laying-press, according to size.
The boards are used to prevent the back being injured. When the end-papers have a broad leather joint, which is to be finished, it is best to lay on gold over all the space, with the tip or cotton, and then work the ornaments as desired. It is upon the sides of whole-bound books that the competent finisher usually finds the best scope for his talent and can show his taste and skill. Where the ornamentation is confined to a simple roll worked round the side, a line made with the folder will be sufficient guide, and the gold can be taken upon the roll and worked direct. But when the pattern is large and complicated, and with much detail, it will be well to work all the tools upon the side before glairing, and apply the gold subsequently. The gold may be laid on one side only, and that side be finished first, and the book be screwed up in the laying-press.
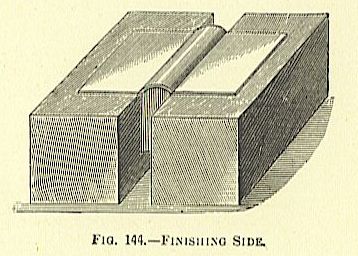
Or, still better, the book may be placed between a couple of firm billets of wood resting steadily on the work-bench (Fig. 144); and thus the gold may be laid on both boards. The whole of the boards may be glaired over with the sponge, or the whole be first worked, and the impressions only glaired with the brush. To gild silk or velvet, it is necessary, owing to their delicate character, to adopt a different procedure to that used with leather. Wet glaire would, of course, permanently stain them, and therefore the whites of eggs are carefully dried, and brought to a very fine powder; this is placed in a small bottle, with a piece of fine muslin tied over the mouth, and can then be shaken and powdered over the place desired. On this powder the gold is applied, and the tools worked.
Many modern bookbinders prefer powdered gum sandarach to the egg albumen. As there is no moisture in silk, the finisher must not lay on so much gold at one time as he would on calf or morocco. “We will now give an example of a side finished in gold. We cannot give more than one, owing to the space which such illustrations would take up.
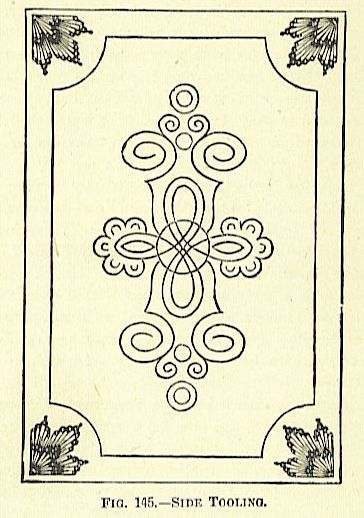
The principle, however, is in all cases the same, and the operator, if possessed of a little good taste and self-reliance, should have no difficulty in so combining a small collection of suitable tools as to make plenty of effective designs for himself. In our example (Fig. 145) it will be seen that the tools required are a single-line fillet, several semi-circular gouges of different sizes, some circles, and the line and corner tools shown at Fig. 146, of which two are volutes or scrolls.
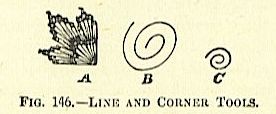
The single-line fillet is first worked round the side, equidistant from each of the .edges. The tool A is then worked at each corner, as shown. Inside this, again, the fillet is used so as to produce a square incomplete at the corners, which are afterwards finished off with a gouge. The central ornament should be worked blind first. The middle knot is formed with gouges carefully worked so that the lines interlace. At their ends the volute (Fig. 146, B) is placed, and to this is added the smaller volute, 0. The circles worked within each other finish the design, which is chaste and pretty. Of course, the design is mainly one of lines. In others the ornaments preponderate, and a few lines are only used to bind them together in something like a coherent decoration.
Other designs have more of a border character consisting of a wide square or oval framework, formed by working broad rolls or a multiplicity of tools round, while the middle of the design has no ornament. For look, few methods are better than to cover the sides with scrolls or gouges carefully arranged to run into or branch out from each other, while small terminal tools spring from their extremities. Some of the smaller tools shown at Fig. 125, p. 151, are well adapted for this. Ancient binders of repute seem to have been very fond of a style of decoration which secured the most massive and showy appearance at little cost of designing skill. This was done by running a couple of broad rolls round the boards, working some large ornamentssay, a crown or a mitrein the middle, and filling up all the interspaces by continued repetitions of some small tool, as a fleur de lis or a rose.
Many of the books of Henri II. and Diane de Poitiers are finished thus; and the famous French binder Le Gascon was also much addicted to this manner. A side can be also completed by the use of rolls alone, working them in gradually lessening squares, or, rather, parallelograms, inside each other, and ending with a centre tool in character with the rolls. Blind Tooling. This is seldom done upon the sides of morocco-covered books. With calf it is not uncommon to run a roll round the board, and to fill up the central space with blind work produced by plates, and known as “graining.” The plates are of metal, and bear the “grain” that it is desired to impart to the leather on one side. One of the most common patterns is that termed ” russia.” For this, slight file-cuts are made round a sheet iron or copper plate, and thin copper wire is coiled around, passing into each of these saw-slots. When all the wire is wound, the plate is covered with molten solder on one side, which solders the wire firmly to that side of the plate.
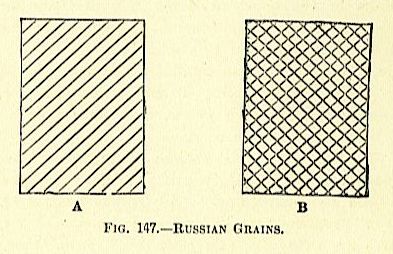
The folds of loose wire on the other side are then removed, and the working face of the plate resembles A (Fig. 147), the lines of wire standing up boldly. To use these plates, one is placed on each side of the book, the whole put between boards, well pulled down in the standing-press, and left in all night, or longer. When removed, it will be found that the plates have stamped in the pattern A (Fig. 147) on each side. The plates are now reversed, so that the lines run across those already made, and again screwed down in the press. When taken out, the side will be found to bear the complete russia pattern, as at B (Fig. 147). Besides the above pattern, there are others known as morocco, turkey, fish scale, basket, shagreen, waving, and double patterns. These are engraved in solid metal plates, and are used the same as the ” russia ” plates, but do not need reversal and a second impression. Inlaying.
From a very early period in the history of bookbinding, endeavours have been made to get variety by embellishing the sides of the boards in various devices with pieces of leather of different colour to that which the book was bound in. This is termed ” inlaying.” Most of the larger volumes in the famous library of the celebrated Grolier, chancellor of France, were inlaid. The pattern generally used was that of interlaced strapwork. In Grolier’s time, this peculiar kind of ornament was very popular, especially in Flanders and Germany, and to some extent in France, as a general decorative enrichment; it consists of a narrow fillet or band folded and’crossed, and occasionally interlaced with another, the convolutions sometimes exhibiting much ingenious elaboration. The style originated, however, at a much earlier period. A specimen which dates as far back as the eleventh century, and possesses all the characteristics of the Byzantine art of that time, is sculptured in stone over the church gate at Nassau, Saxony. The adoption of this peculiar ornament was exceedingly common in the later days of the Renaissance, and became a prevailing characteristic of that style. It was carried to perfection under Henri II. of France, and hence it is not surprising to find it brought into the bookbinding of that era. Books so bound are often called ” Groliers” in the present day, from those of that chancellor bound in this style.
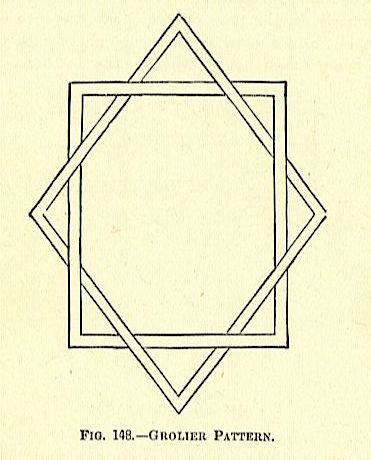
Fig. 148 exemplifies a simple pattern of this description; it consists of an interlaced square and diamond. Patterns of this kind are easy for anyone to design in great variety. It is only necessary to bear in mind that any under of either ribbon must be followed by an over. Fig. 149 shows a more complex corner strapwork ornament of the time of Henri II.
The pattern is usually cut out of morocco of two or more colours, differing from that of the book cover. For instance, if the book be bound in purple morocco, the square (Fig. 148) may be scarlet, and the diamond bright green. They may be cut out with a sharp-pointed knife. Of course, the leather is only used single; that is to say, when one colour appears to go under thd other, that portion is omitted. The leather should be pared thin before the ornament is cut out, as otherwise it may be found very difficult to pare it. It should also be cut from morocco which either has no grain or from which the grain has been rubbed out.
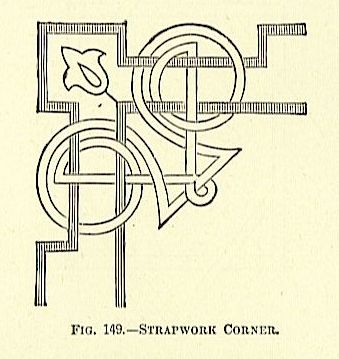
The various portions of the ornament are carefully pasted over with thick paste, laid accurately care also being in the position which they are to occupy on the book side, and rubbed down scrupulously with the folder; taken not to stretch the leather. When the paste has got out, place a pie the book in the a little set, clear away any that has squeezed ce of clean waste paper on each side, screw press and leave it there until dry. The inlaid ornament is finished by working pallets and line tools in gold around all its outlines. These had better be in fine lines. If the binder have a tolerable assortment of single-line pallet gouges, and the others recommended in Chapter XIX., he should have no trouble in matching any pattern; but, if he have any doubt, then, in designing his pattern, he mrst take into consideration what tools he has, and modify it accordingly.
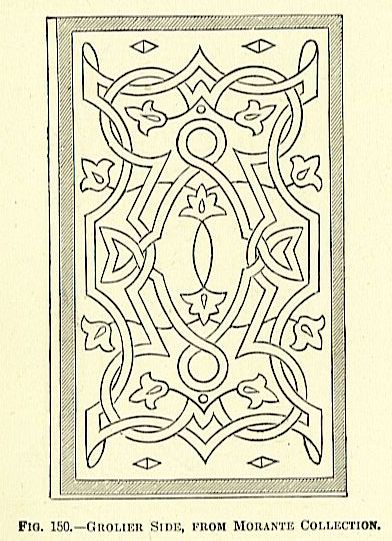
Fig. 150 shows a side of an ancient book in the Grolier style, from the Morante collection. This pattern is a very good one. Fig. 151 shows a less complicated pattern of the same period. Etruscan.In this style, instead of being covered with gold, the back is ornamented with Gothic and Arabesque compartments, or imitations of Greek borders and Etruscan vases, in their proper colours, which, when well executed, have a good effect.
The Marquis of Bath possesses a copy of Caxton’s ” Recuyell of the Historyes of Troye,” bound in this coloured manner by Whittaker, of London, who some years ago brought it to great perfection. The back represents a tower in imitation of stone, on the battlements of which is a flag. bearing the title, and on a projection of the tower the name of the printers is impressed. On the sides are Trojan and Grecian armour in reliefs, round which is a raised impression of the reeded axe. The insides, which are also of russia, are ornamented with drawings, in Indian ink, of Andromache imploring Hector not to go out to fight, and the death of Hector. The edges of the leaves are gilt, on which various Greek devices are painted. To execute this kind of work properly, the design must be carefully marked out on the covers. The proper tints and shades for the colour must be ascertained by trials on waste pieces of the same leather as the book is bound in. Painting.Another variety of ornamentation for the sides of whole-bound books are landscapes. These can of course only be done if the workman be skilled in painting. The volume ia prepared by being paste-washed, so as to present an uniform fawn colour, the designs slightly traced and afterwards coloured, according to the pattern, the colour being mixed to the proper shade with water. The shades must be tried on pieces of refuse leather, as, being spirit colour, when once laid on, no art can soften them down if too strong, and a peculiar lightness of touch will be necessary to produce effect. Portraits, &c., may also be executed in this manner, and many superb designs have at times been executed by the best binders of France. M. Didot, the celebrated Parisian printer, presented a copy of the ” Henriade,” published by himself, and most elegantly ornamented in this style, to Louis XVIII. It was executed by M. Leniers Belliers, bookbinder, of Tours, and exhibited on one side a miniature of Henri IY., and on the other a similar one of Louis XVIIL, both perfect likenesses. The greatest difficulty consisted in the portraits, which were first imprinted on paper, very moist, and immediately applied to the cover, on which they were impressed with a flab roller. When perfectly dry, they were coloured with all the art of which the binder was capable, and the other ornamental paintings were executed by hand. This kind of work demands much time and care. When this style of ornamentation is required, and the workman does not possess the requisite skill to properly paint a landscape, the same, or nearly the same, effect may be attained by the use of “transfer” pictures. The proceeding is as follows : Cut the print intended to be transferred close to the design on the sides. Let it steep in glaire till it is well saturated. During this time, glaire the book twice, letting it dry on each application.
Take out the print, place it exactly in the centre of the side cover, and, laying a piece of paper above, rub it sharply on the book, so that it may adhere very closely. Remove the upper paper, and with the fingers rub off the paper gently until the printed design begins to appear, wetting the fingers in glaire should the paper get too dry. The utmost attention will now be necessary, for the least carelessness in removing the paper that still remains may entirely destroy the design, and the whole of the previous labour be lost. The paper must be gently removed piece by piece, till the design only appears in the leather while damp. When dry, a whiter appearance will be presented, arising from the small particles of paper adhering to the ink; but these will be sufficiently hidden in glairing the side previous to finishing. The extent and variety to which, at a small expense, these designs may be carried, with the finish and beauty given to the sides of the books, render the subject worthy of the ornamental workman particularly; but he must possess perseverance and carefulness in an eminent degree to carry it to perfection. After the gilding or other ornament is executed, the side must be finished off in the usual manner. A slight coat of varnish will give a superior finish.
MARBLING AND COLOURING LEATHER.
THIS part of bookbinding is a matter of some importance, especially as tree-marbled calf patterns have again recently revived in popularity. We will first speak of the preparation of the colours and solutions necessary. Binders differ much amongst themselves in the formulae they prefer; but the following, mainly those given by John Hannett, in his ” Bibliopegia,” may be relied upon.
All the woods and other ingredients named should be reduced to powder or small pieces before being used.
Black.
1. Dissolve 1lb. green copperas in a couple of quarts of water. The oxide contained in the sulphate of iron will combine with the tannin of the leather and produce a good black.
2. Boil in a cast-iron pot a quart of vinegar with a quantity of rusty nails or steel filings till reduced one-third, taking off the scum as it rises to the top. This liquid improves with age. To keep up the quantity, boil with more vinegar.
Brown.
1. Half-pound of good Dantzig or American potash dissolved in one quart of rain-water, and preserved in a bottle, well corked.
2. Salts or oil of tartar in the same proportion as above.
3. A beautiful brown may be procured from the green shells of walnuts.
To prepare this, a quantity of the green shells, when the nuts are gathered, must be pounded in a mortar, to extract the juice, and then put into a vessel capable of holding a sufficient quantity of water. The water being put in, the whole should be frequently stirred, and left to soak with the vessel covered. Afterwards, the liquid must be passed through a sieve, the juice well expressed, and bottled, with some common salt, for use. This liquid, after fermentation, will produce the best effects for the uniform tints, as it tends to soften the leather, and will not corrode.
Blue.1.
It is usual with many binders to use ” Scott’s Liquid Blue,” but it is well to know the composition of the colour. Perhaps the best and most simple one is that given by Poerner, which is as follows: In 4oz. of sulphuric acid of 66deg. mix gradually 1oz. of finely-powdered indigo, so as to form a kind of pulp. Place: the vessel in another containing boiling water for some hours, and leave it to cool; afterwards put in a small portion of good potash, dry and finely powdered, stirring the whole well, and letting it rest for twenty-four hours, when bottle, and use as required. This colour will appear nearly black, but may be made any shade by adding water to it. If any portion remains after being diluted, it must be put into a separate bottle, as if mixed with the first preparation the whole would be deteriorated.
2. A readier blue may be prepared by mixing loz. of powdered indigo with 2oz. of oil of vitriol (sulphuric acid), and letting it stand for twenty-four hours, and then adding 12oz. of pure water. Purple.Boil half a pint of archil, or logwood, with vinegar and water, of each half a pint.
Lilac.
Same as the purple, with the addition of about two tablespoonfuls of potash. Violet.Half-pound of logwood chips and loz. of Brazil dust, boiled over a good fire in four pints of water, until reduced one-half, and left to clear. Then throw in loz. of powdered alum and 2gr. of cream of tartar, and boil again till dissolved. This liquid must be used warm. Fawn.In two pints of water boil loz. of tan and a like portion of nutgalls, till reduced to a pint.
Yellow.
1. To Io2;. of good caked saffron, turmeric, or French berries, add a portion of spirits of wine or hydrochloric acid, and leave the mixture to macerate. This liquid is used cold, and may be varied to any shade by adding water as required.
2. In two pints of water put 8oz. of French berries, and boil till reduced one-half; then pass it through a sieve or fine cotton, add a small quantity of powdered alum, and again boil, using it warm.
Orange.
In a pint and a half of potash liquid boil £lb. of fustic chips till reduced one-half; then put in loz. of good annatto, well beaten, and, after boiling, a small portion of alum, and use warm.
Green.
1. Liquid blue and yellow, mixed, will best suit for general purposes.
2. Dissolve in a bottle loz. of verdigris in loz. of best white wine vinegar, and place the whole before a fire for four or five days, frequently shaking the bottle.
Red.
There are three sorts of red, viz., common, fine, and scarlet. Common :
1. In a tin kettle, boil 1lb. of Brazil wood, 8gr. of nutgalls, both powdered, and three pints of water, till the whole is reduced one-third. Then add powdered alum and sal ammoniac, of each loz., and, when dissolved, strain through a sieve. This liquid must always be used warm.
2. Boil 1lb. of Brazil dust, 2oz. of powdered cochineal, and a little alum, in two pints of the best vinegar, till a bright red is produced. Use warm.
Fine:
1. In three pints of water boil 1Ib. of Brazil dust and 1oz. of powdered nutgalls; pass the whole through a fine cotton, and replace the liquid on the fire, adding 1oz. of powdered alum and 1oz. of sal ammoniac; give another boil, and then add a portion of hydrochloric acid, according to the shade desired, and use warm.
2. A quicker and cheaper proceeding is by putting in a cup a portion of Brazil wood, and adding to it the hydrochloric acid, letting it stand for a quarter of an hour to extract the colour.
Scarlet:
To 1oz. of white nutgalls and 1oz. of cochineal, both finely powdered, add two pints of boiling water. After boiling some time, add 1oz. of hydrochloric acid, and use warm.
Vitriol Water.
Vitriol, as sold in the pure state, should not be used in marbling or sprinkling, as it would corrode and destroy the leather. It must be weakened at least in a proportion of 1oz. of vitriol to 3oz. of water.
Marbling Water.
It is usual with many to use the water pure, but a few drops of potash liquid used with it renders the marble more distinct.
Glaire.
Put sprits of wine in the proportion of two drops to the whites of twelve eggs, and beat the whole well together until perfectly clear.
Marbling.
Before going into details of the different marbles, it may be well to give some general information. It must be borne in mind that success in many of the marbles depends largely upon prompt and quick execution, and therefore the operator should have his colours, brushes, and preparations so disposed that everthing is ready to his hand in the order required. In preparing the colours, only sufficient for the job should be made ready, because, as a rule, when mixed, they will not keep well. The covers of the books to be marbled should be washed over with paste water, to which has been added a small quantity of pearl-ash liquid; this should be done with a sponge, and the books allowed to dry afterwards.
Next, the books should be glaired carefully and equally over, and again allowed to dry. The books are then placed upon the marbling-rods. These rods are in pairs, and slope towards the operator. The books are placed in them so that the boards rest extended on the rods, and the leaves hang between them; the tail of the book is thus lower than the head. In some cases the back is required to be left plain, and not marbled. When this is the case, a piece of wood grooved to the shape of the back, or even a piece of thin millboard or pasteboard, curved by the fingers, is placed over it. To avoid the scum arising from the beating of the brushes over the colours, it is better to rub the ends of the bristles upon the palms of the hands, on which a little oil has been spread. All these details being settled, let us begin with the simplest marble.
Common Marbles.
The book being placed on the rods, throw on the water prepared for marbling in large drops, with a coarse brush, or a bunch of quills, till the drops unite; then, with a brush charged with the black liquid, and beaten on the press-pin as directed for sprinkling the edges, a number of fine streaks are produced by throwing the colour equally over the cover. Afterwards, the brown liquid must be similarly thrown over. When the veins are well struck into the leather, the water must be sponged off, and the book placed to dry.
Another plan is to throw on the vinegar-black, then the brown, and lastly a fine sprinkle of vitriol water. If the volume has been previously coloured with any of the preparations before described, and it is wished to produce a marble thereon, the brown must be thrown on first, and then the black, as, without this precaution the marble would not strike, because of the acid which forms part of the colours. This observation is also applicable to all the other designs.
Purple Marble.
Colour the cover two or three times with hot purple liquid, and, when dry, glaire. Then throw on water, and sprinkle with sti’ong vitriol water, which will form red veins.
Stone Marble,
After throwing on the water, sprinkle boldly with the black liquid, then, with a sponge charged with strong brown, drop the colour on the back in three or four places, so that it may run down each side in a broad stream, and afterwards operate with vitriol water on the parts the brown has not touched.
Green Agate.
Sprinkle black, in nine times its quantity of water, in large drops over the whole surface .of the cover, and, when the drops unite, apply on the back, at regular distances, the green liquid, so that it may flow on the boards and unite with the black.
Blue Agate.
Proceed as above, only substituting blue in place of the green, weakened with water according to the shade required.
Porphyry Vein.
Throw on large drops of black diluted in double the quantity of water. When the colour has struck well into the leather, sprinkle in the same manner brown mixed equally with water; then apply a sprinkle of scarlet, and afterwards large spots of yellow, the liquid nearly boiling. Whilst these colours are uniting, throw on weak blue, and then nitro-muriatic acid, which, flowing together down the sides, will form the vein distinctly.
Tree Marbles.
These had their origin in Germany, whence they passed into this country; they are great favourites, and, when well executed, are very elegant. They are formed by bending each board down the middle, so that the water and colours flow from the back and fore edge to the centre of the board in the form of branches of trees. The name is also given to such as are made to imitate the grain of wood, but those are rare.
Walnut.
Formed by sprinkling black and brown only, as for the common marble.
Cedar.
After sprinkling as for walnut, and before perfectly dry, apply lightly a sponge presenting large holes, dipped in orange, upon various places on the cover, so as to form a description of clouds; afterwards apply the fine red, with a similar sponge, evenly upon the same places, and, when dry, give the whole two or three coats of yellow, taking care that each penetrates evenly into the leather.
Mahogany.
The proceedings are nearly the same as for the walnut, the difference being merely in sprinkling the black more boldly, and, when perfectly dry, giving two or three uniform coats of red.
Box.
In order to imitate the veins contained in box, the boards must be bent in five or six different places, and in diverse ways. After placing the books between the rods, throw on the water in small drops, and proceed as for the walnut; when perfectly dry, throw water again in large drops, and sprinkle on small spots of blue, equally diluted with water; and when again dry, and rubbed well, apply the scarlet with a sponge, as directed for the cedar. Finally, when dry, give two or three coats of orange.
Wainscot.
Colour with strong brown glaire, and place between the rods, with the boards flat; throw on weak black in large spots, then brown in like manner; and, lastly, sprinkle boldly with vitriol water.
Sprinkles.
These are produced by paste-washing the book (not glairing), then putting on the rods, and sprinkling it over in fine spots with any of the colours given, precisely as the edge is sprinkled. Plain cheap school books are often thus sprinkled for common work.
COVERING.
THE materials of the cover vary widely, and comprise most kinds of leather, parchment, vellum, bookbinders’ cloth, velvet, needlework, wood, and imitations of different kinds, such as leatherette and feltine, Amongst the leather we have various kinds of morocco, goatskin, or imitation morocco, such as ” levant,” calf of different kinds, and imitation calfs, roan, sheep, and occasionally russia never hogskin.
Whole-binding.
If the book is to be entirely covered with leather, the skin, whether of calf or morocco, is laid down upon a large smooth board, with the ” flesh ” or rough side upwards. Then the book is grasped by the fore edge of the leaves with the left hand, the millboard hanging loose, and lowered down on the leather, so that the book rests on it and the boards lie on it flat (Fig. 109).
The leather can now be cut with a sharp-pointed knife round the book, allowing enough all round to turn in, which may be about fin. for an octavo, and less or more for smaller or larger books. Next, the exact size of the book may be marked on the leather with a soft blacklead pencil. Some binders keep paper or millboard patterns for the covers of all sizes of books, and cut out by these. The edges of the leather must now be “pared,” “skived,” or shaved down all round, so that they will cause no unsightly protuberances when the leather is pasted on. The part between the pencil marks and the edge is the portion to be pared. The operation is performed with a long sharp knife, on a marble slab, a bit of lithographic stone, or a piece of plate glass. The French paring knives, sold by Messrs. Eadie, of Great Queen-street, Lincoln’s Inn (whose name we have previously mentioned), are by far the best in the market. The leather is laid on the slab with the grain side downwards, and drawn tight by the fingers and thumb of the left hand, while the blade of the knife is laid almost flat upon the edge of the leather, and gradually pushed forward by the right hand. More or less leather will be removed according to the angle at which the knife is held, and if it be held too upright it will go through the leather before the edge is reached, and make bad work. In setting the knife upon the oilstone, the ” burr ” should be left on the side which is to go towards the leather in paring; for, if the burr be on the other side, the knife will slip off the leather or not cut. What is especially necessary, when some skill is attained, is to take off a level shaving of the right thickness, and not to leave a series of ridges on the leather by uneven cutting. To overcome some of the difficulty which morocco and roan present in paring, it is the usual practice to damp the edges of the cover for a little way in, with a sponge and water.
The same plan is occasionally practised with rough calf, that is to say, calf which is dressed inside out, so that, when the book is covered, the ” flesh ” side is placed outwards. This is usually a ” stationery” binding on account books, but occasionally law books or books of reference are bound in “rough” calf. Great care must be taken in paring the back, both at the head and tail, or when turned in the effect will be bad. It requires great practice to pare leather properly. If the cover be of morocco, it should now be well wetted with a sponge and grained up either with the hand or a piece of cork. The leather is then folded together, and rubbed in all directions with the cork until the ” grain” is sufficiently developed, when the cover is pasted over on the flesh side with thin paste and hung up to dry. For ” straight grain,” the leather should only be rubbed one way. Where it is desired to have the morocco quite smooth, to imitate some antique book, the leather should be soaked with water, and the grain quite rolled out with a rolling-pin, used with good pressure; or, if the cover be small, it maybe beaten out by the careful use of the backing-hammer. Russia also should be moistened and well rolled with the rolling-pin. The cover (if of morocco) should now be well pasted with good thick paste, made as before directed, applied with a small brush (what painters call a ” giash tool” is best). The paste should be spread evenly, and no more should be left on than is required to make the cover adhere to the book. Any lumps or hairs from the brush should be carefully removed. The cover is then laid on a clean millboard o:a the bench, fore edge to the operator, and pasted surface upwards, the squares at the book’s head and tail carefully adjusted, a slight touch of paste applied with the finger to each band, and then lowered down upon the cover, as at Fig. 109, in such a position that the back of the volume which is farthest from the workman will be in the middle (see B). The far part (A) is then brought over the board which is uppermost, and fastened at the fore edge. The square portion (C) is then treated in a similar manner.
Care must be taken during this manipulation that the squares are not disarranged. The volume is now placed on its fore edge, and the leather tightly strained over the back with the hands and rubbed smooth with the folder. The leather is then alternately raised from each side board, drawn as tightly as it can be, turned in again at the fore edges, and smoothed down well on the sides and back with the hand and the folder. In manipulating morocco covers, care must be taken at every stage not to mark the covers with the folder. The bands (if any) should now be pinched slightly with a pair of band-nippers. The cover at the head and tail of the book must at this stage be turned in; to do so, take it by the fore edge, and place it upright on the bench with the boards slightly extended, and with the hands, one on each side, slightly pushing back the board close to the headband, and folding the cover over and into the back with the thumbs, drawing in so tightly that no wrinkle or fold is seen. If the back is an open one, the loose part of the fold previously made must be covered over with the leather, in the same way as the boards. The leather on both boards being turned in along the fore edge, and the edges rubbed well down and square, the parts of the cover are next brought together at the corners, pulled up almost perpendicularly with the board, pinched together, and nearly all above the angle of the corner cut off with the shears.
The portion on the side is then turned down (Fig. 110), and the other, on the fore edge, wrapped a little over it, the corner being set by the aid of the thumb-nail, and folded as neatly as possible, and so that no raw edge of the cover is visible. The folder should also be well rubbed in the joints to make the cover adhere to those parts where the back is likely to hold the leather oft’. If any derangement of the squares has taken place, it must now be rectified. The headband must next be set; this is an important operation, upon which much of the beauty of the work depends. It is usual to tie a piece of fine twine round the book between the back and the boards before the headband is set. This cord rests in the places where the inner corners of the bands at head and tail are cut off (Fig. 111), and should be tied in a knot.
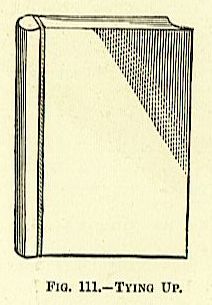
With a small smooth folder, one end a little pointed, the double fold of the leather at head must be rubbed, to make it adhere; and if the boards have been cut at the corners, the hand must be applied thereon, and headband forced close to the leather and made even on the back with the fingers, while a neat cap is formed of the projecting part on the top of it. The folder is then applied again to the edges of the boards, to ensure their square appearance. The cap of the headband should be exactly level with the boards, and yet cover the headband neatly and completely. The grain of the morocco should be nowhere marked or obliterated. The perfection of covering in TYING UP morocco is to have all the edges of the boards sharp and square, without the grain of the leather being anywhere destroyed. In some cases, when the leather is unusually thick or untract-able, some binders ” tie up ” the bands, to ensure the adhesion of the cover to the back, in the manner following. A pair of backing-boards are placed on each side of the book at the fore edge in such manner that they project slightly over it, and are then secured by a cord with a slip-knot (see Fig. 112). Another knot of the same kind is made at the end of a longer piece of cord, and the loop is placed crossways around one of the end bands. It is then drawn in a slanting direction over the backing-board at the fore edge, and drawn tight; next passed round the other band, then over the fore edge again, and so on with the other bands.
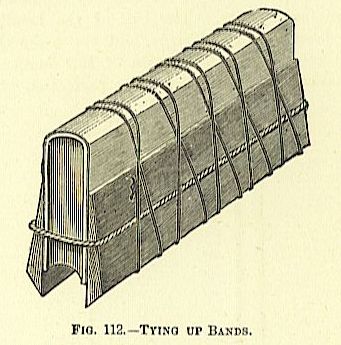
This is roughly shown at Fig. 112, whence it will be seen that the cord, which should be kept fairly tight, presses down on each side of each band and drives the leather home there, while the backing-boards prevent the cord leaving any impression on the edge of the boards at the fore edge. Th s cord is left on all nigbt until the cover is dry. TYING UP BANDS Half-binding.The same general directions as given for whole binding are applicable to half-binding. The corners are put on first, and afterwards the backs. With calf, the corners are first rolled up in the backs, flesh side out, tied tightly round with a strip of paring, and thrown into a pail of water.
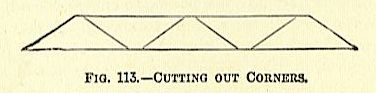
When they are sufficiently soaked, the water is squeezed out, and they are then untied and smoothed out well with the hands on a flat board, ready for pasting. The shape of the corners is shown in Fig. 113. As mentioned in the covering of whole-bound books, great care should be given to turning in the corners neatly. The corner should be put on slightly aside, so that when the side of it is turned over, there is a slight double of the leather at the extreme point, as at A, Fig. 114. Now when the top fold, B, is turned down, it is easy to see that the corner at the extreme angle will be a double or fold of the pared leather instead of a raw edge, and, therefore, much more durable.
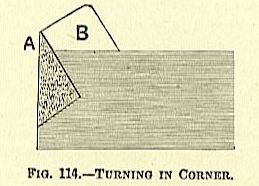
All calf books, whether whole or half bound, will require a small piece of morocco leather affixed to the back, to receive the lettering. The calf itself, when properly prepared, will form a surface sufficiently good to receive, and retain, a fairly perfect impression, in gold, of the ordinary ornamental finishing tools; but good impressions of the letters cannot be depended upon, especially if small. When the back of the book is provided with five bands, the lettering generally occupies the space from the first to the second, as in Fig. 115 at A.
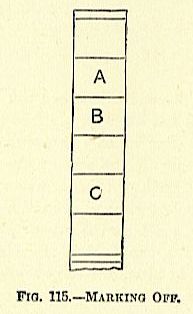
Occasionally there is a subsidiary lettering of the volumes, author’s name, &c. This is sometimes placed on the single space just spoken of, sometimes on the space between the second and third band, as at B (Fig. 115), or more frequently between the fourth and fifth, as at C. Where the back is not provided with bands, the space should be divided off by the compasses, and the places where the bands would be, and where the fillet will be worked across, should be well and distinctly creased with the edge of a sharp folder, so as to leave a clearly perceptible channel. A single mark should be also made at the head, and a double one at the tail, as at Fig. 115. A piece of smooth morocco, which has no grain, or from which the grain has been entirely removed by wetting the leather and rolling it with a rolling-pin on a marble slab, or smooth board, or glass, or by rubbing it well with a blunt folder, is selected. A slip of the width between the bands is now set off with the compass, and cut off with a sharp-pointed knife on the cutting-board.
Each edge of this is pared very carefully, and pieces are accurately cut off the slip of the width necessary for the various volumes. Each of these has now its other two edges carefully pared. The lettering pieces are then well pasted over with good thick paste, stuck on the proper place, and well beaten and rubbed down with the folder. Scarlet, bright green, or purple, and occasionally blue, are the colours usually chosen for lettering pieces. Where there are two, they are generally of different colours. Half-bound books have their sides covered with cloth or marbled paper, the first being the more substantial.
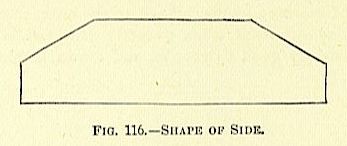
Either is folded and cut to the shape of Fig. 116, so as to allow enough to turn over, and to permit sufficient of the corner to show The corner space must be of the same size on both sides. The cloth sides are glued as previously described; the marbled paper sides are pasted with thin paste. Both should be carefully rubbed down, and made nicely square and sharp over the edges of the board with the folder. The cloth is usually selected to match the leather in colour and (if morocco) in grain as far as possible. Some binders think that the sides of half calf should contrast, but this is not good taste. Marbled paper should match the end-papers and edges. The new leatherette, feltine, &c., may at times be used advantageously.
Cloth Binding.
The covers are cut out, like the leather ones, a little larger than the size of the book, to allow for turning in. They are then each rolled up with the hand the contrary way to what they have been in the roll. This is to take the curvature out of them, and make them lie flat. Each one is now laid, right side down, upon the glueing-board, and is lightly but completely glued over. To make a good job of this, it is indispensable that the glue should be in good condition. In the first place, it should be thoroughly melted, and so thin that it will run easily from the brush when the latter is raised from the glue-pot. But it may be all this, and still be stripy and scummy when applied, as the grain of the cloth offers some obstacle to complete distribution. To “cut up” the glue, therefore, it is best to take the glue-brush (which should be a good sized one) out of the pot while filled with glue, dab it down on a piece of waste brown paper, and, with the handle between the open palms of both hands, give the brush a rapid rotary motion, while held upright, for a few minutes. The brush is then replaced in the pot and the same motion imparted to it. In a few minutes the glue-pot will be filled with froth. The glue is now well ” cut up,” and, if the cloth be rapidly but perfectly :glued over, there will be no streakiness, but tlie whole surface will look, as it were, frothy, as did the glue in the pot.
The book is now laid upon the glued cloth, and the manipulation of covering proceeded with, much the same as the covering of a whole-bound book in leather. The cloth must be well rubbed down, so as to thoroughly adhere both to the back and boards, and the edges of the boards must be made nicely square. The joints should also receive particular attention, but great care should be taken not to mark the cloth with the folder, nor damage the grain more than possible. If necessary, through the glue getting too cold to work, the book may be held to the fire for a few seconds, when the glue will again become fluid. The ” forwarding ” of the book is now practically finished, and it is ready for the finisher. Some binders paste down the endpapers now, while others prefer to leave that operation until the book has been finished.
Whenever the former plan is carried out, it is best to cut a slight shaving only from all round the outside loose end-paper with the knife and cutting-board, as this obviates any unsightly projection of the end-paper inside the board, caused by the stretching of the end-paper from the damping with the paste. The board of the book is laid back, and the end-paper pasted over with thin paste by the brush, and the board lowered upon it, when it will adhere. The board is then again raised, and the end-paper rubbed down with the hand and folding-stick, the latter being especially applied with great care at the joints. This is very necessary, or the paper may not properly “go home ” and adhere here, and, if it should not, an unsightly protuberance of loose paper at the joint will be the result, which is generally termed a ” pencil case,” and is a clear mark of bad bookbinding. Flexible Binding.The kind of work thus denominated concerns those books which, as before explained, are sewn upon the bands without any saw-kerfs being made in them, so that the bands or cords stand up from the back, as in old books.
This kind of work is not lined up, and the leather is attached directly upon the backs of the sections themselves; but a piece of fine linen is glued over the headband and well rubbed down, the surplus being cut off when dry. The bands are damped, and then knocked up perfectly straight and square with the end of a cutting-board or a blunt chisel. If there are any saw-kerfs in the back from former binding, pieces of untwisted cord are pasted and carefully worked in. These are all well smoothed when dry, and no means should be neglected to make the back perfectly level, as any inequalities will show through the leather when the book is covered. In the style called ” flexible, not to show,” a piece of stiff muslin, called ” mull,” is glued on the back first, and th^n one piece of paper. For the hollow, three, four, or even five pieces are glued one on the other to gain firmness, whilst the book itself will appear as if it had a flexible back.
<!—-more>
p style=”text-align: center;”>PLAIN FINISHING.
THE materials required in finishing are paste, size, glaire, and oil. The first is the ordinary thick paste of the bookbinder, which should be made as advised on page 61. The size is made with parchment or vellum cuttings, such as are rounded off from account-book covers. When size is required, a quantity of these parchment clippings are cut up very small, put into a pipkin of glazed earthenware, covered with clean water, and set on the fire to boil. The pipkin should have a tin lid to keep out soot. After being boiled, and then allowed to cool, the size should be a jelly of such consistence that, if the pipkin be inverted, the size will not run out. The size is reheated every time it is used. The glaire is made of the whites of eggs well beaten up, as follows: Break a number of eggs, according to the quantity of glaire you require, and get the whites into one vessel, without a particle of yolk. Then put in the “devil” [24](see Fig. 18), and, taking the handle between the palms of both hands, cause it to revolve rapidly. This will quickly beat the glaire up into foam; which will fill the cup, mug, or other vessel containing it. If put by for a while, the white will subside from the froth, and should be poured out into another vessel.
This is glaire, and differs from the ordinary white of egg, in thisthat whereas the latter is stringy and ropey, so that it would not lie evenly on any surface, the glaire is as limpid as water, and can be evenly spread on anything; hence “beating up” the glaire well with the devil is indispensable to the finisher’s success. Some kind of oleaginous substance is required to be applied to the leather after glairing, and immediately before the contact of the gold. We, and most bookbinders, prefer olive oil, but many use lard, and some say that nothing equals a palm-oil candle. The first step in the finishing process is to paste-wash the books. We may mention that, in an ordinary shop, a certain number of books, known as a ” batch,” are generally forwarded together, and also finished together. There are certain advantages in dealing with a batch of, say, twenty books, which would be wanting if they were either forwarded or finished by couples.
For the paste-washing, then, the back of the book is smeared over with the thick paste. If it be a calf book, the paste is then well rubbed up and down the back with the edge of a blunt folder. A sponge, dipped in clean water, is next taken, and the paste removed from the back; and the sides, corners, or other portions of the leather are washed over with the combined paste and water remaining on the sponge. The latter is then well squeezed out in the “water, and the book washed over with clear water alone. This paste-washing is intended to fill up holes, pores, and interstices in the leather, so as to form a good level foundation for the size and glaire. The paste-washed books are now left to dry, and are next washed over with hot size, applied with a piece of sponge. When the size is dry, they are glaired; the glaire is also applied with a piece of clean sponge. The number of times the glaire is applied depends upon the kind of leather. For sheep and roan, one good glairing over will be sufficient; for morocco, the same. On morocco, however, the sponge is not generally used, but the glaire is applied only at such places as are to be gilded, with a camel-hair pencil. Calf is glaired three timesfirst, over the back, sides, and corners; second and third, over the back only.
Each coat must be allowed to dry before the next is applied. When the last application is just dried, but not hard, the finishing may begin. We will take a plain half-calf book as first specimen, filleted and lettered. We first put a single or two-line fillet on the gas stove (see [25]Figs. 11 and [26]12, page 19). The single fillet is a brass wheel, which has a periphery or edge like A [27](Fig. 117); the two-line has an edge like B in the same figure.
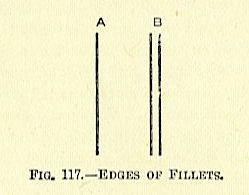
The book is taken and lightly greased with a little oil or lard, applied with a piece of cotton wool or flannel; it is then screwed up in the finishing-press, and the press turned on the board, so that the head is to the operator’s right hand. Meanwhile, a leaf of gold is taken out of the book, with the gold-knife, and laid on the cushion. If not quite level, a slight breathing, exactly upon its centre, will bring it flat. Now cut from one side sufficient strips, just a little broader than the fillet is wide. This is done by putting the gold-knife gently on the leaf, and pushing the knife backwards and forwards, as if sawing, when the gold leaf is easily cut. The fillet is now taken from the stove, and tested to see whether it is sufficiently hot. This is done by spitting upon it, and judging by the hissing. If the saliva adheres to it, and slowly evaporates, it is not hot enough. If, on the other hand, it forms a globular drop, and slides swiftly off, the tool is a trifle too hot. The right heat is just between the two extremes.
When the required temperature is arrived at, pass the edge of the tool a few times over the flesh side of a piece of leather, or the gold-cushion, to make it clean and bright; then carefully draw it across the palm of your left hand, to impart a very slight greasiness to the edge. If it be now carefully rolled on the strips of gold leaf on the cushion, they will adhere to it. When its edges are thus supplied, roll the fillet carefully, and with an equal pressure, over the back of the book, at the places where you have previously marked it with the folder. The fillet must be hot enough, or the gold will not adhere to the leather, but not too hot, or the leather will be burned, and the fillet will cut it. When the book is filleted, the next thing is to letter it. There are two different ways of doing thiseither with separate letters, or with the; whole title set up in a row of type. The first is the old-fashioned way, is quicker, and still popular with many of our best binders; the second is simpler, and easier for the amateur. With the first, you have an alphabet of separate letters, each cut on the end of a small piece of brass, and fixed in a round wooden handle. The brass letters are kept in a round pasteboard box, face upwards. Supposing your book is Pope’s ” Homer,” you pick out ” P, 0, E, S, H, M, R,” and an apostrophe and full point, and range them on the gas stove the ends that bear the letters over the hot centre of the stove, and their round handles resting on the semi-circular niches in the iron ring that surrounds the stove (see [28]Fig. 12, page 19). It is well to have a small piece of sponge, fixed to a block of wood, and wetted. By placing each letter in contact with the wet sponge before using, you can tell from the hissing whether it is of the right heat. This is more cleanly than the saliva test. You now cut out a square piece of gold, of the size of the lettering piece, and bring it to an unoccupied part of the cushion. The book is then lowered upon it, and moved a little from side to side, when the gold leaf will adhere to the lettering piece. The book is next to be screwed up in the finishing-press again, with the head, which must be furthest from the operator, elevated a little more than the tail. It requires great dexterity to letter with the separate letters, and different binders adopt slightly different plans.
Perhaps the following is best for beginners: Take up the P first, and, having rubbed it on the leather, or gold-cushion, to brighten it, hold the handle with the right hand, and, steadying the end of the letter with the thumb of the left, carefully print it where you wish the centre of your first line to be. Replace the P on the stove, and, taking up the 0, stamp that on to the left of the I’; take the latter letter again, and stamp it on to the left of the 0. Replace the P on the stove, and, raising the E, imprint it to the right of the P first made; let the apostrophe (‘) follow, to the right of the E; then the S, to the right of the apostrophe, which will finish the first line, ” POPE’S.” Now take the M, and stamp this in the centre of the lettering piece, a short distance below the first line; follow this by the 0 and the H on the left side, and the E and the II on the right. Of course, great care must be taken to ” work” the letters in a perfectly straight line. Some binders affect various little ” dodges” to help them, as, for instance, marking lines across the gold leaf, with the point of a dull knife or a blunt bodkin; others take a short piece of sewing-silk, with a tiny flat lead weight at each end, and lay the silk across at the place as a guide; but care and practice are all that are needed. When the types are used, you have a ” fount” of the size required (for you need more letters by this plan, as you cannot use the same letter again and again). These are generally kept in a box, with compartments for each letter. Then a type-holder, as shown at [29]Fig. 14 (page 22), is necessary. The line or lines required are then picked up, ranged in order in the type-holder, and screwed up tightly. The whole apparatus is then heated, and the lines worked across the back of the book in one motion. When the lettering and filleting of the book are completed, the gold leaf is wiped off with the gold-rag. This is generally a piece of open canvas which has been well greased, and consequently the fragments of gold leaf attach themselves to it-(This rag, in process of time, becomes of value, in consequence of the accumulated gold contained in it, and may be sold to the gold refiners.) The gilding is then cleaned up more carefully with a piece of flannel, and on morocco very frequently with a piece of indiarubber, smartly but cautiously applied. Blind Tooling.Most books are further ornamented by having the heated tools stamped on some part of them without any gold; this, of course, only leaves the pattern indented in the leather, and is technically termed ” blind tooling.” Generally, a tool is worked ” blind ” on each side of the gilded fillets. If it be wished that the blind tooling be left ” dull”that is to say, free of glairethe latter can be removed with the point of the finger, wrapped over with a piece of fine cotton and wetted.
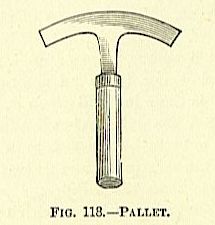
The pallets used in blind tooling are of the shape shown at Fig. 118, with various patterns on the edge. Some of them are very simple and some very elaborate. At Fig. 119 we give several patterns of pallets.
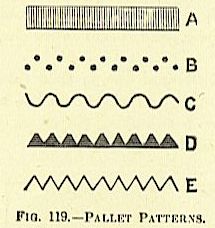
The finishing-press (with the volume screwed up) is turned again, so that the head of the book is to the right hand of the operator, and the pallet heated and worked across on each side of the fillets, so that the completed back presents the appearance of Fig. 120; A being the gold lines, the blind ones being on each side of them.
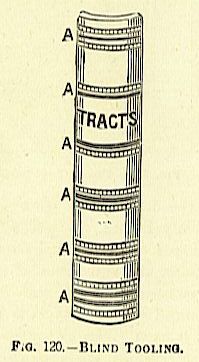
The book, if a half-bound one, is then taken out and laid on its side on a clean millboard placed on the work-bench, and the two-line fillet (blind) is run along the edges of the sides, both at back and corners, as in Fig. 121.
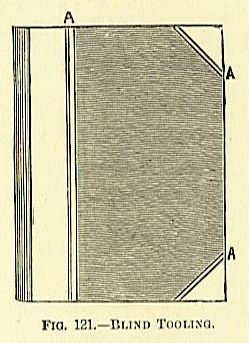
The finishing of the half-bound book is now completed, if it is only to be plainly bound. The back is polished with the polisher to render it more glossy and level. There are two forms of this tool, as shown at Fig. 122. A is the more usual form, and the only one suited to the sides of whole-bound books; but B is more useful to apply to the sides of the boards.
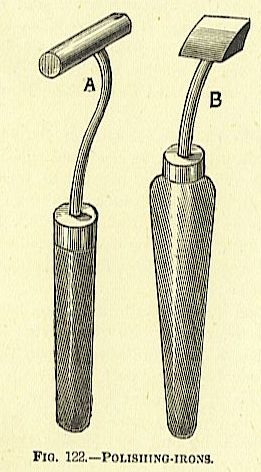
In either case, the implement is heated on the stove, rubbed clean and bright on a piece of leather, and, the book being held in the left hand, with the head or tail against the workman’s abdomen, the polisher, held in the right, is passed swiftly, with a slight, equable pressure, a few times up and down the back of the book. Very frequently half-calf books are “varnished” over the leather. This is partly in order to give a better gloss than the burnishing will produce, and partly as a preservative for the leather. Bookbinders’ varnish can be procured of any of the dealers in bookbinders’ materials whom we have enumerated. The French is the best. It is well to give a good price for varnish in preference to using inferior qualities; thereby certainty of a good result is obtained, and the best will go farther, and so be found the cheapest. It can be applied with a bit of sponge. We certainly should not advise the amateur to attempt to make his own varnish, but, in order to render our book complete, we append an approved recipe, that of the celebrated Tingry ; it is perhaps the best known for its brilliancy and drying qualities. Put into a vessel 6oz. of mastic (in drops), 3oz. of sandarach (finely powdered), 4oz. of coarsely broken glass (separated from the dust by a sieve), and 32oz. of spirits of wine, of about 40deg.; place the vessel upon straw in another filled with cold water, put it on the fire, and let it boil, stirring the substances together with a stick to keep the resin from uniting. When the whole appears well mixed, put in 3oz. of turpentine, and boil for another half hour, when the whole must be taken off, and stirred till the varnish, and’the water in which it is placed, cools. Next day, filter it through fine cotton, by which means it will acquire the greatest degree of limpidity, and well cork it up in a bottle. Another recipe is given by M. F. Maiset, of Chatillon-sur-Seine, and may be prepared similarly to the preceding. The ingredients are three pints of spirits of wine, of 36deg. to 40deg.; 8oz. of sandarach, 2oz. of mastic in drops, 8oz. of shellac, and 2oz. of Vienna turpentine.
There is also a varnish called Caoutchouc Polish, which is very good. The varnish is first put on the back of the book, with a camel-hair brush, as lightly and in as small quantity as possible. When nearly dry, it is polished with a ball, formed of fine white cotton filled with wool, on which has been rubbed a small quantity of olive oil, to make it glide freely. The back must be rubbed at first lightly, and as fast as the varnish dries, and becomes warm, more sharply. The sides are then varnished, one after the other. Before entering further into detail on the various styles of finishing, we may here cite the advice of the celebrated Dr. T. F. Dibdin, a great authority upon the subject: “First, let your books be well and evenly lettered, and let a tolerable portion of ornament be seen on the backs of them. 1 love what is called an overcharged back. At first, the appearance may be flaunting and garish ; but time, which mellows down book ornaments, as well as human countenances, will quickly obviate this inconvenience, and about a twelvemonth, or six months added to the said twelvemonth, will work miracles upon the appearance of your book. Do not be meagre of your ornaments on the back, and never suffer blind tooling wholly to pervade a folio or quarto, for by so doing you convert what should look like a book into a piece of mahogany furniture. ” In large libraries, there should not be too much blind tooling, or too great a want of gilt.
No doubt the ornament should be as appropriate as possible to the book. No one could endure gingerbread-gilt Bibles and Prayer Books, or chronicles, or dictionaries, or other books of reference. Let these have a subdued decoration on their backs; bands only full gilt, or a running edge-tool in the centre of them, with small ornaments between the bands. ” I would recommend the lettering of a volume to be as full as possible, yet sententiousness must sometimes be adopted. The lines should be straight, and the letters of one and the same form, within the line; yet the name of the author may be executed a size larger than that of the date or place of its execution, and the lettering may be between the top and bottom, [query ” second”] bands, or it may occupy the space between three bands, or even more. Re-letter old books perpendicularly, as was the custom. In fresh bindings, however, prefer horizontal to perpendicular lettering.”
HALF AND FULL GILT FINISHING.
IN our last chapter, we dealt with backs that were simply filleted in gold and blind tooling. Let us now advance a step in decoration, and advert to what is generally called “half gilt.” Here the back is provided with the raised bands, and these are tooled in gold, generally by working a broad pallet or roll, with a pattern on it, across them.
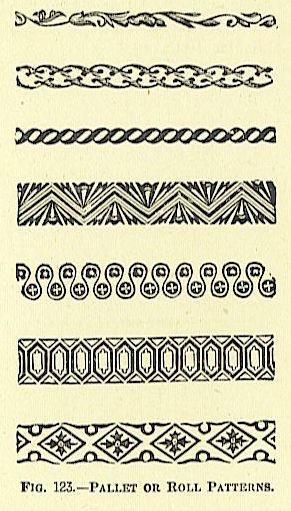
A tool may or may not be worked in the centre of each space between the bands. If it is used, it IB worked in gold. The patterns for pallets and roll edges are almost infinite in number. Pallets cost from about 4s. 6d. to 10s. 6d. each, according to size and elaborateness of pattern; rolls, from 10s. to 40s., according to pattern and diameter of roll. We have given some, and adduce a few more at Figs. 123 and 124.
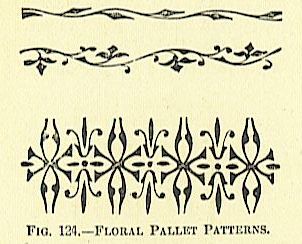
The patterns given at Fig. 124 are more novel in character, and generally imitative of floral or plant forms. These are very light and elegant, and may be had in great variety. They were, we believe, originally introduced by the Messrs. Sharwood. tool- cutters (now out of business).
The amateur should look through a tool-cutter’s specimen book, and select those that meet his taste. In forming a judgment, it is well to remember that the impression in gold will look heavier than that in printing ink, in the specimen book. Amongst bookbinder’s tool cutters we irmy mention the following: Knight and Cottrell, 9 and 10, St. Bride’s-avenue, Fleet-street; Hughes and Kimber, West Harding-street, E.G.; Thomas Francis, 10, Old Bailey, E.G.; and Frederic Knights, 10, Bolt-court, Fleet-street. Others may be found in the London Post Office Directory.
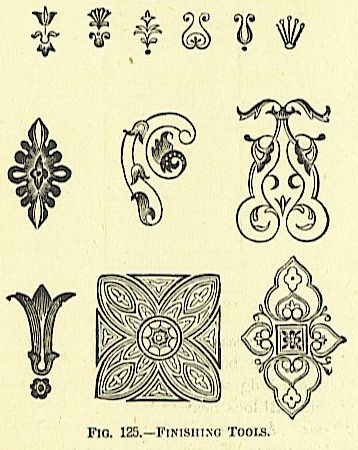
With regard to the separate ” tools,” such as would be worked in the centre of the inter-band spaces, Fig. 125 shows several varieties. Fig. 126 shows a half-gilt back. Although very effective, this class of work may be done quite quickly, because there is little or no working of separate tools.
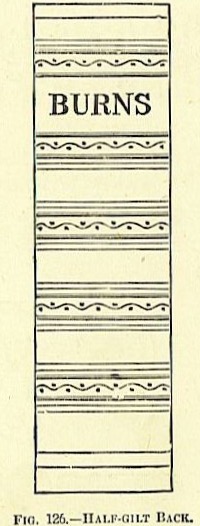
There is a kind of pallet made especially for working across bands, which may be had of any length, and in varied patterns. Several of these are shown at Fig. 127. A ” full-gilt” back has, as its title imports, the whole of the back covered with gilt tooling.
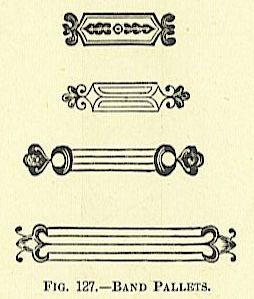
There are several ways of doing this. The book maty have raised bands, and these may be finished by the pallet or the roll in the manner just spoken of. The portion of the back between the bands may then be finished with centre and corner tools, or the back may be without bands, and finished as at Fig. 128.
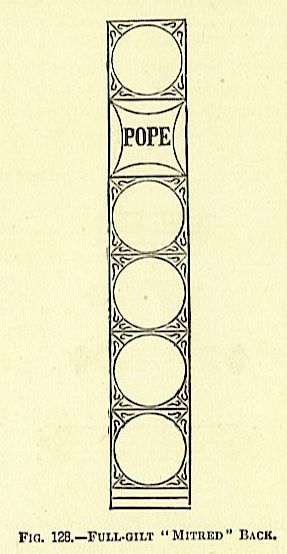
Here the pallet shown at Fig. 129 is made to do the whole of the work by being used in the different positions, so as to cover the back with squares, as at Fig. 128. If carefully selected pallets are used, this style looks very nice.

A gouge (of which the binder should possess an assortment, of different sizes) is worked on each side of the lettering-piece. Fig. 130 shows another style of back.
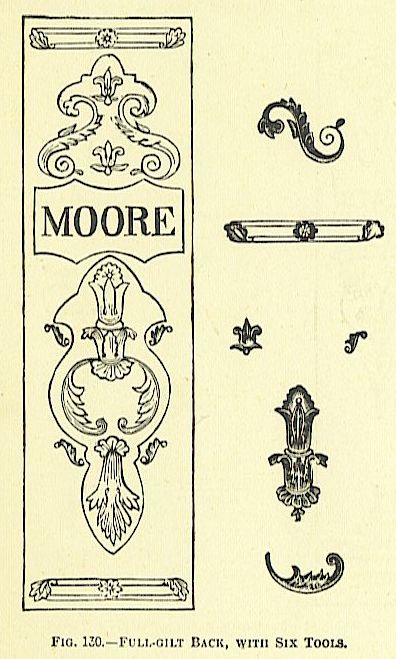
This is done with six tools, worked as shown, and a single-line pallet and gouge worked around the lettering. Fig. 131 shows another back done with four tools; and Fig. 132 another, in the execution of which only three tools and some line pallets and gouges are required.
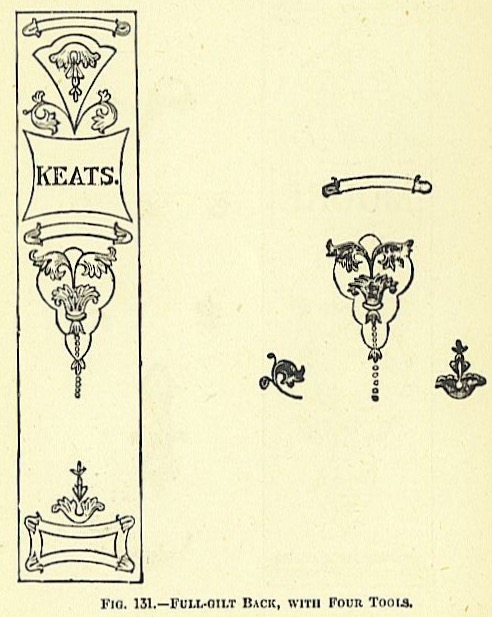
Fig. 128 is known technically as “mitred” back. There is a style now very popular for post octavos and other small books. The lettering-piece is placed near the head of the book, and a pallet worked over the whole of the back below it. A similar effect can be produced by working a repetition of any small tool, but of course this takes longer.
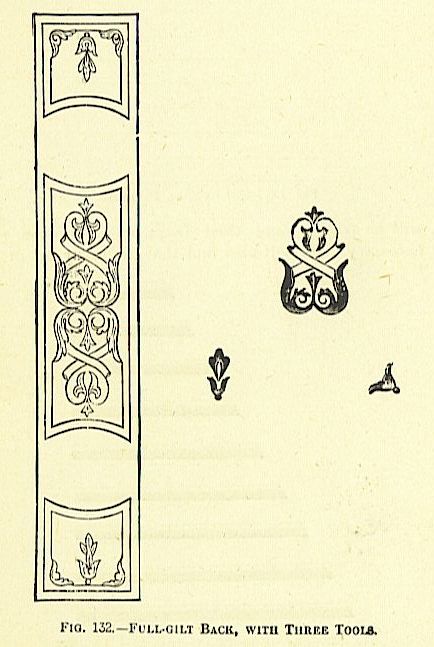
We may here quote, as a pendant to that of Dr. Dibdin in our last chapter, the very sensible advice given in the ” Bibliopegia” of James HannEtt, who viewed the matter from the standpoint of a practical bookbinder: “It is a subject of the utmost importance, in the selection of the tools for gilding, that the party have a good knowledge of the style of binding peculiar to the day, and a quick perception of the beanty of this kind of ornament, the general bearing of the designs towards each other, and their geometrical fitness for application when combined, so as to produce a series of patterns from the same tools. Without this, as may be seen in many offices where judgment has not presided in the selection, a large and expensive collection of tools may be provided, which cannot be blended together without offence to the eye of taste from the defect presented in the complete designs, which even one misfit tool will cause.” So important a point in finishing is the combination of tools, tliat the novice should spare no pains to make a good working selection, as no man can finish satisfactorily without a judicious selection of good tools, such as will combine to form an extensive series of scroll ornaments, flowers, &c.
As all combinations are composed of a variety of ornamental tools and plaiu lines, it becomes of necessity not only a matter of taste but of expense with the binder in the selection of the former; but of the latter, it will be economical to possess himself of such as he will find constantly required, or being newly introduced into almost every design he may wish to execute.
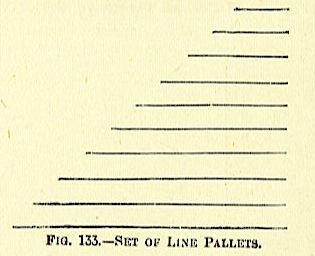
The cost of a set of gouges, half-circles and plain lines, will be trifling, and their frequent application renders them necessary. He will also find that a similar set of circles and three-quarter circles, though not so constantly required, are not less requisite where work of a superior character ia executed.” Fig 133 shows a set of plain line pallets of a certain size,
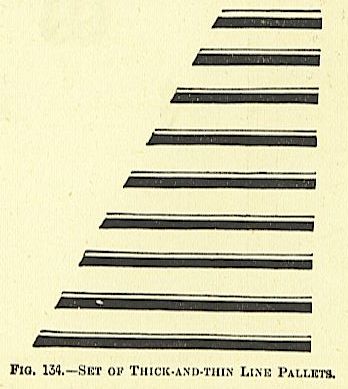
and Fig. 134 a similar set of thick-and-thin line. Fig. 135 represents a set of gouges, and Fig. 136 a set of half-circles.
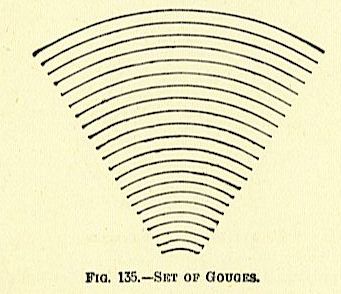
Circles are exemplified at Fig. 137, and three-quarter circles at Fig. 138. Each shape can be had as a single line (broad or narrow), a double line, a dotted line, a thick-and-thin line, or a thick-and-double-thin line. In finishing morocco books,
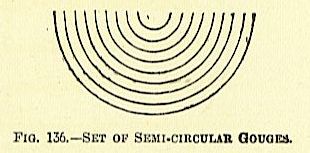
the back is not usually glaired all over, as is calf. Let us take a morocco back, and suppose that the finishing is to consist of a pallet on each side of the bands, and a tool in the middle between each. First ascertain the centre of the back.
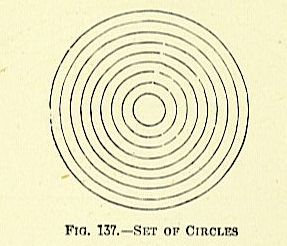
This can be done by measuring at the head and tail with a pair of compasses or spring dividers. By holding a runner to these two marks, the centre of the space between the bands can be uiaiked off with the points of a folder. Now heat the pallet and the tool slightly on the gas stove, and work them in their places with a slight impression only.
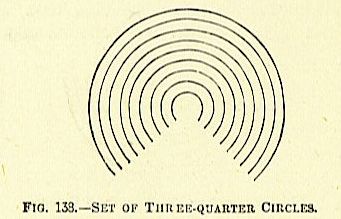
Next wash the back with some vinegar, and pass over it, with the grain of the leather, a small, hard, clean, short-haired brush. When dry, glaire the impressions made by the pallet and tool, applying the glaire with a small camel’s hair pencil. When the glaire is dry, apply a second coat in the same manner. When the second application is dry, rub the places over with the oiled cotton wool previously mentioned. Next take a leaf of gold from the gold-book, put it on the gold-cushion, and cut it with the gold-knife into pieces a shade larger than the glaired spaces. Lift them by a piece of cotton wool which has been drawn over the operator’s head to render it slightly greasy. Place each piece of gold leaf in its place and press it down in the pattern. If there are any holes or breaks, breathe slightly on the gold leaf and put another piece on the top of it. When all the places are covered, begin to work the tools. These require to be heated to such a temperature that if you let fall a drop of water upon them it does not hiss or roll off, but dries up at once. Work all the tools exactly in the blind impressions.
HALF AND FULL GILT FINISHING.
IN our last chapter, we dealt with backs that were simply filleted in gold and blind tooling. Let us now advance a step in decoration, and advert to what is generally called “half gilt.” Here the back is provided with the raised bands, and these are tooled in gold, generally by working a broad pallet or roll, with a pattern on it, across them.
A tool may or may not be worked in the centre of each space between the bands. If it is used, it IB worked in gold. The patterns for pallets and roll edges are almost infinite in number. Pallets cost from about 4s. 6d. to 10s. 6d. each, according to size and elaborateness of pattern; rolls, from 10s. to 40s., according to pattern and diameter of roll. We have given some, and adduce a few more at Figs. 123 and 124.
The patterns given at Fig. 124 are more novel in character, and generally imitative of floral or plant forms. These are very light and elegant, and may be had in great variety. They were, we believe, originally introduced by the Messrs. Sharwood. tool- cutters (now out of business).
The amateur should look through a tool-cutter’s specimen book, and select those that meet his taste. In forming a judgment, it is well to remember that the impression in gold will look heavier than that in printing ink, in the specimen book. Amongst bookbinder’s tool cutters we irmy mention the following: Knight and Cottrell, 9 and 10, St. Bride’s-avenue, Fleet-street; Hughes and Kimber, West Harding-street, E.G.; Thomas Francis, 10, Old Bailey, E.G.; and Frederic Knights, 10, Bolt-court, Fleet-street. Others may be found in the London Post Office Directory.
With regard to the separate ” tools,” such as would be worked in the centre of the inter-band spaces, Fig. 125 shows several varieties. Fig. 126 shows a half-gilt back. Although very effective, this class of work may be done quite quickly, because there is little or no working of separate tools.
There is a kind of pallet made especially for working across bands, which may be had of any length, and in varied patterns. Several of these are shown at Fig. 127. A ” full-gilt” back has, as its title imports, the whole of the back covered with gilt tooling.
There are several ways of doing this. The book maty have raised bands, and these may be finished by the pallet or the roll in the manner just spoken of. The portion of the back between the bands may then be finished with centre and corner tools, or the back may be without bands, and finished as at Fig. 128.
Here the pallet shown at Fig. 129 is made to do the whole of the work by being used in the different positions, so as to cover the back with squares, as at Fig. 128. If carefully selected pallets are used, this style looks very nice.
A gouge (of which the binder should possess an assortment, of different sizes) is worked on each side of the lettering-piece. Fig. 130 shows another style of back.
This is done with six tools, worked as shown, and a single-line pallet and gouge worked around the lettering. Fig. 131 shows another back done with four tools; and Fig. 132 another, in the execution of which only three tools and some line pallets and gouges are required.
Fig. 128 is known technically as “mitred” back. There is a style now very popular for post octavos and other small books. The lettering-piece is placed near the head of the book, and a pallet worked over the whole of the back below it. A similar effect can be produced by working a repetition of any small tool, but of course this takes longer.
We may here quote, as a pendant to that of Dr. Dibdin in our last chapter, the very sensible advice given in the ” Bibliopegia” of James HannEtt, who viewed the matter from the standpoint of a practical bookbinder: “It is a subject of the utmost importance, in the selection of the tools for gilding, that the party have a good knowledge of the style of binding peculiar to the day, and a quick perception of the beanty of this kind of ornament, the general bearing of the designs towards each other, and their geometrical fitness for application when combined, so as to produce a series of patterns from the same tools. Without this, as may be seen in many offices where judgment has not presided in the selection, a large and expensive collection of tools may be provided, which cannot be blended together without offence to the eye of taste from the defect presented in the complete designs, which even one misfit tool will cause.” So important a point in finishing is the combination of tools, tliat the novice should spare no pains to make a good working selection, as no man can finish satisfactorily without a judicious selection of good tools, such as will combine to form an extensive series of scroll ornaments, flowers, &c.
As all combinations are composed of a variety of ornamental tools and plaiu lines, it becomes of necessity not only a matter of taste but of expense with the binder in the selection of the former; but of the latter, it will be economical to possess himself of such as he will find constantly required, or being newly introduced into almost every design he may wish to execute.
The cost of a set of gouges, half-circles and plain lines, will be trifling, and their frequent application renders them necessary. He will also find that a similar set of circles and three-quarter circles, though not so constantly required, are not less requisite where work of a superior character ia executed.” Fig 133 shows a set of plain line pallets of a certain size,
and Fig. 134 a similar set of thick-and-thin line. Fig. 135 represents a set of gouges, and Fig. 136 a set of half-circles.
Circles are exemplified at Fig. 137, and three-quarter circles at Fig. 138. Each shape can be had as a single line (broad or narrow), a double line, a dotted line, a thick-and-thin line, or a thick-and-double-thin line. In finishing morocco books,
the back is not usually glaired all over, as is calf. Let us take a morocco back, and suppose that the finishing is to consist of a pallet on each side of the bands, and a tool in the middle between each. First ascertain the centre of the back.
This can be done by measuring at the head and tail with a pair of compasses or spring dividers. By holding a runner to these two marks, the centre of the space between the bands can be uiaiked off with the points of a folder. Now heat the pallet and the tool slightly on the gas stove, and work them in their places with a slight impression only.
Next wash the back with some vinegar, and pass over it, with the grain of the leather, a small, hard, clean, short-haired brush. When dry, glaire the impressions made by the pallet and tool, applying the glaire with a small camel’s hair pencil. When the glaire is dry, apply a second coat in the same manner. When the second application is dry, rub the places over with the oiled cotton wool previously mentioned. Next take a leaf of gold from the gold-book, put it on the gold-cushion, and cut it with the gold-knife into pieces a shade larger than the glaired spaces. Lift them by a piece of cotton wool which has been drawn over the operator’s head to render it slightly greasy. Place each piece of gold leaf in its place and press it down in the pattern. If there are any holes or breaks, breathe slightly on the gold leaf and put another piece on the top of it. When all the places are covered, begin to work the tools. These require to be heated to such a temperature that if you let fall a drop of water upon them it does not hiss or roll off, but dries up at once. Work all the tools exactly in the blind impressions.
Monastic finishing
ANTIQUE OR MONASTIC FINISHING.
IN the work described in Chapter XIX. gold leaf is used in all the principal ornamentation, and blind tooling is only auxiliary to the gilding. But another style of finishing, often found in ancient books, was revived some few years ago, and is now very popular for religious books, and is used for secular ones. This style is known as “antique.” or sometimes “monastic,” and consists entirely of blind tooling except the lettering; and as a rule, in this description of work, the edges are either unburnished red or gilt, or gilt upon red. The boards used are thick, and generally have bevelled edges. The tools for this work are of the usual kind, but the patterns are generally bolder and heavier in appearance than those used for gold. On the sides heavy rolls and line work, produced by such sets of tools as shown at Fig. 134 (last chapter), are most effective. Although it may not appear at first sight to require such nicety as gilding, the novice will speedily find that quite as much care and dexterity are needed to produce effective decoration. Everything must be worked straight and true, and the depth of impression given to the various tools must be the same. The colour of the tooling (which should be a dark mellow brown) should be uniform over the work. Before commencing work, the back of the book is damped with a sponge and clean water, which latter is then well “worked” into tlie grain of the leather with a small, clean, hard brush.
In executing antique work, the tools are heated, and each one worked several times in its place on the damp leather; this singes the leather until it is darkened. A steady hand and great care are required to ensure that the tool always falls exactly in the same place, and is not doubled or slurred at the edges. This kind of work is only employed on morocco and calf. Brown, olive, and slate-colour are the colours best adapted, particularly the first. The book is screwed up in the finishing-press, having had its back marked off. The pallet is then heated and worked steadily across the back, the motion being given by the wrist only. This must be done several times, and, as the leather dries, the heat of the pallet must be raised, which will usually gradually darken the lines and produce the deep tints required. Occasionally, it will be found necessary to damp the part of the book operated on several times before the necessary depth of colour can be obtained. The pallet must be held very steadily, and worked across the back quite straight. The gloss has next to be given to the blind tooling. This is done by making the pallet rather hot; it is then rubbed upon a piece of greasy leather and again worked backwards and forwards in the impressions previously made. This ia technically termed “jiggering.” The surface of the leather being damp, the brass face of the tool, however clean, will have a certain liability to stick to it, and perhaps pull off the grain. This is to be avoided, and the tool made to ” come away” with facility, by the following process.
Take 1 1/4oz. of white wax and 1oz. of lard, and melt them together in a glazed pipkin over the fire. Rub some of this grease on the flesh (rough) side of a piece of thick leather, and rub the tools for blind work occasionally on this greased surface while using them. In “finishing” the sides of whole-bound antique work, the pattern must first be marked out with the end of a pointed folder, assisted by a straight-edge and, when necessary, compasses. The whole surface is then clarified and brushed, as already described. Any fillets that may be required are next worked over the lines several times until the colour and depth of impression are secured. In order to give the lines a gloss, the fillet is then fixed by putting a small wooden wedge between the edge of the roll and the fork, as shown at Fig. 139.
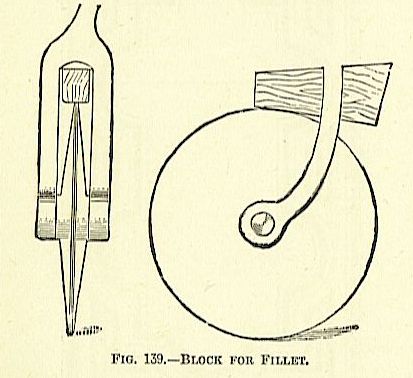
The periphery of the fillet is now rubbed with, the greased leather, and it is then ” jiggered” over the lines, great care being taken not to double or blur the lines. Tools must be worked by making them slightly warm at first and then increasing the heat at subsequent impressions. Then the leather is permitted to dry, the tool re-heated, greased, and worked again for the gloss.
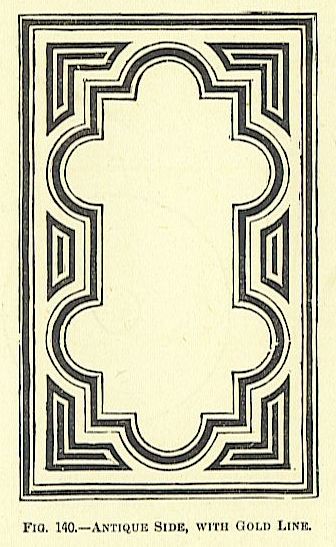
Antique work may be diversified and improved by working a fine gold line amidst the heavy blind tooling, as shown at Figs. 140 and 141.
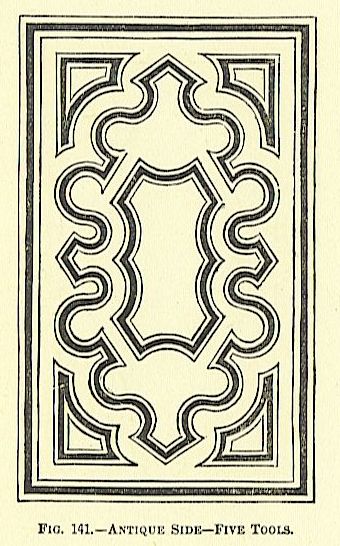
The pattern shown at Fig. 142 is also an excellent and effective one for the side of an antique book. The lettering is completed after the blind tooling is finished.

Books bound in morocco flexible (which are generally devotional works) are usually finished with blind lines (a thick and thin) worked close to the bands.
There are a few favourite tools much used in ” antique ” finishing on the spaces of the back, &c. They are mostly modern imitations of some ancient ornaments found in the printed books of the celebrated Stephen Aldus, one of the most famous of the early printers. Hence these tools are called “Aldine.” Aldus’s own badge was that of a dolphin twined around an anchor, but this is not used by the bookbinder, although the anchor alone is; one of the most common of the Aldine tools is an acorn (Fig. 143, A), another is the Maltese cross (Fig. 143, B).
These tools are first worked blind; then the place is glaired with the camel’s hair pencil, and the tool again worked in gold, the other ornamentation being, as already stated, blind tooling, and the leather being left dull, or not glaired, polished, or varnished.
IN finishing books, the operator should exercise his best discrimination with regard to the selection of tools, so that they shall be appropriate to the subject of which the book treats. In order to succeed in this, the finisher in all cases needs to be a man of wide reading and good knowledge. It is an excellent plan for the finisher, ambitious of attaining excellence in his art, to devote some time to the study of the different styles of various countries and historical epochs.
Beginning with the Egyptian form of ornament, and casually glancing at those prevailing at Nineveh and Babylon, as exemplified by the disinterred remains, he will next consider the ornamentation of Greece and Rome, and, on the fall of the latter empire, the modification of decoration which grew out of Roman art, as the Byzantine, Mauresque, or Saracenesque, and the early Gothic. Later Gothic will lead on to Renaissance, ” and, gradually, to modern art. Abundant materials exist in modern literature to aid the inquirer; while in our museums can be found actual remains of Egyptian, Assyrian, Greek, and Roman art, and our ancient churches will give plenty of Gothic examples.
A careful tour through the ” courts” of the Crystal Palace is, in itself, a fair education in styles of ornament. In finishing books to which the different classes of ornament are applicable, care should be taken not to mix the styles. When a certain class of ornament is decided upon, it should be carried consistently through. With regard to the ornamentation of modern books, some few general rules may be given, as suggesting hints to guide the taste. Works upon religious topics would seem to require a sobriety of embellishment, as being more in harmony with their character than ornament of a lighter kind. The decorations should not only be few and simple, but executed in blind toolingthat is to say, without any gold; or if gold be employed at all, it should be confined to the edges of the cover or panels, while the whole of the centre is left blind.
History and biography, if we adopt this principle, may be less gravely embellishel than religious works, but still should have weight and solidity of decoration, as far as the phrase can be applied with propriety to anything in the way of ornament. Poetry and fiction in general would be most characteristically dressed in a light, elegant, and graceful binding, except, indeed, as regards tragedy, which should be clothed in what our old dramatists would have called sad ornament. In short, the bindings should not only assimilate with the taste of the time the work treats of, but the colour should also be in harmony with its subject. It would at first sight seem somewhat inconsistent with the rules laid down, that we should embellish the binding of a modern author, and upon a modern subject, with Greek or Roman ornaments. But this is a necessity growing out of tbe very narrow limits of human invention, or, it may be, of the forms on which that invention had to work. Certain it is, that all the ingenuity of our artists, of every description, has not been able to add a single combination to those invented by the Greeks and Romans, and even they appear to be only modifications of the old Egyptian.
In modern binding, therefore, we consider the whole range of ancient embellishments as being equally appropriate to our time, only taking care to associate the grave with the grave, the light with the light, and the fanciful with the fanciful, according to the suggestions already given. We repeat this fundamental principle of the art, since, of all others, it is the most frequently neglected. The moment any ornament has been brought forward that at all catches the public taste, the binders, for the most part, snatch at it with avidity, and employ it on all occasions, right or wrong, till it is superseded by some new combination from the storehouse of antiquity. This is more particularly the case with binders in cloth; a Mauresqne tool is cut for a work on the Arabian dynasty, when, forthwith, they transfer it to the cover of a volume on the cathedrals of England, or a crimson cloth is with propriety adopted for a life of Wellington, and soon after we find it covering a biography of Bishop Heber. It is hardly necessary to dwell any longer upon this topic; but, to avoid all possibility of mistake, we add a few further illutrations. For example, we would bind a French military history in blue and an English one in scarlet. For a book on the life of Nelson, we would let the ornamentation be in imitation of cable, with, perhaps, a couple of boarding-pikes crossed in the centre of the square (see Fig. 155).
The cable makes a very beautiful roll or fillet. We should bind a treatise on the celestial bodies in cerulean blue, with stars and crescents; a botanical work in green, with a flowery border; Euclid should be tooled in squares, triangles, circles, and rhomboids; and a Moore’s ” Irish Melodies” ornamented with leaves and flowers, either in wreaths or in borders, or with an Irish harp (Fig. 156) in the centre.
Works relating to India would seem to be most fitly embellished with the vegetable and animal productions of that country ; or if the subject be historical, or of ancient date, appropriate ornaments may be found in the sculpture and architecture of the Hindoo race. Fluted pilasters, the zodiac, and figures of various kinds belonging either to their religion or their history, form the principal features to be borrowed for the purposes of the binder. It may be difficult to determine any exact style in which encyclopaedias and serials treating of all subjects and all times should be bound.
We would, however, suggest some plain ornament, such as the Grecian ornamented panel. If the bookbinder carefully follows the directions given in the preceding chapters, and carries out the hints contained in this (the last), he will have no cause to regret any trouble he may have taken in the covering of his books; for his library will present a much more chaste appearance than it would if his books were bound in the indiscriminate and thoughtless style of the present day